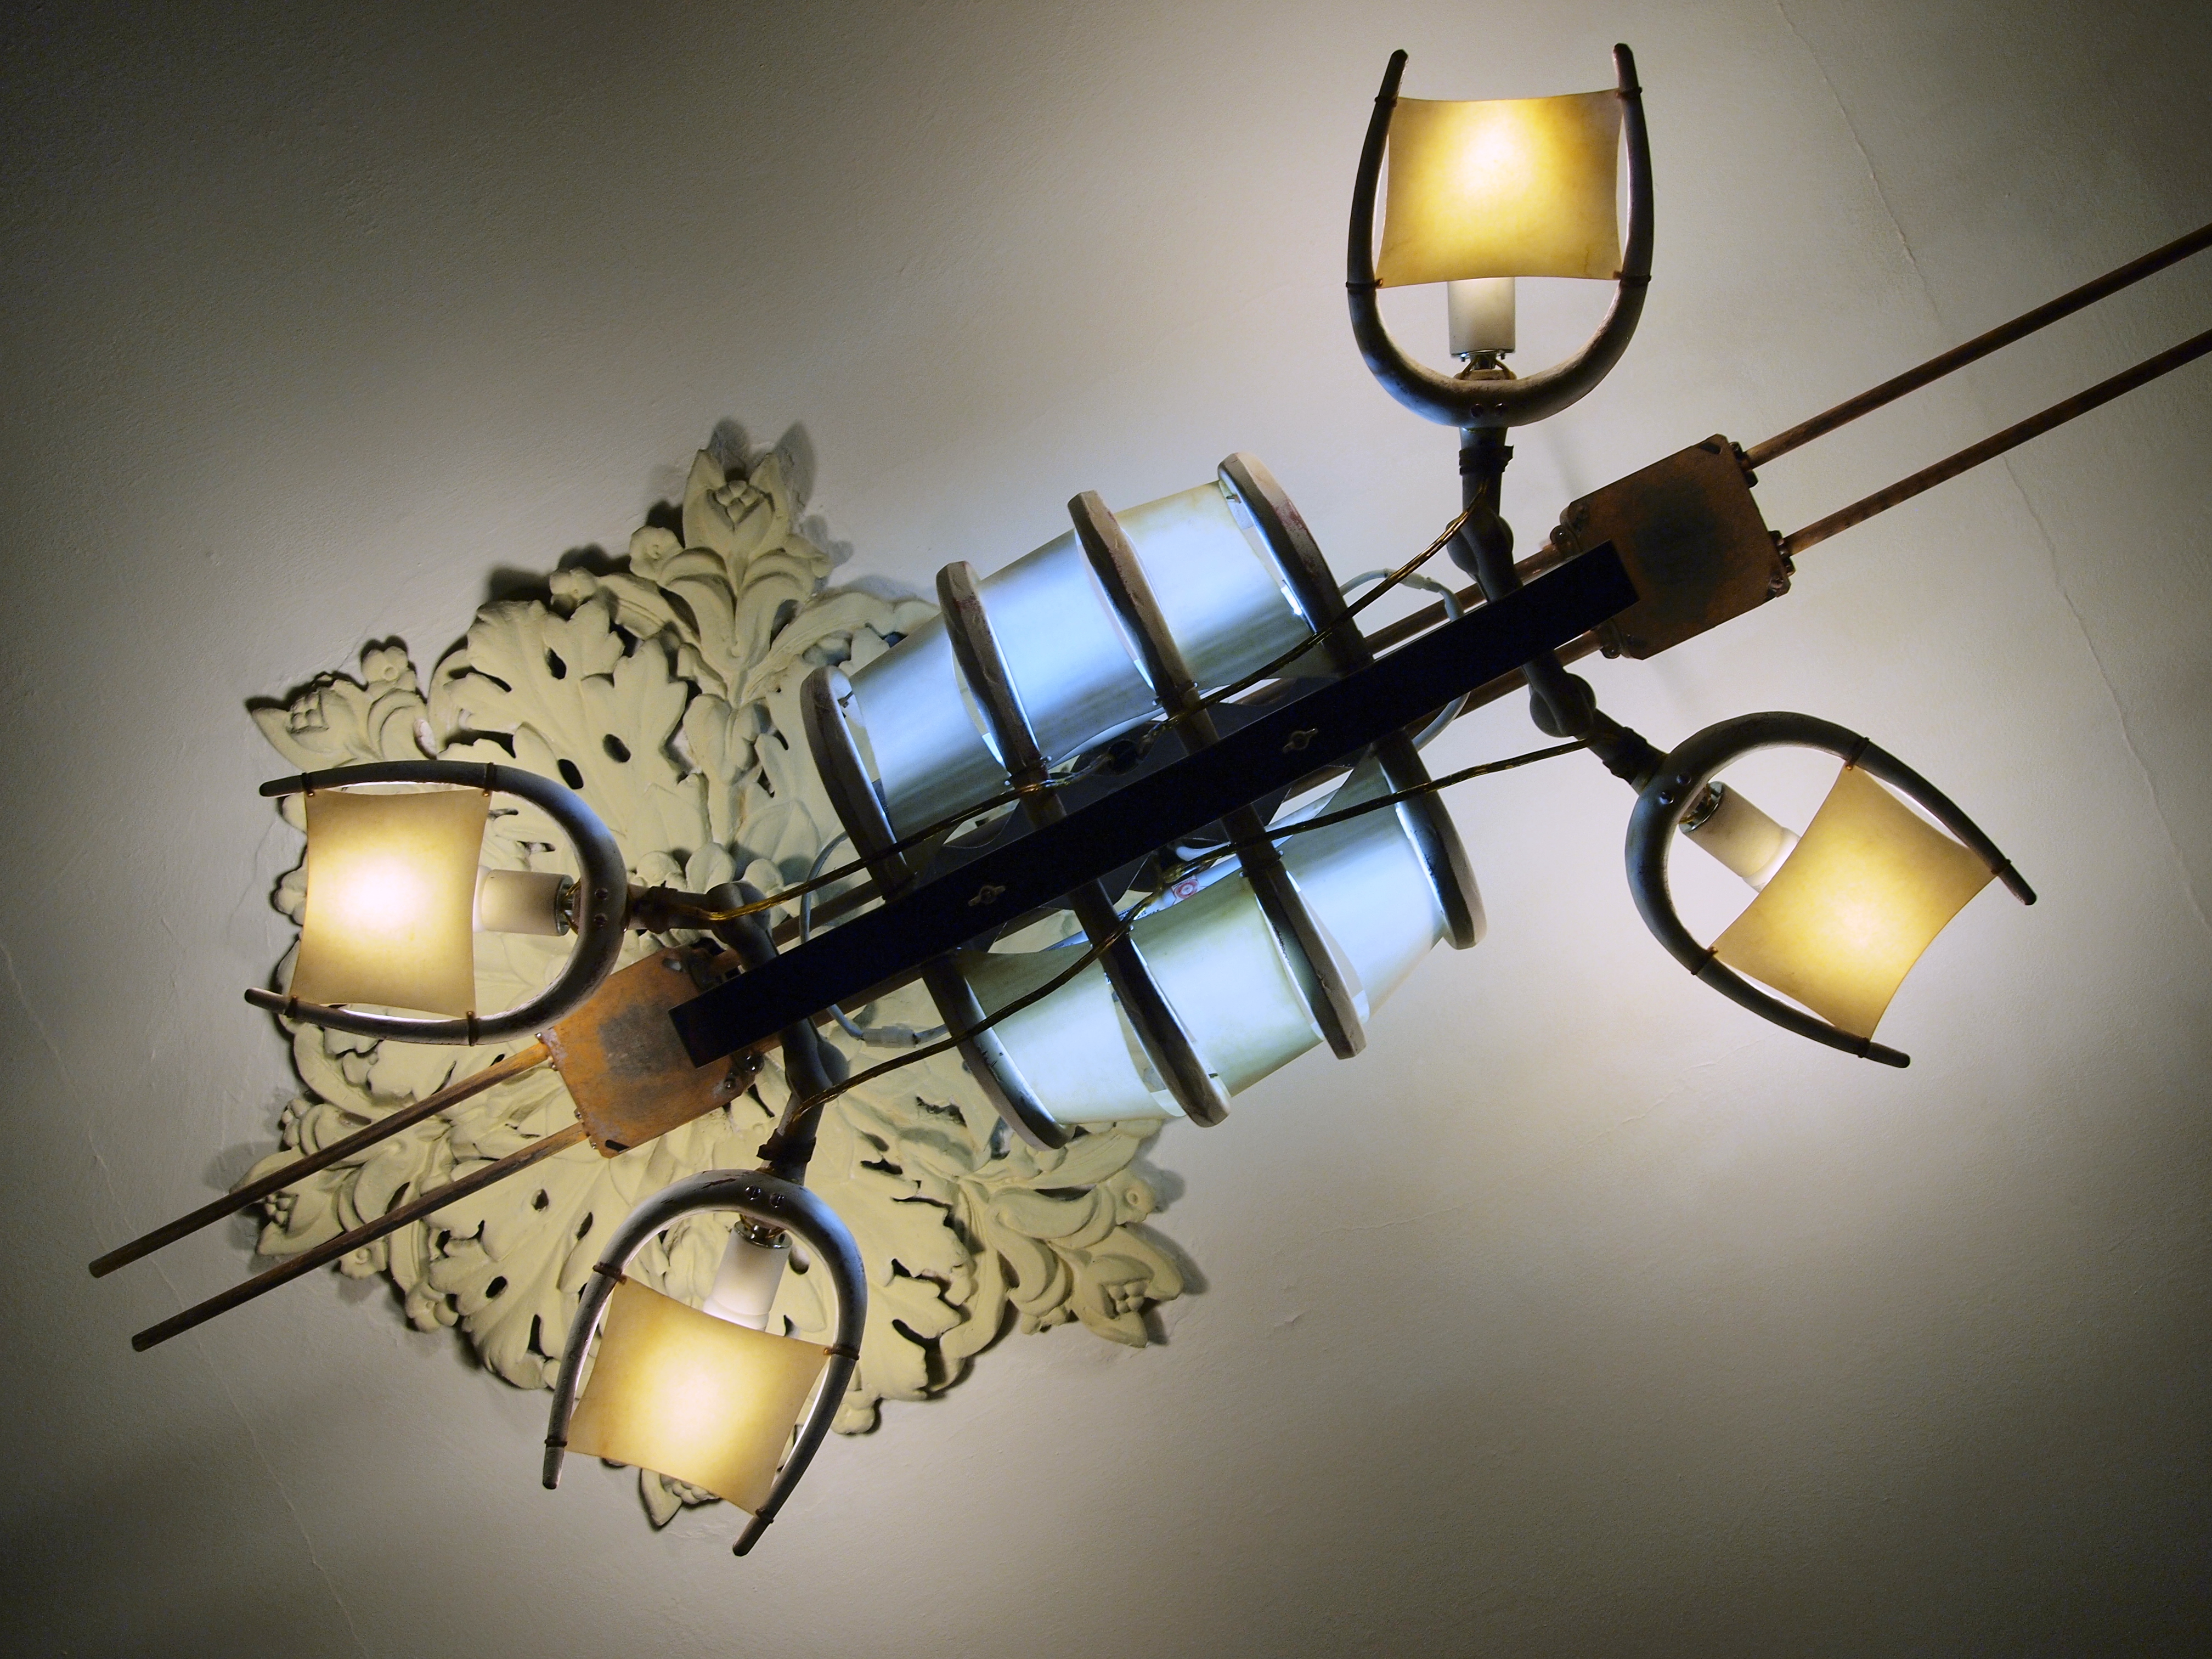
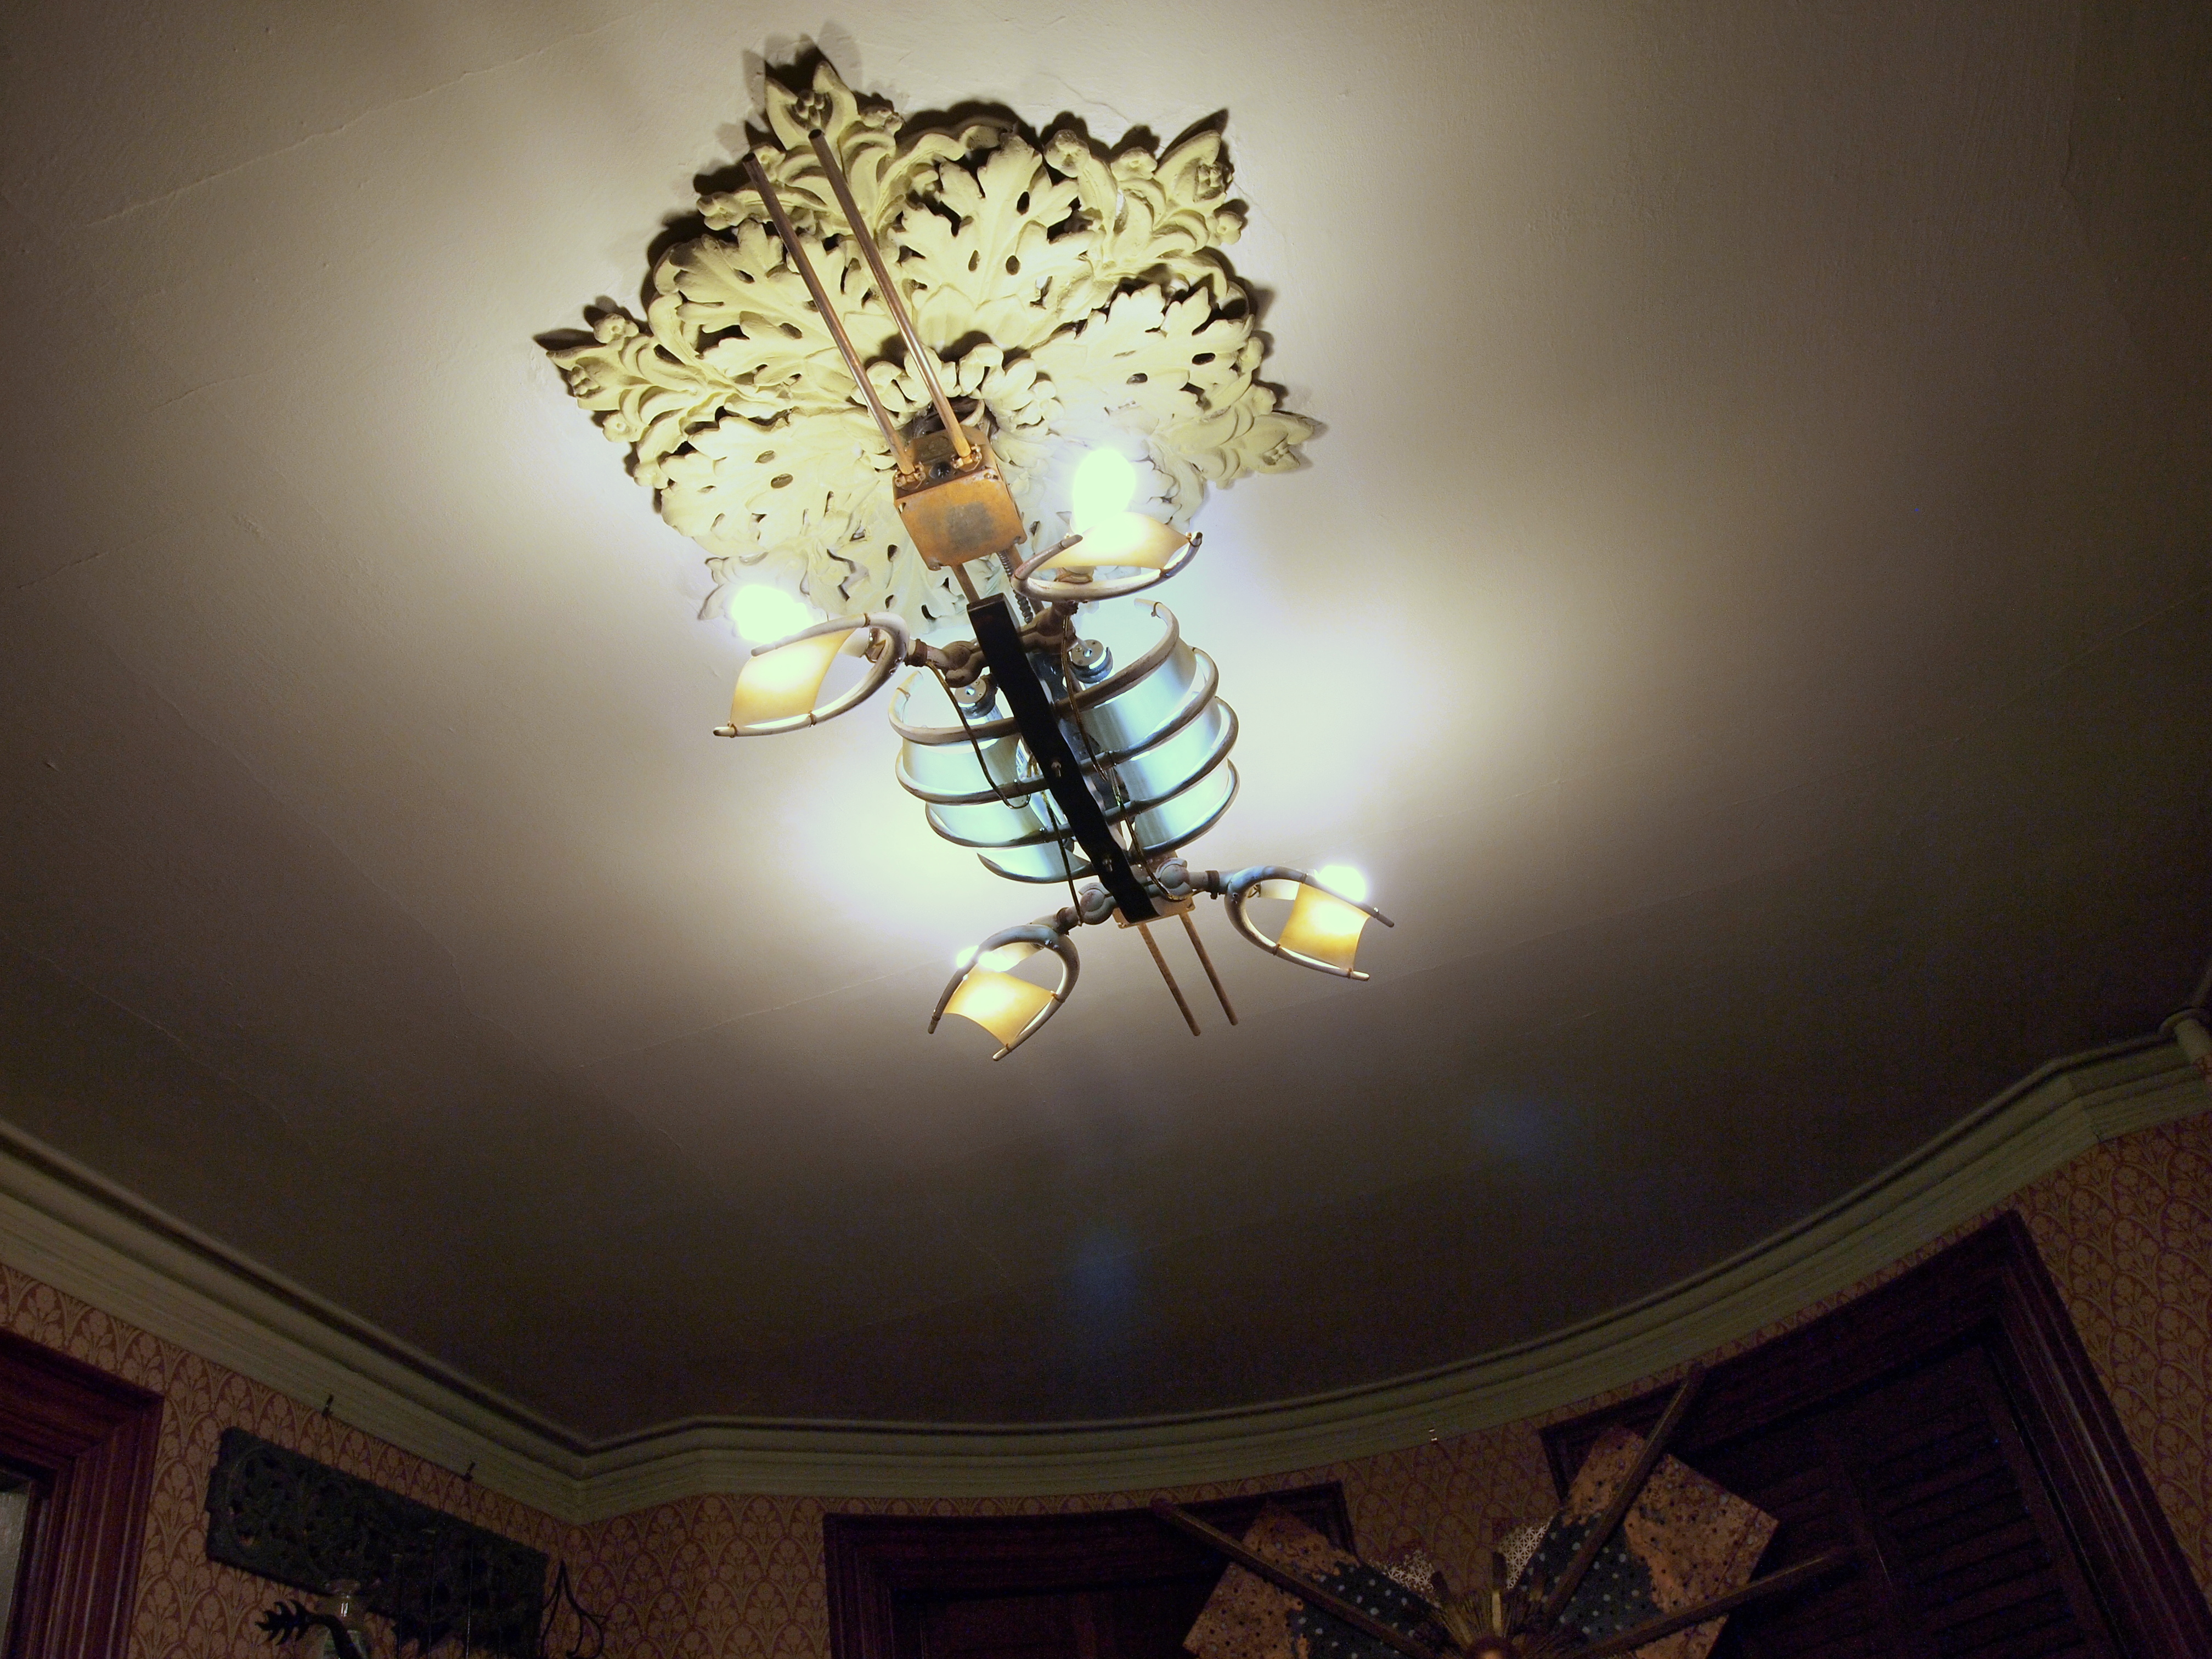
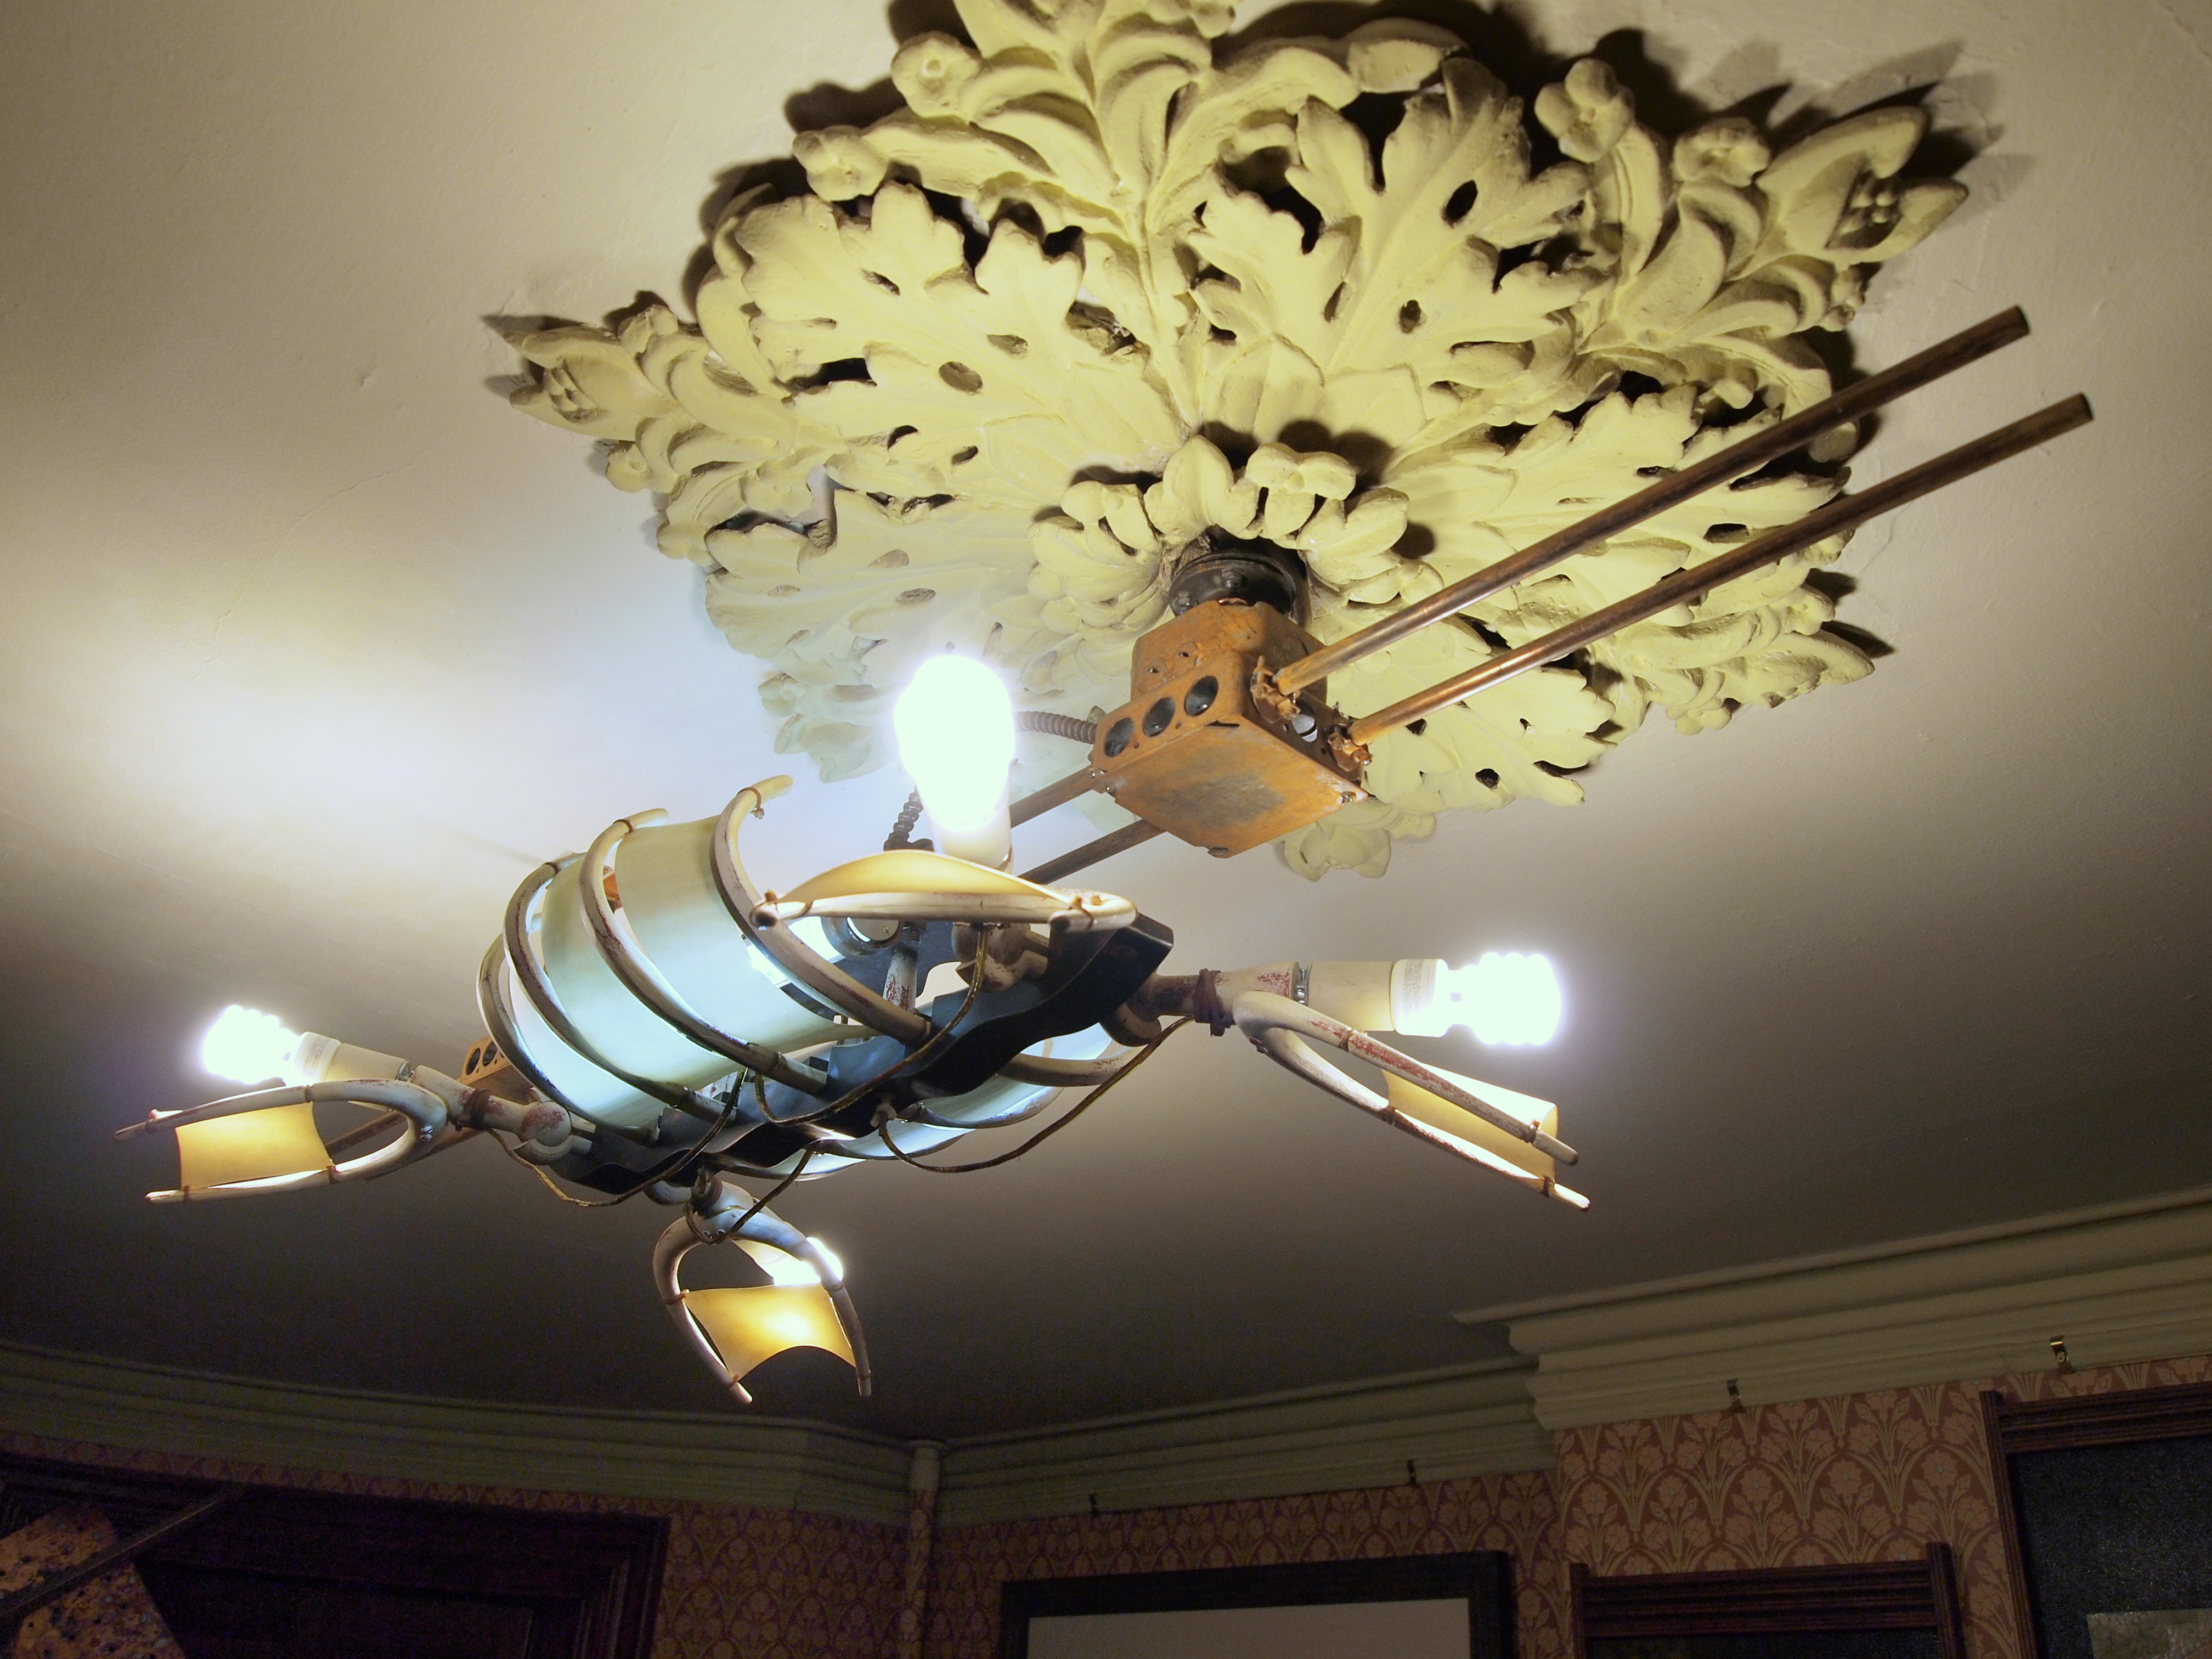
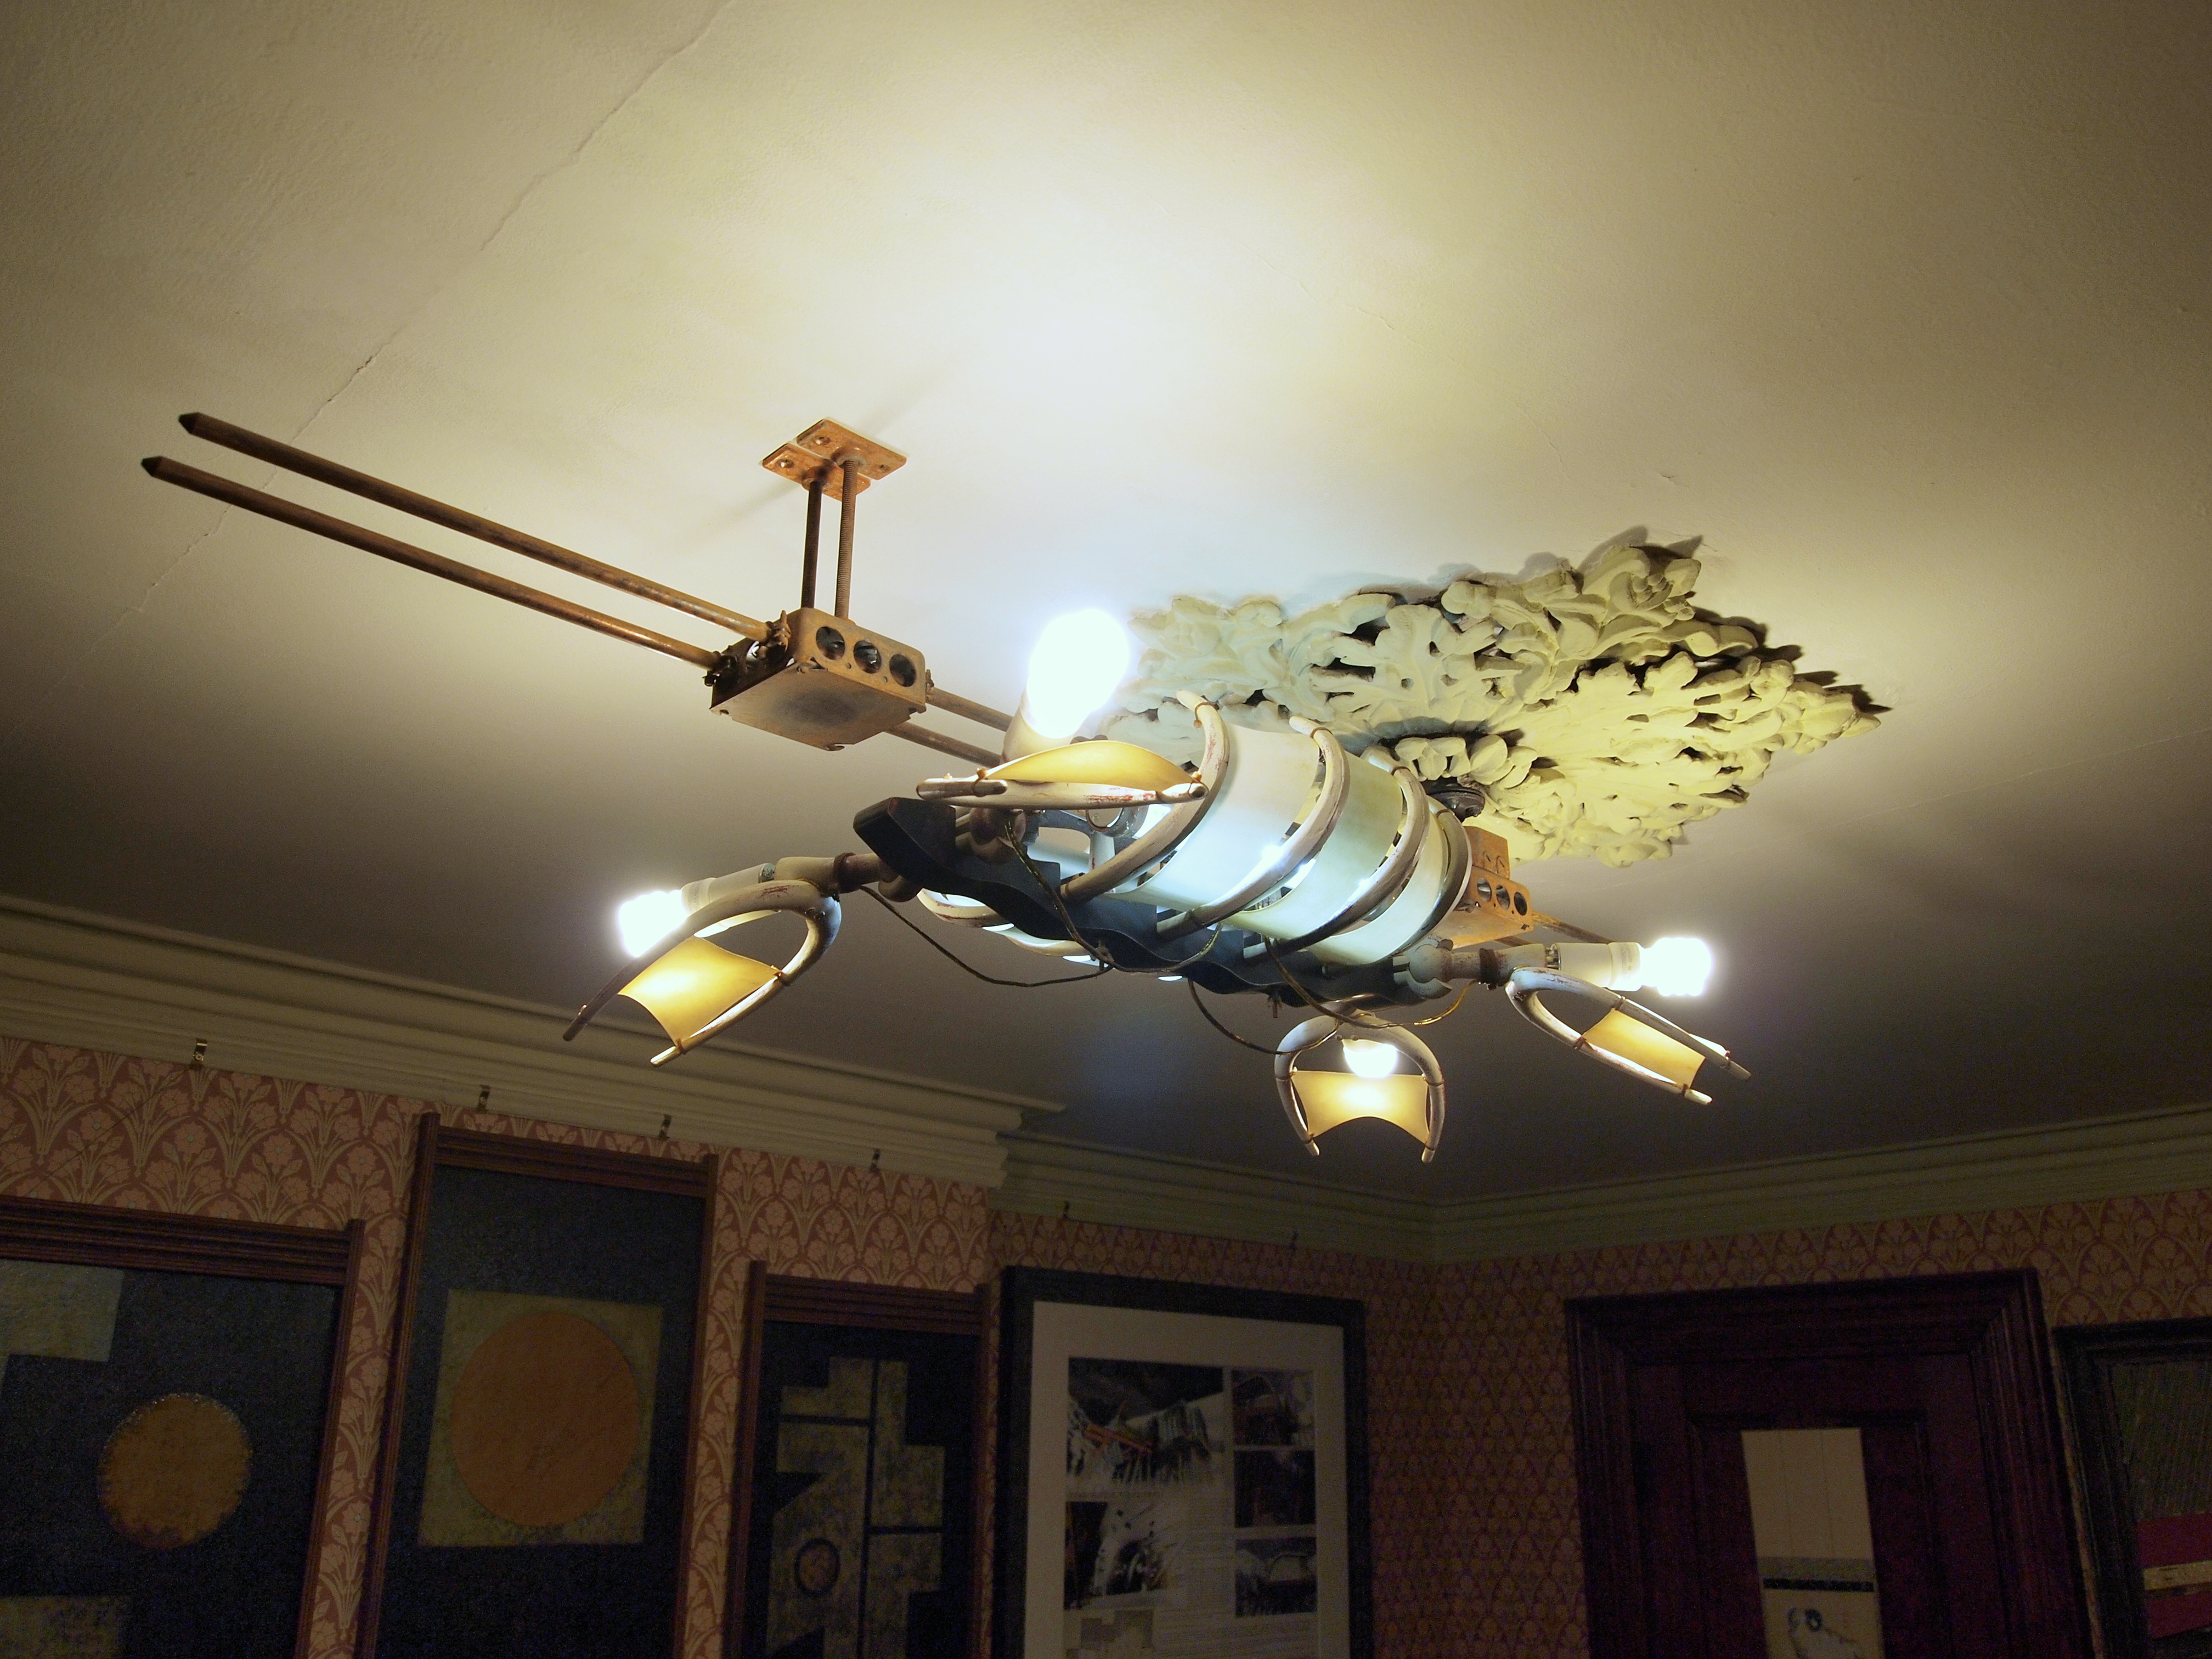
It bothers me to include student work within my my “mature” portfolio, but as with the Hurricane House (2004-2012) this particular piece began as an assignment but was re-worked and finally completed years after my manumission from Yale School of Architecture.
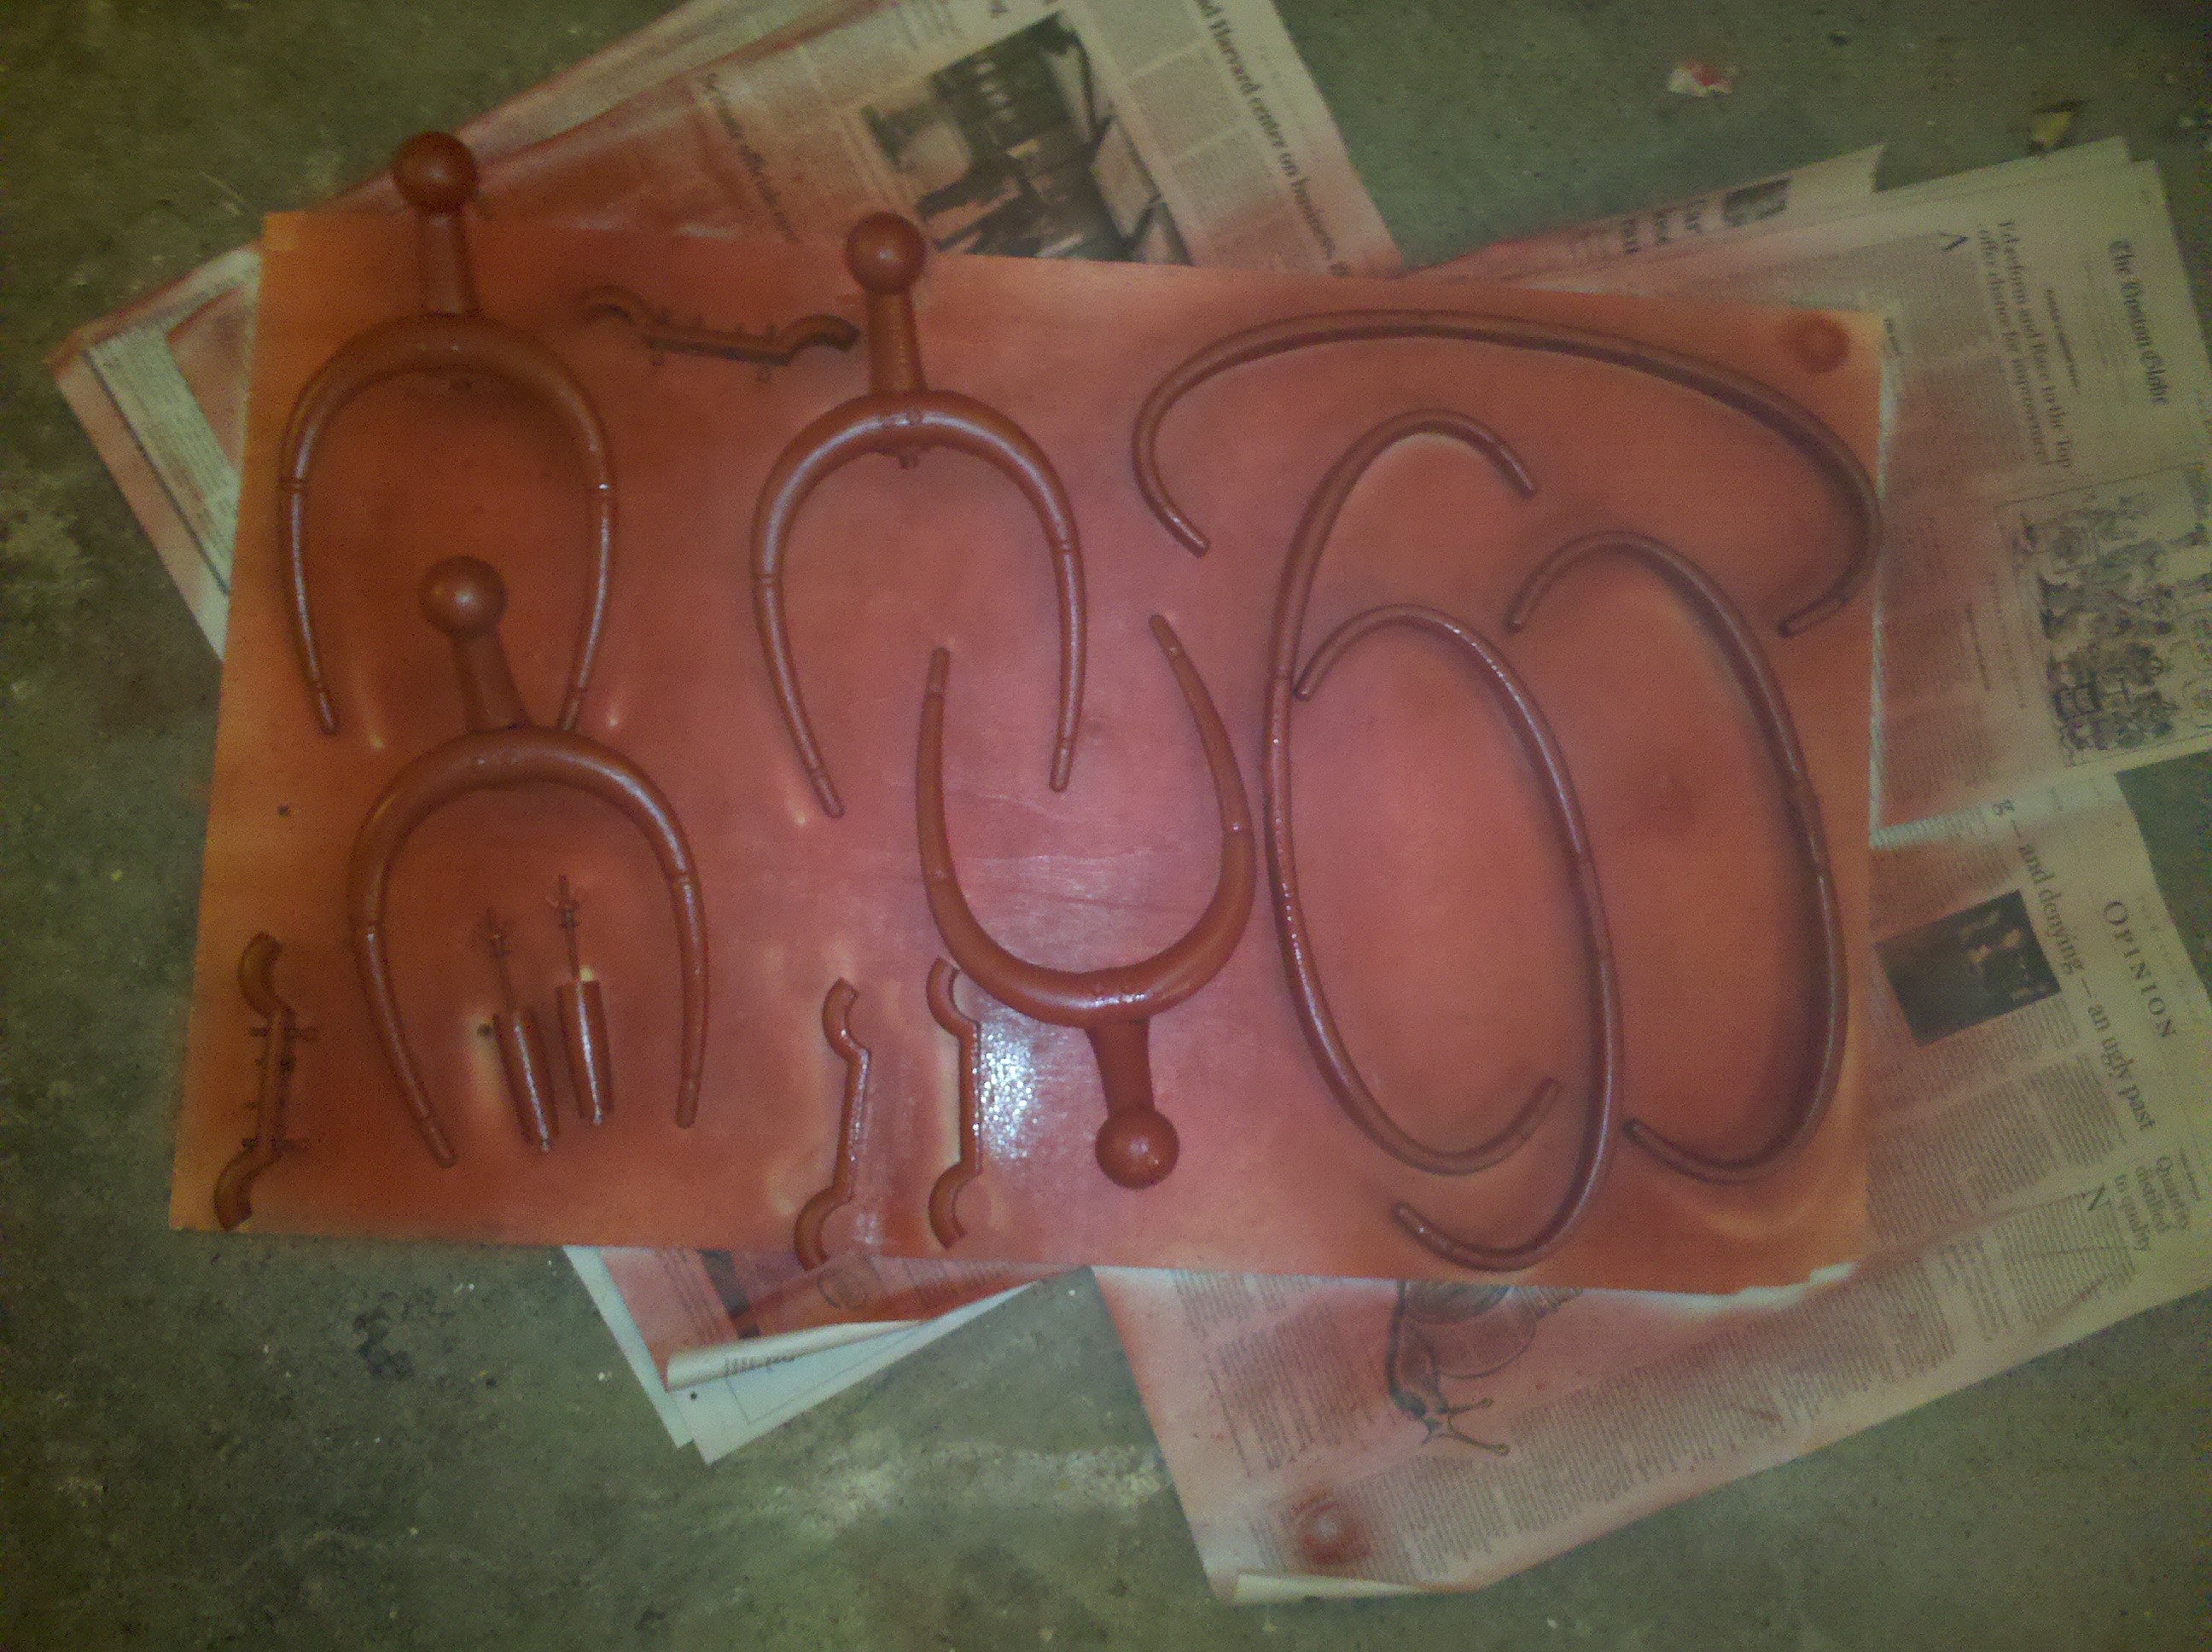
Near the end of my sentence there I found myself with enough credits to take an elective course, and I settled on one that dealt with aluminum casting. The curriculum required us to come up with an assembly of potentially-mass-produced metal objects that could be created using basic sand-casting techniques; create the necessary match-plates which would be used at a local aluminum foundry to realize the components in aluminum; and finally see through any necessary joinery to complete the composite piece. There are a thousand subtleties and precautions necessary to successfully execute a sand-cast, but this is the gist of the process:
- A full-scale model of the object to be cast is carved or otherwise realized in hard, dense materials.
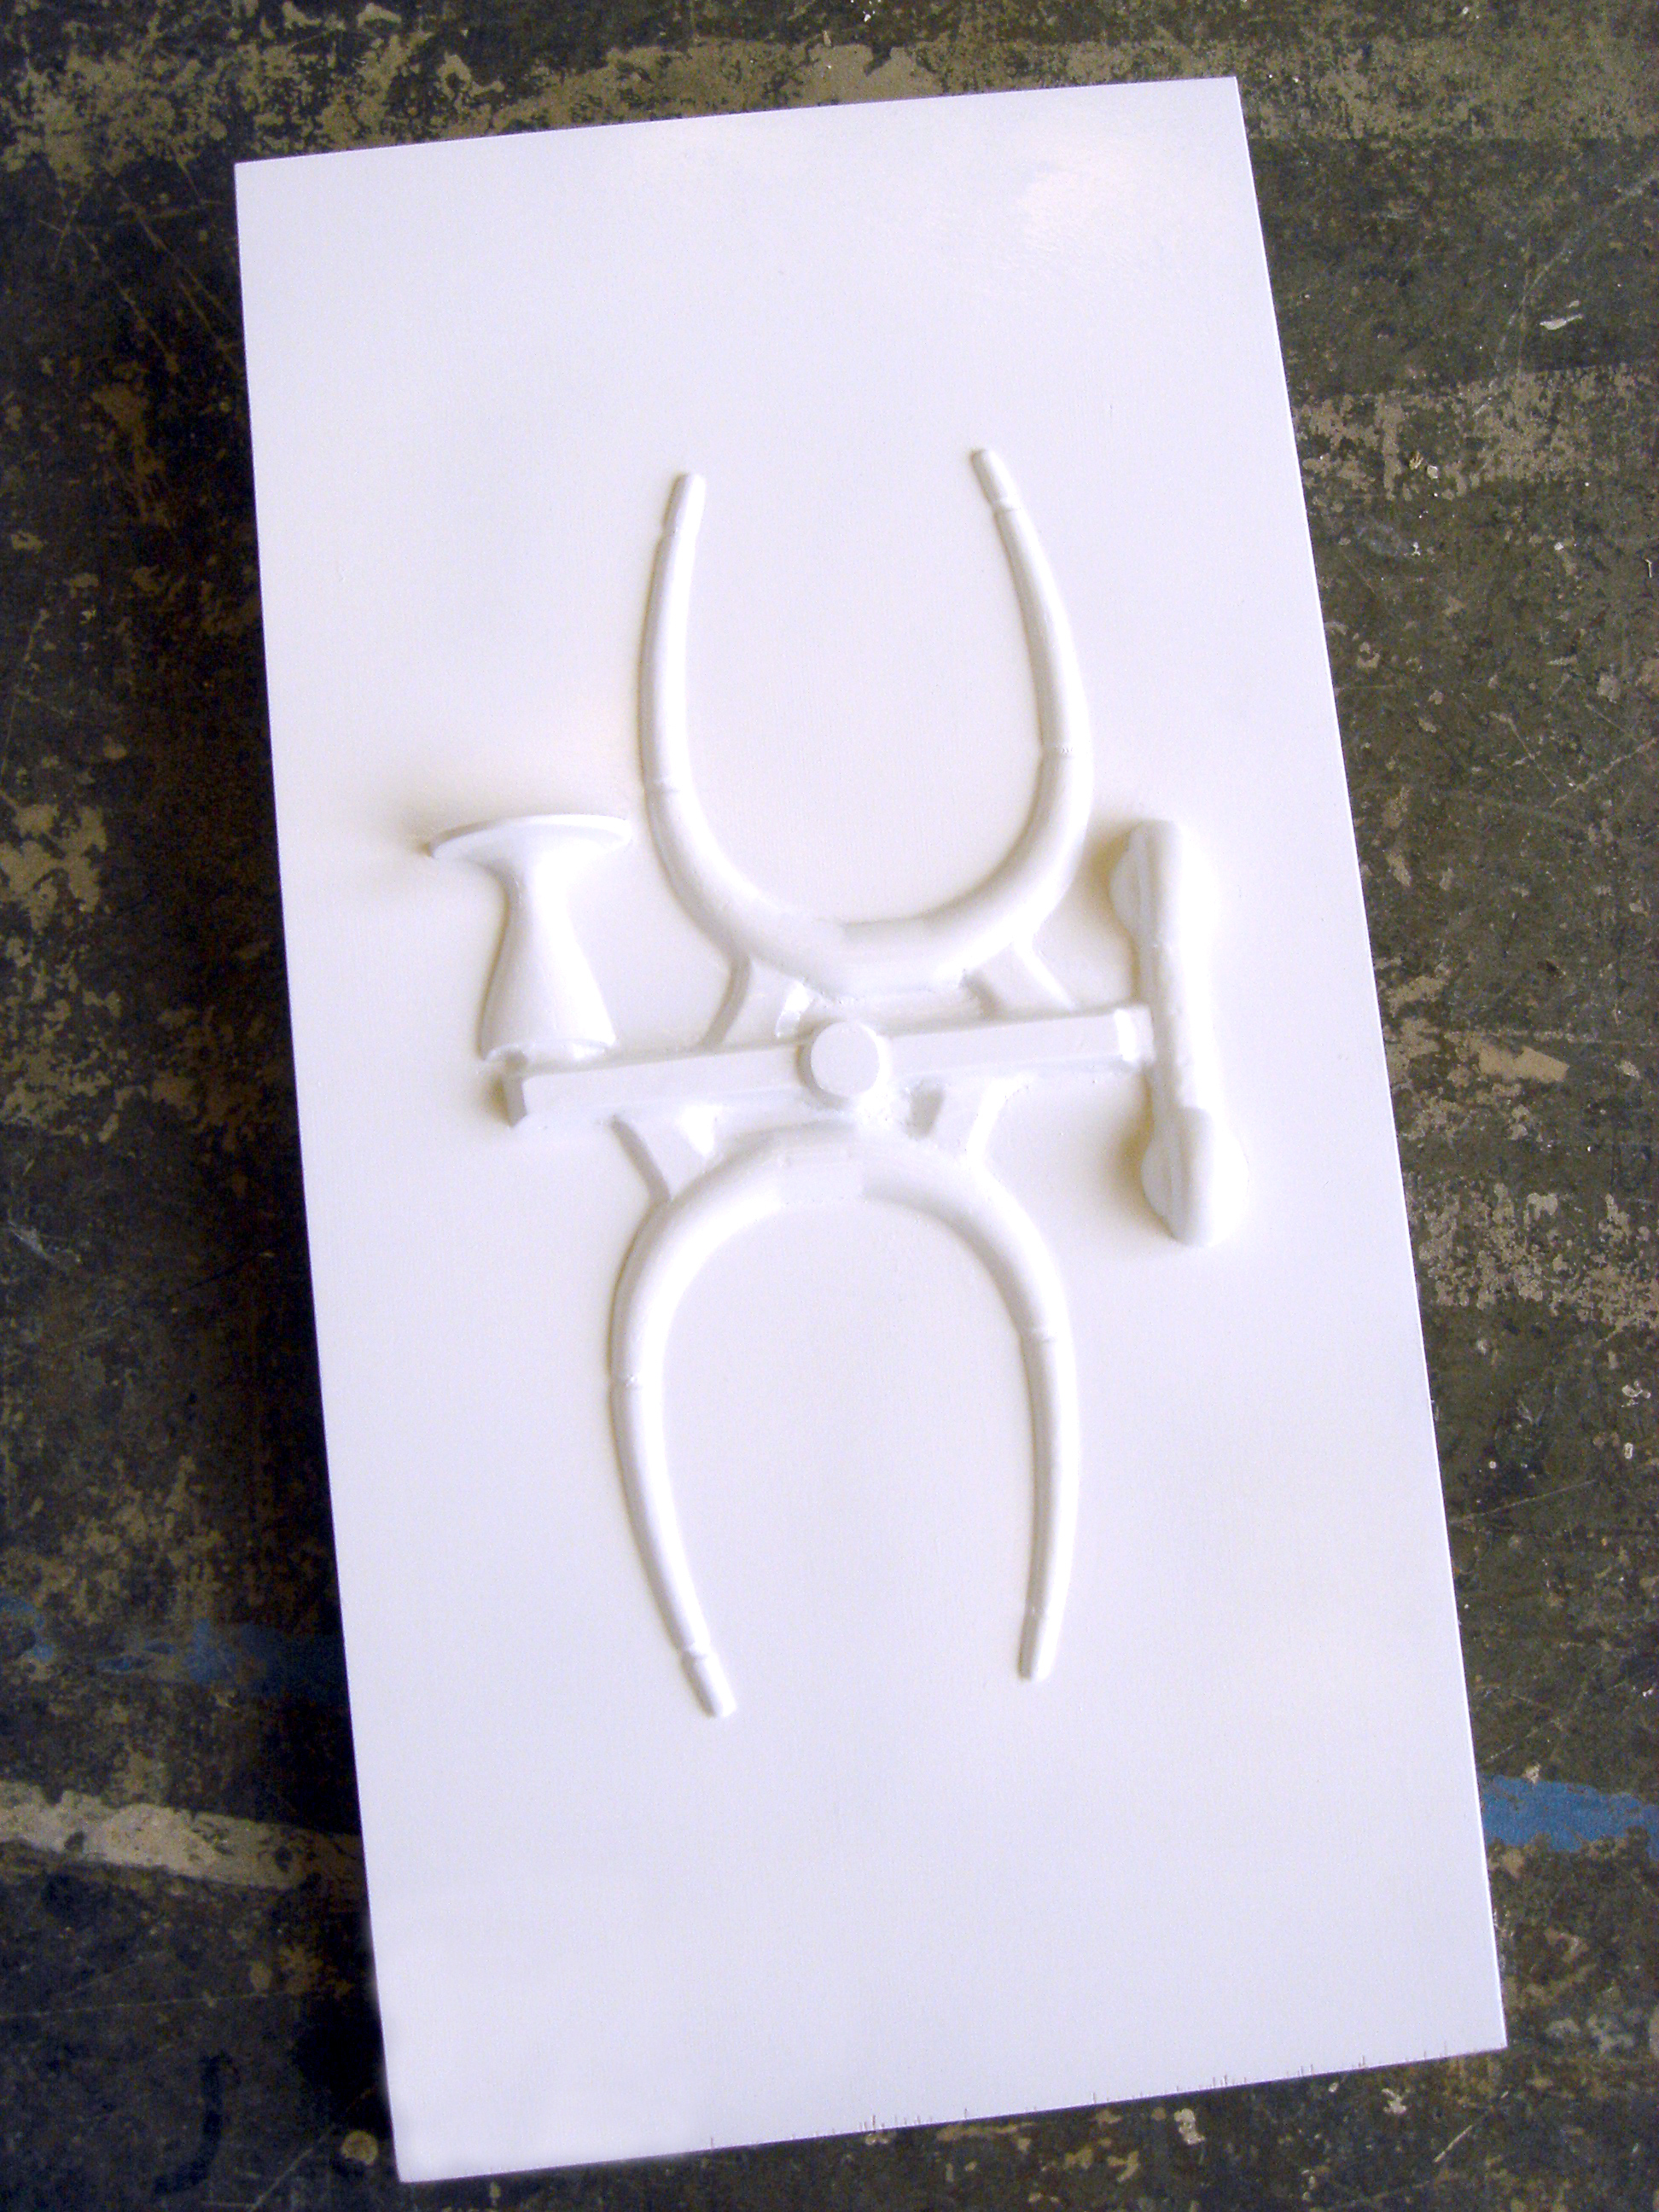
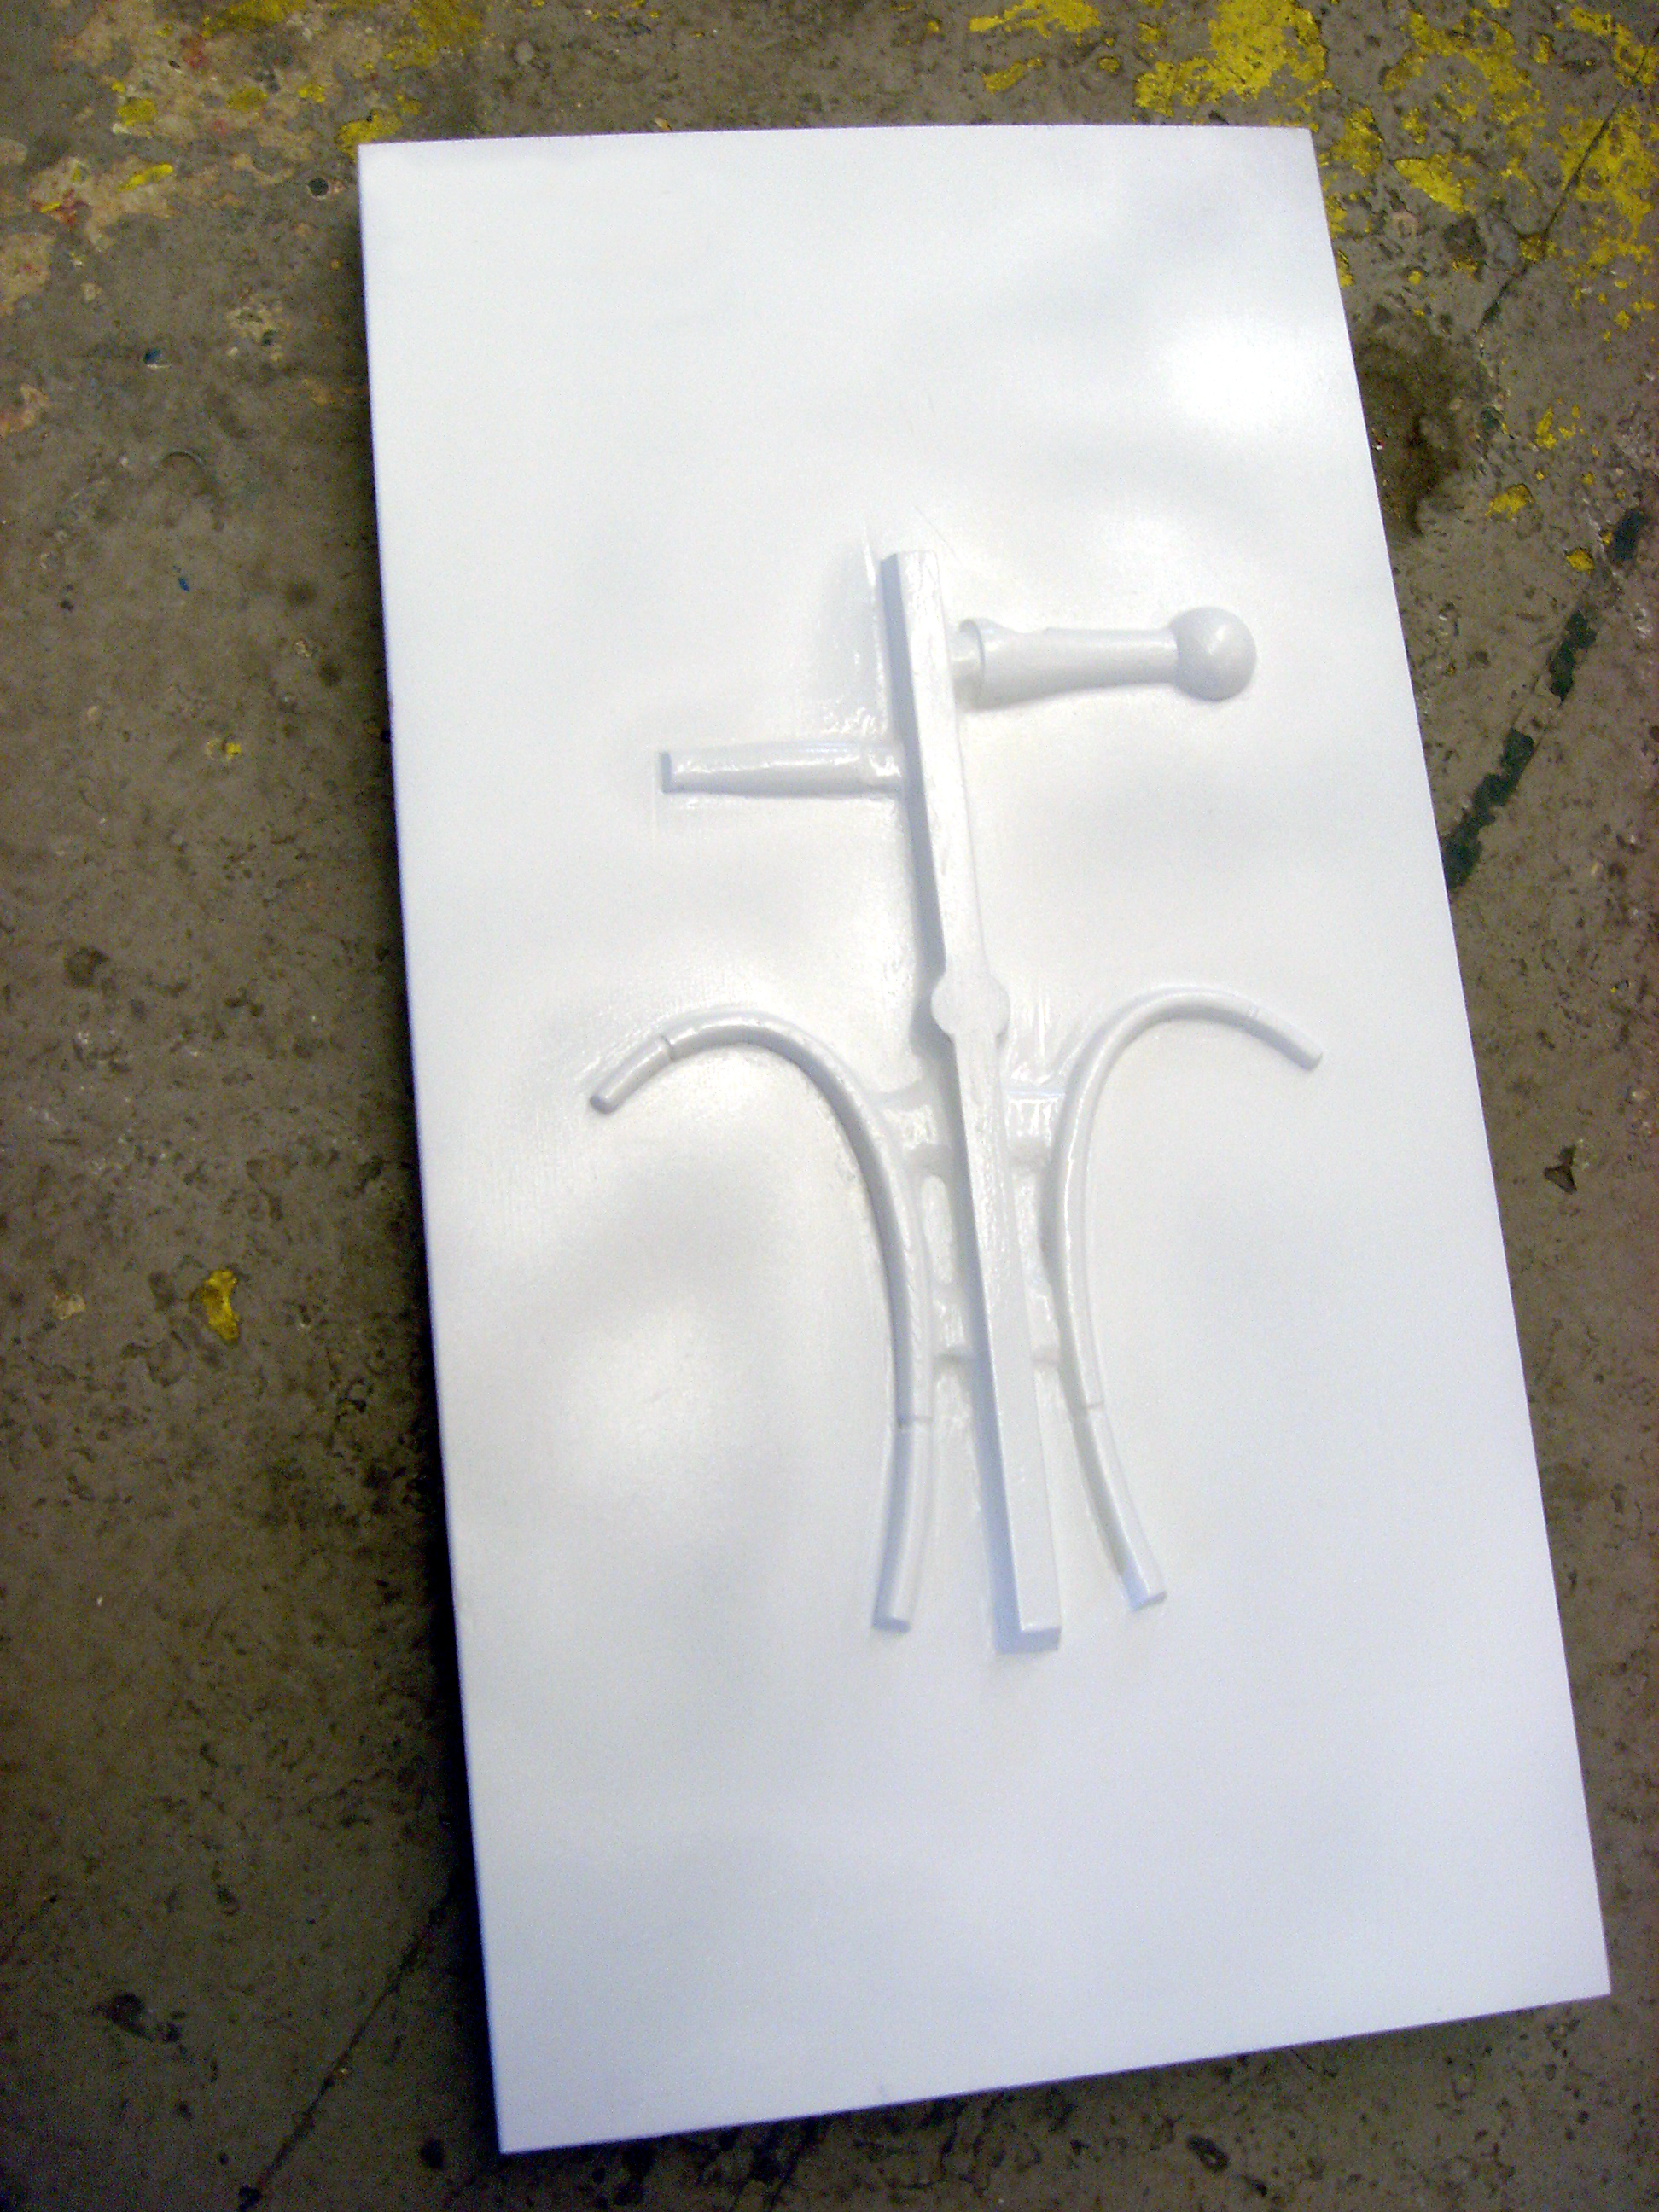
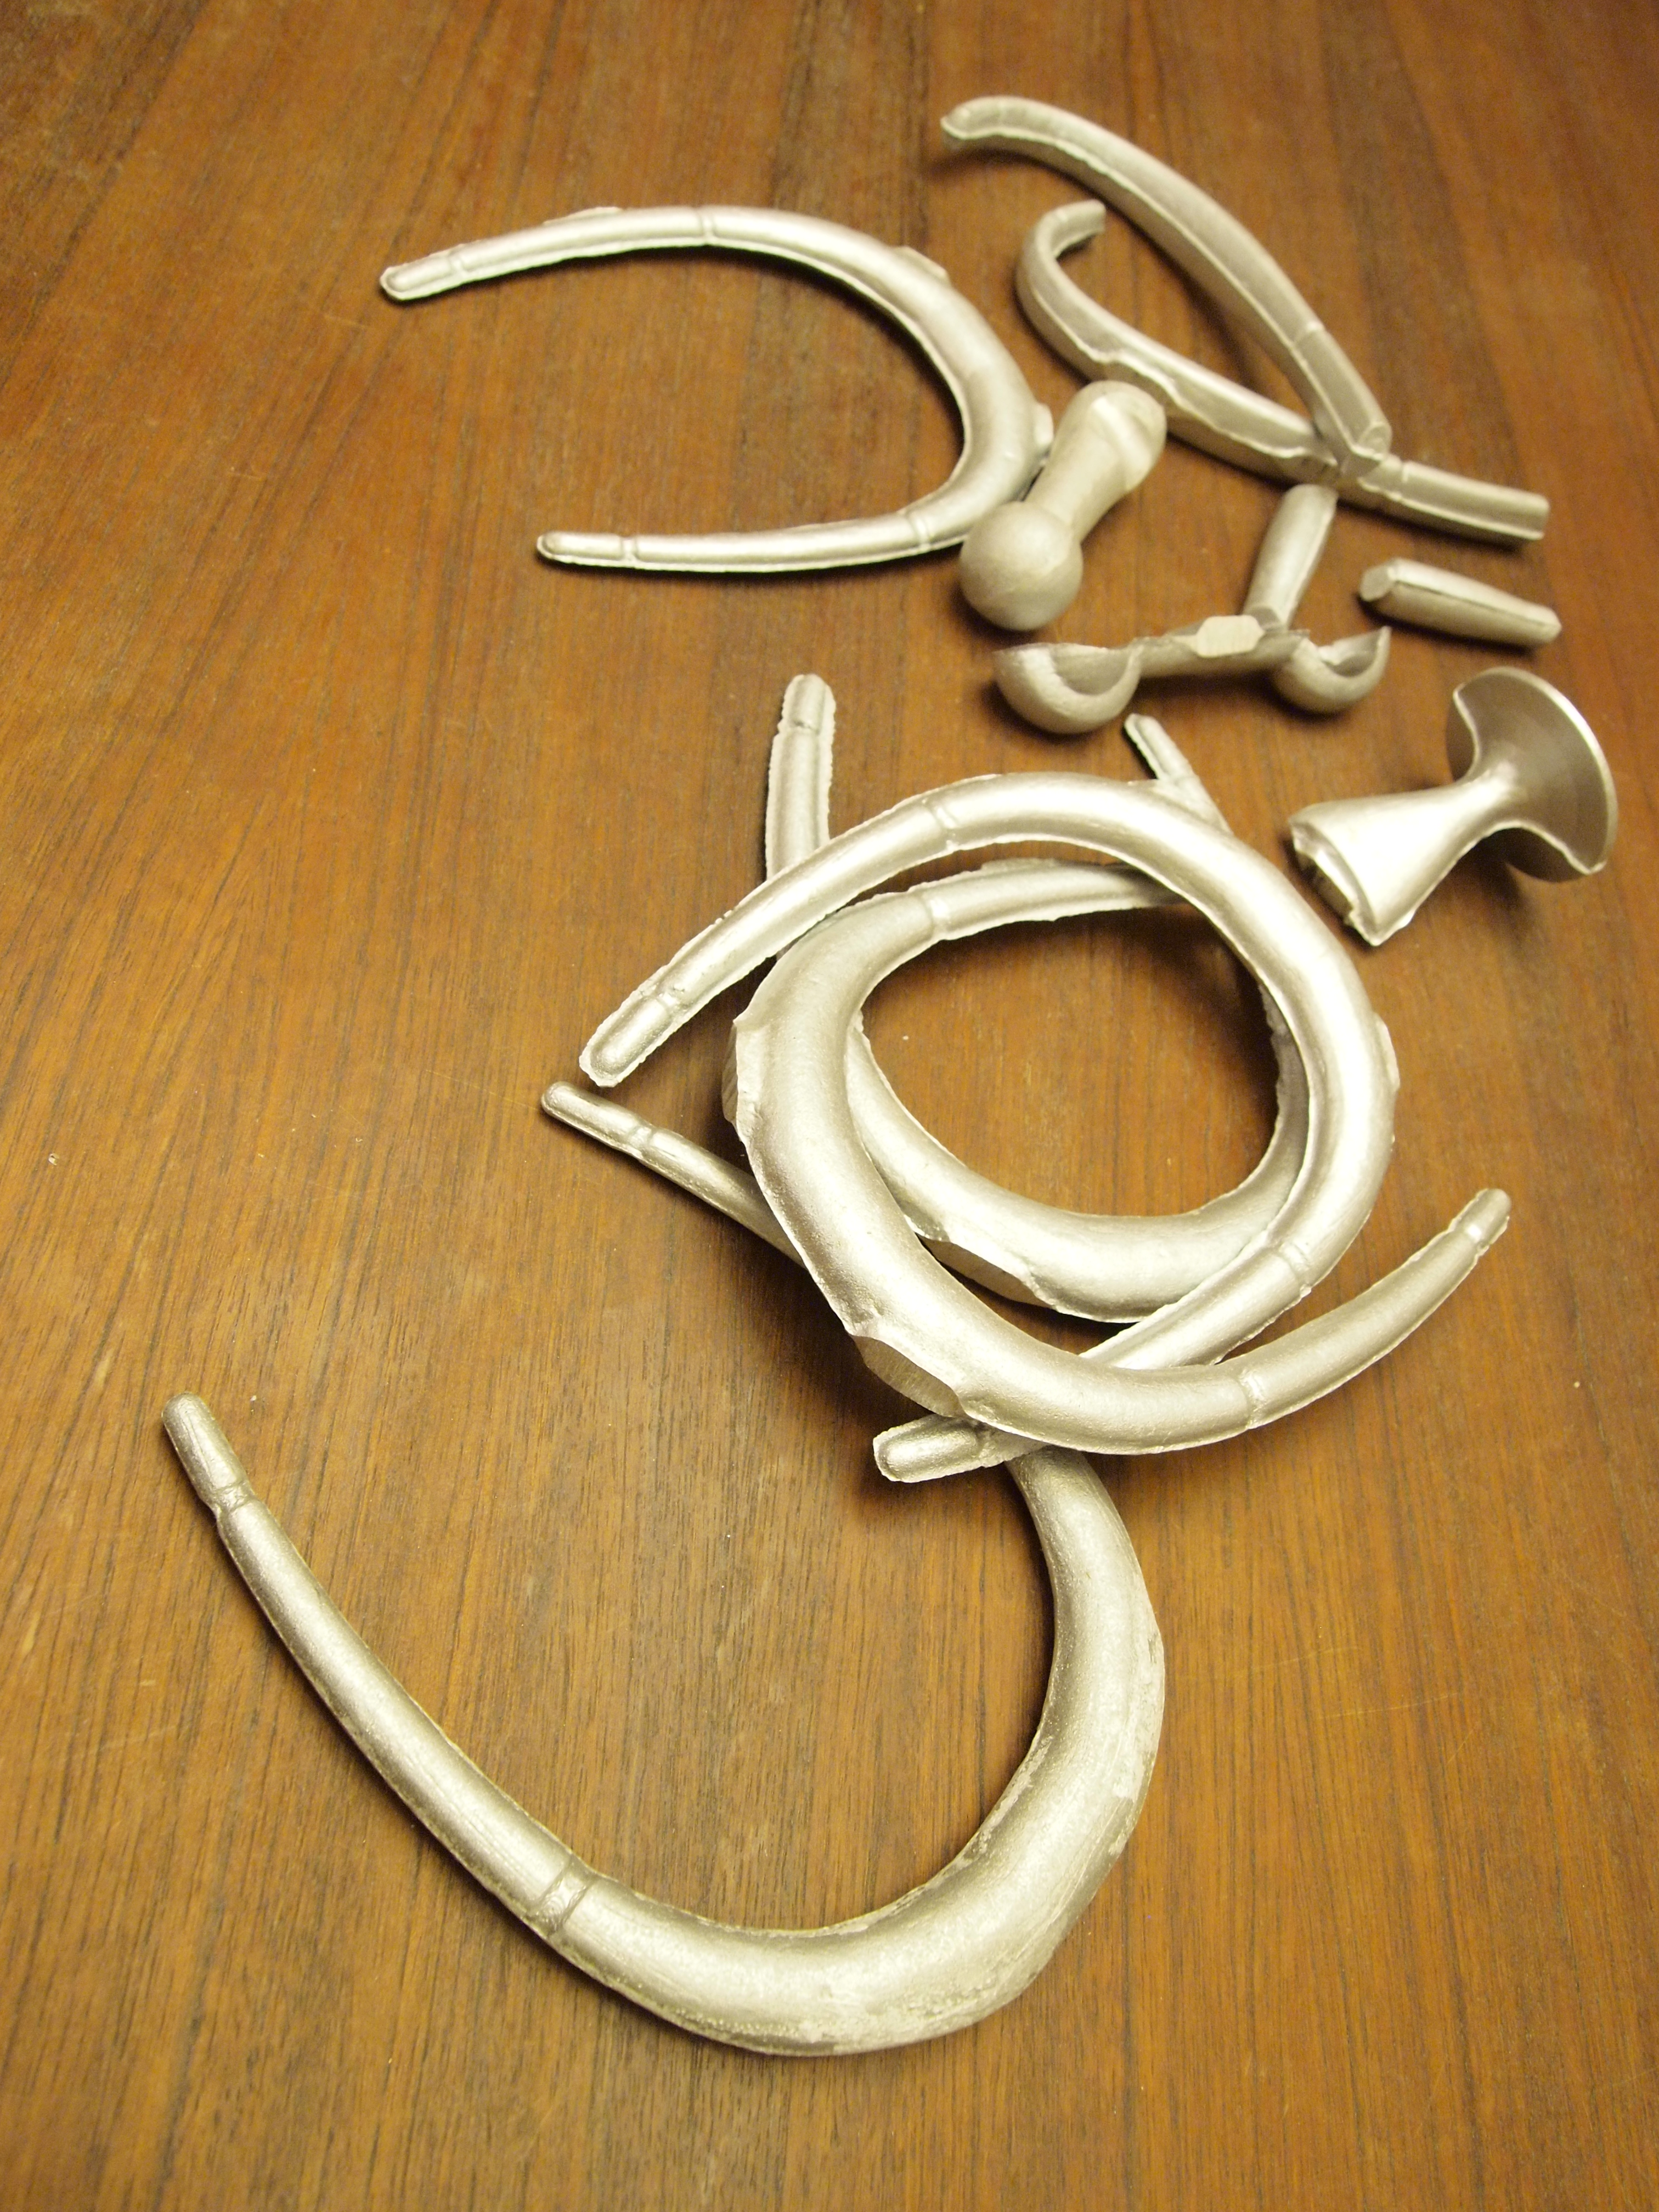
- This is split in halves (or made in halves), and the halves are mounted carefully on either side of a piece of sturdy board, creating the pattern. Solids representing an entrance for the molten metal (the sprue), channels (runners), and reservoirs (risers) are arranged on the pattern in what is called the gating system.
- Boxes of slightly oiled sand are compressed against both the top and bottom sides of the pattern; the box and sand above the pattern is the cope, that below the drag, and the pair constitute the casting flask.
- The cope and drag are separated and the pattern carefully removed. The halves of the flask are clamped back together creating the mold.
- Molten metal is poured into the sprue, flows through the runners, and fills the reservoirs (which compensate for metal shrinkage during the solidification process) and the voids left in the sand by the pattern.
- Finally, when the metal cools sufficiently, the sand is swept away, leaving the rough casting.
I’ve often wondered if the true pedagogic point of the course in this topic was to convince tyro architects to stay as far away as possible from the design of cast-metal objects. Resisting that impetus, and not being particularly interested in abstract (or even pointless) exercises in the expenditure of time and metal, I decided to create a light fixture that would hang over my own dining room table after I graduated, as a reminder of (to borrow an experiential category from a Migraine Boy comic) “all the good times” I had at architecture school. With this in mind, it became obvious that the only suitable form for a memento of my “professional” education would be the skeleton of a dead animal.
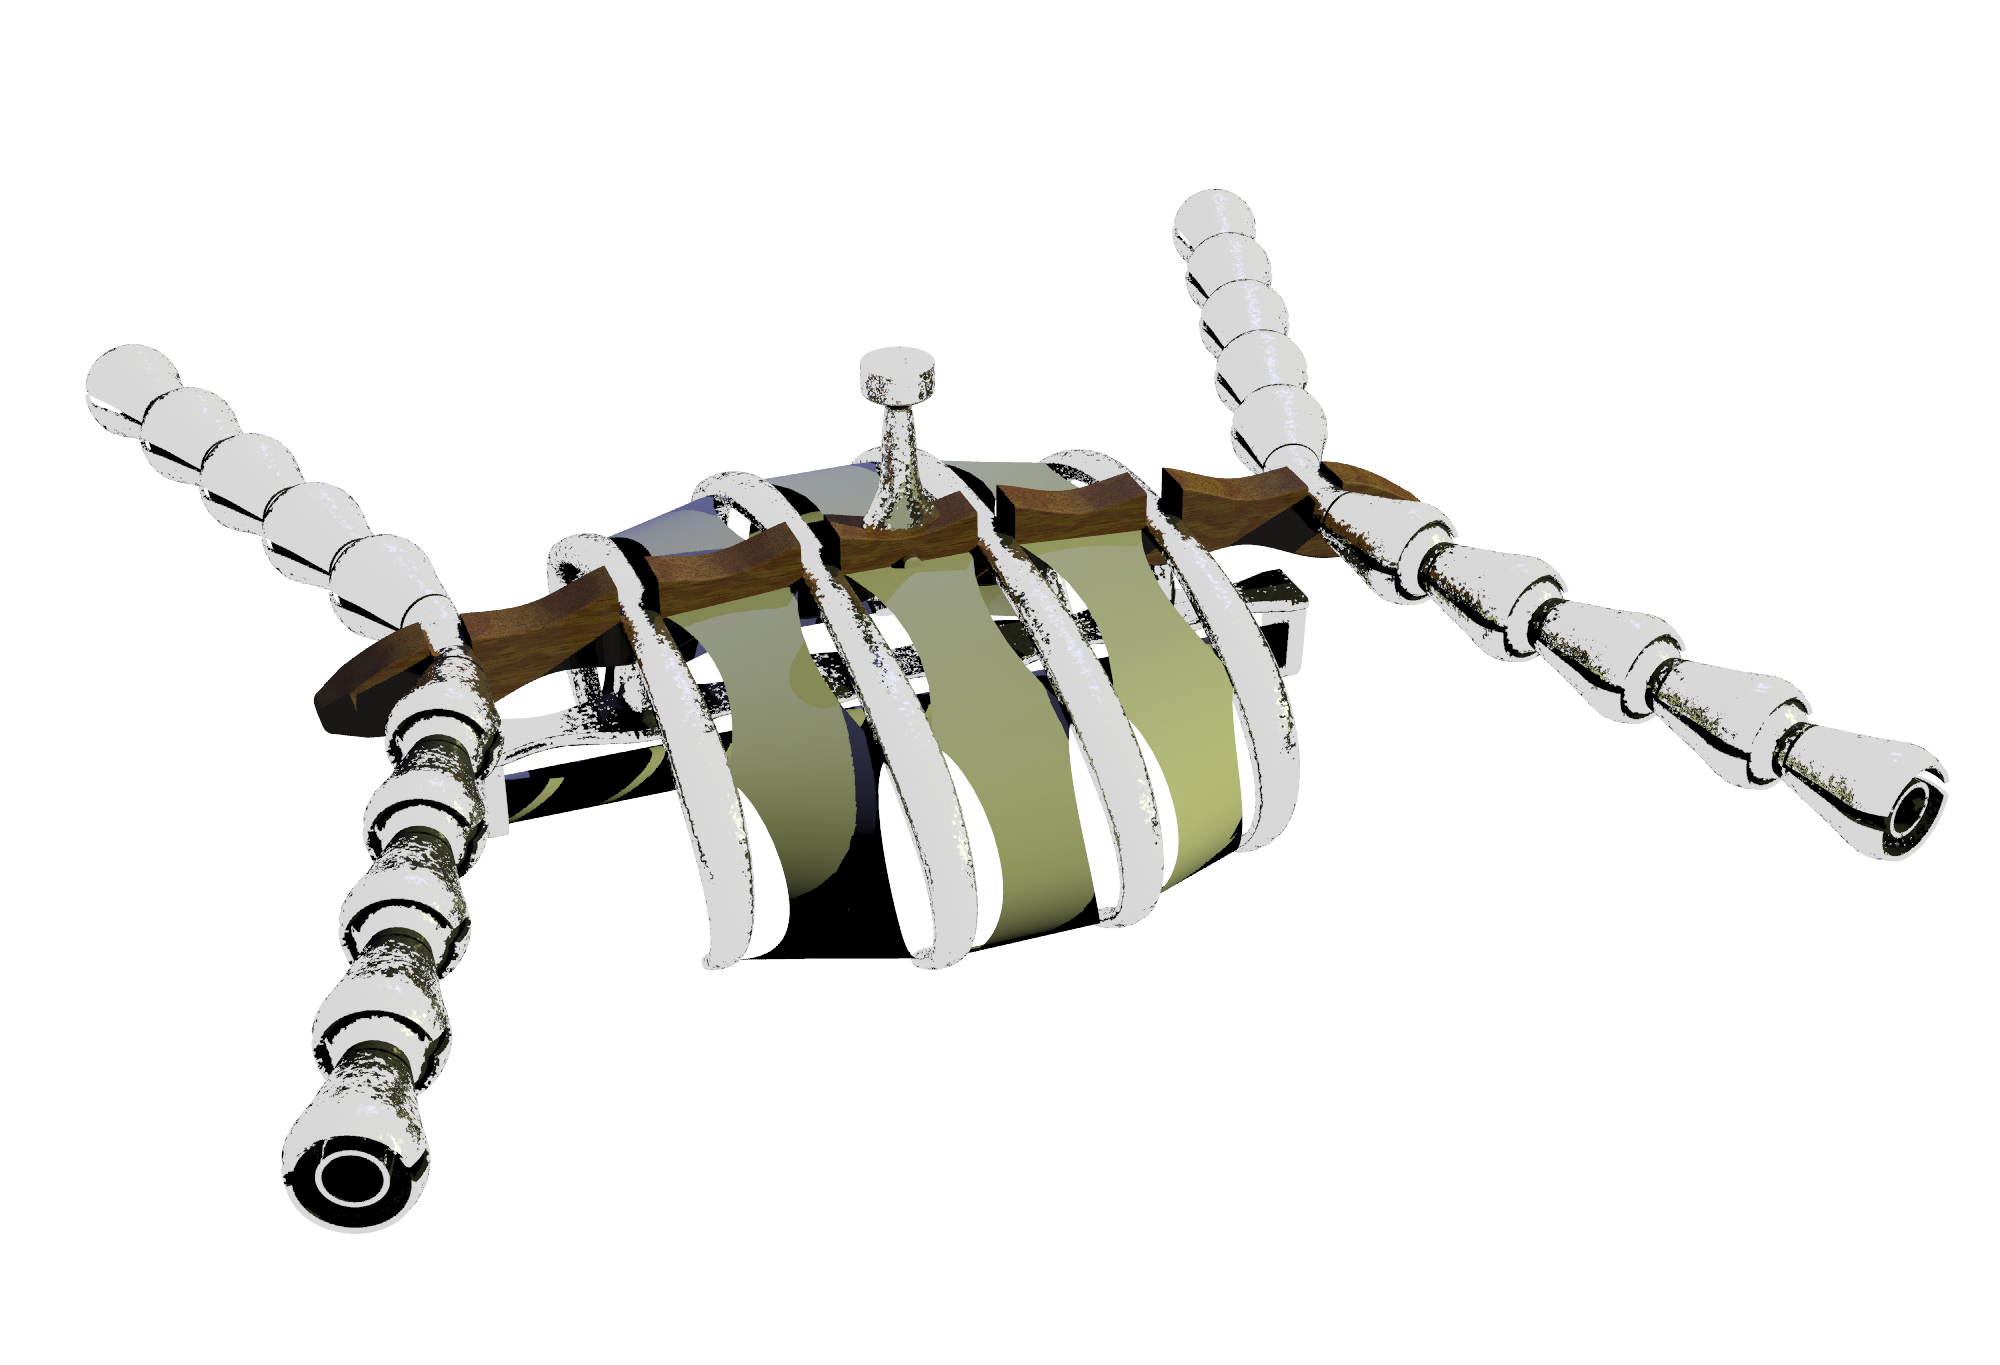
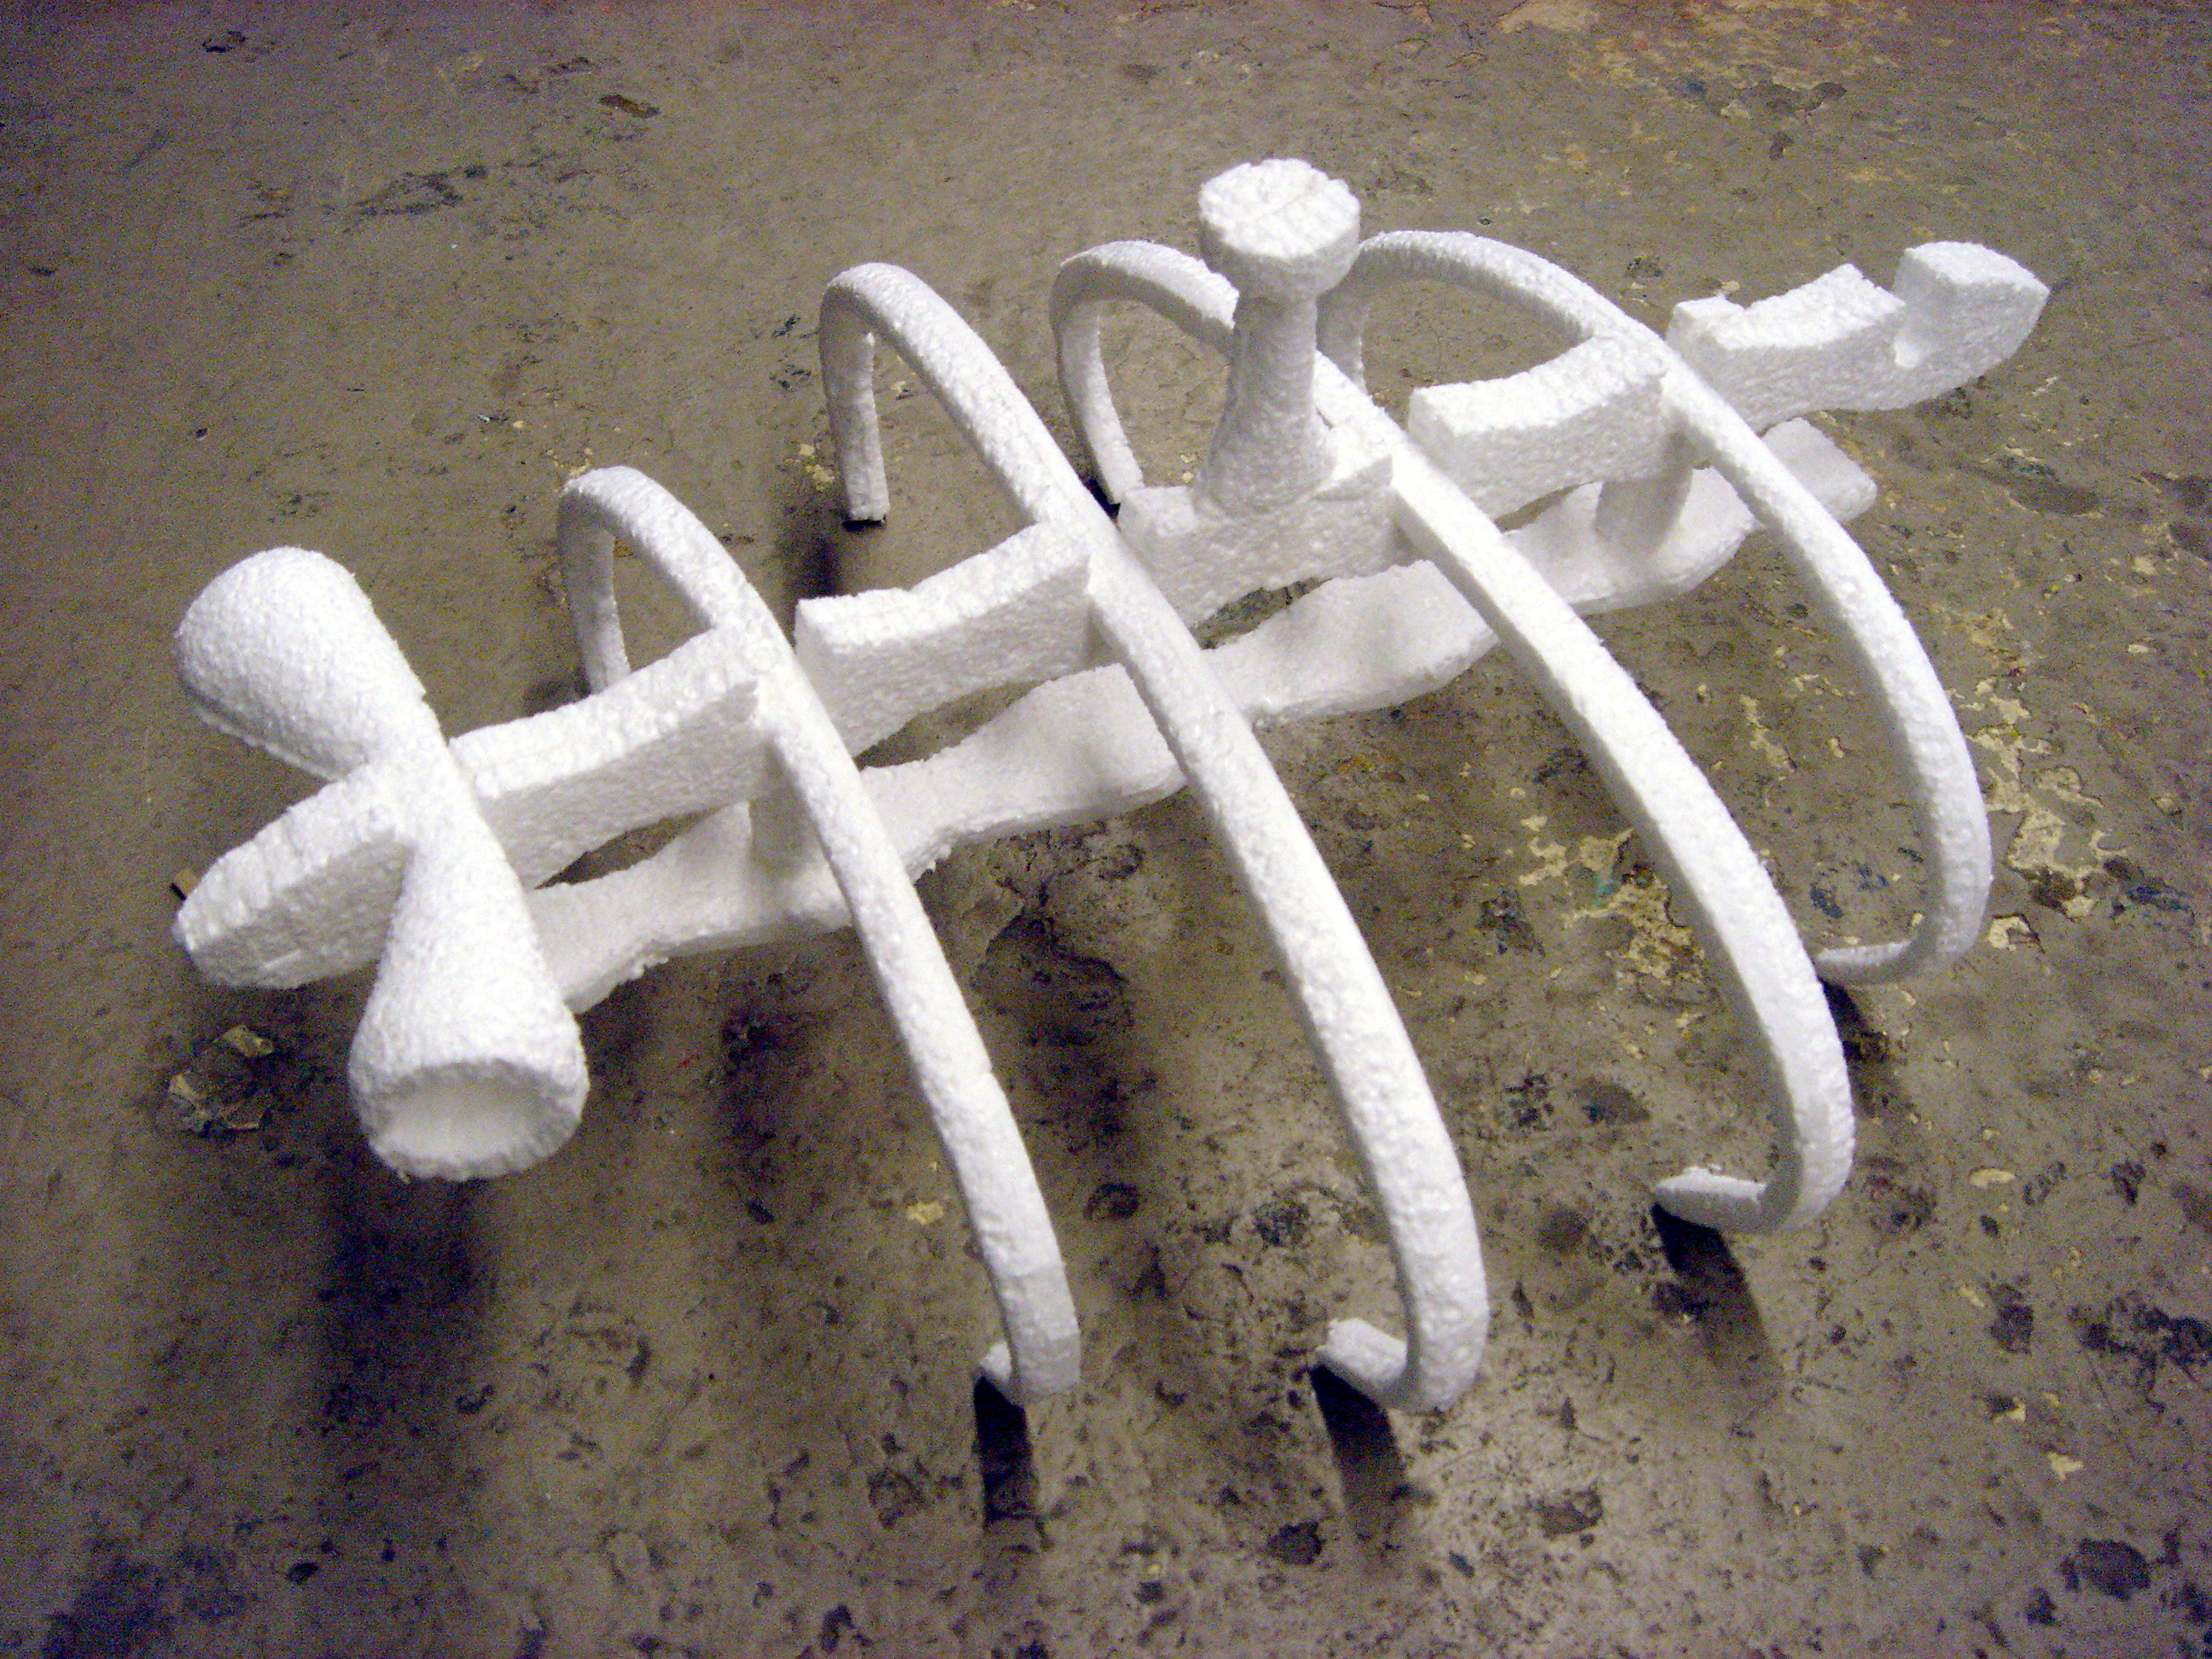
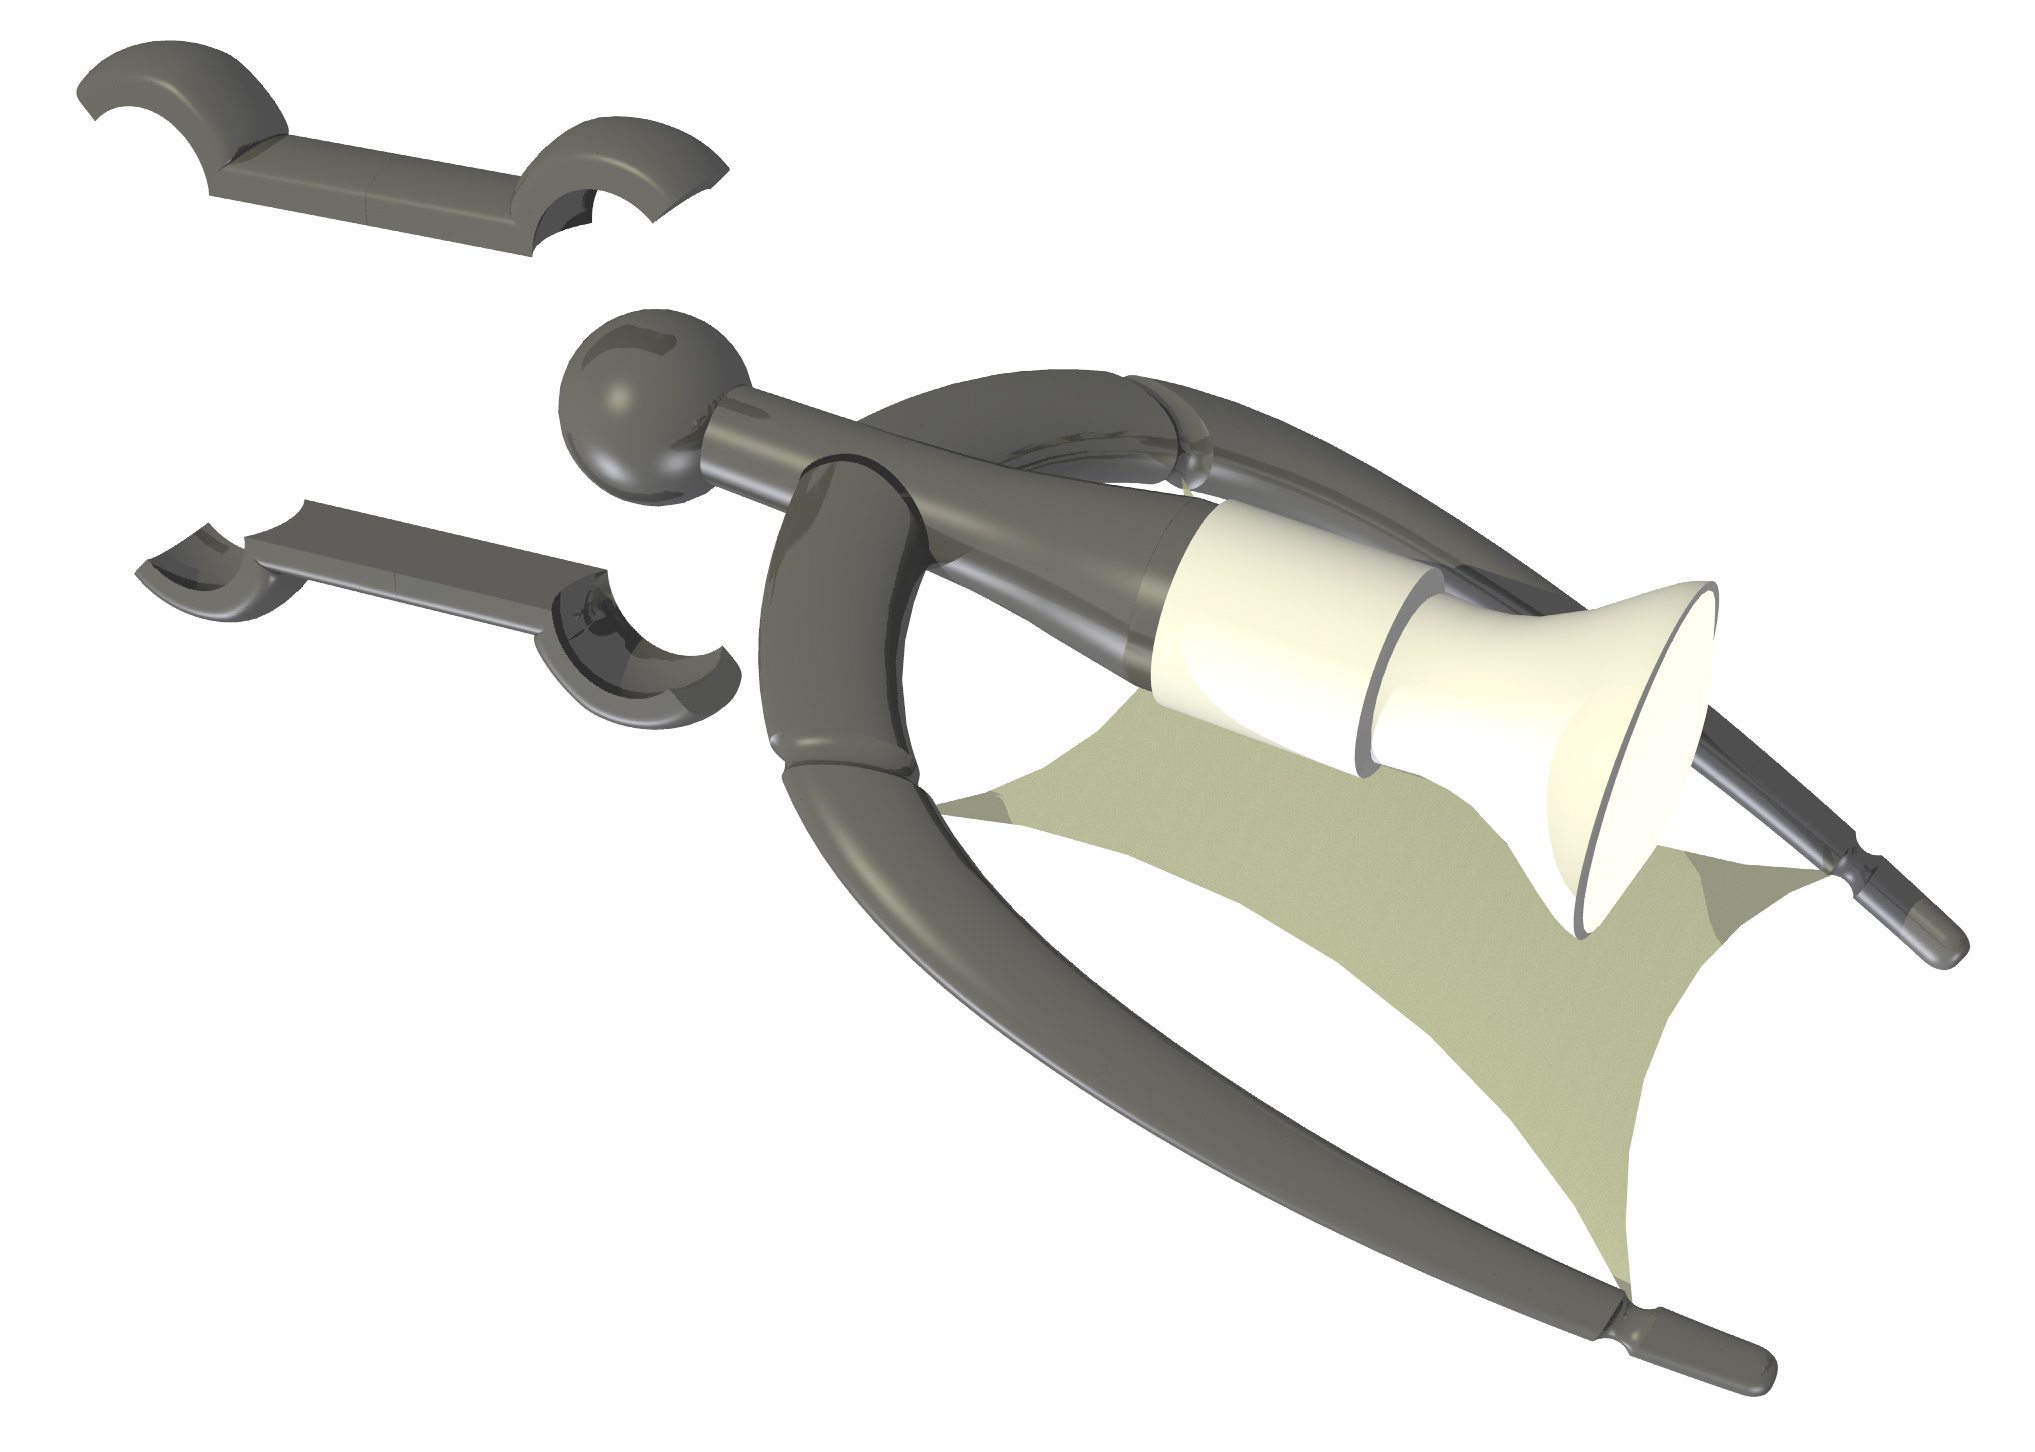
I even CNC-milled a scale model of this beast in EPS foam to test my concept before moving to more expensive materials.
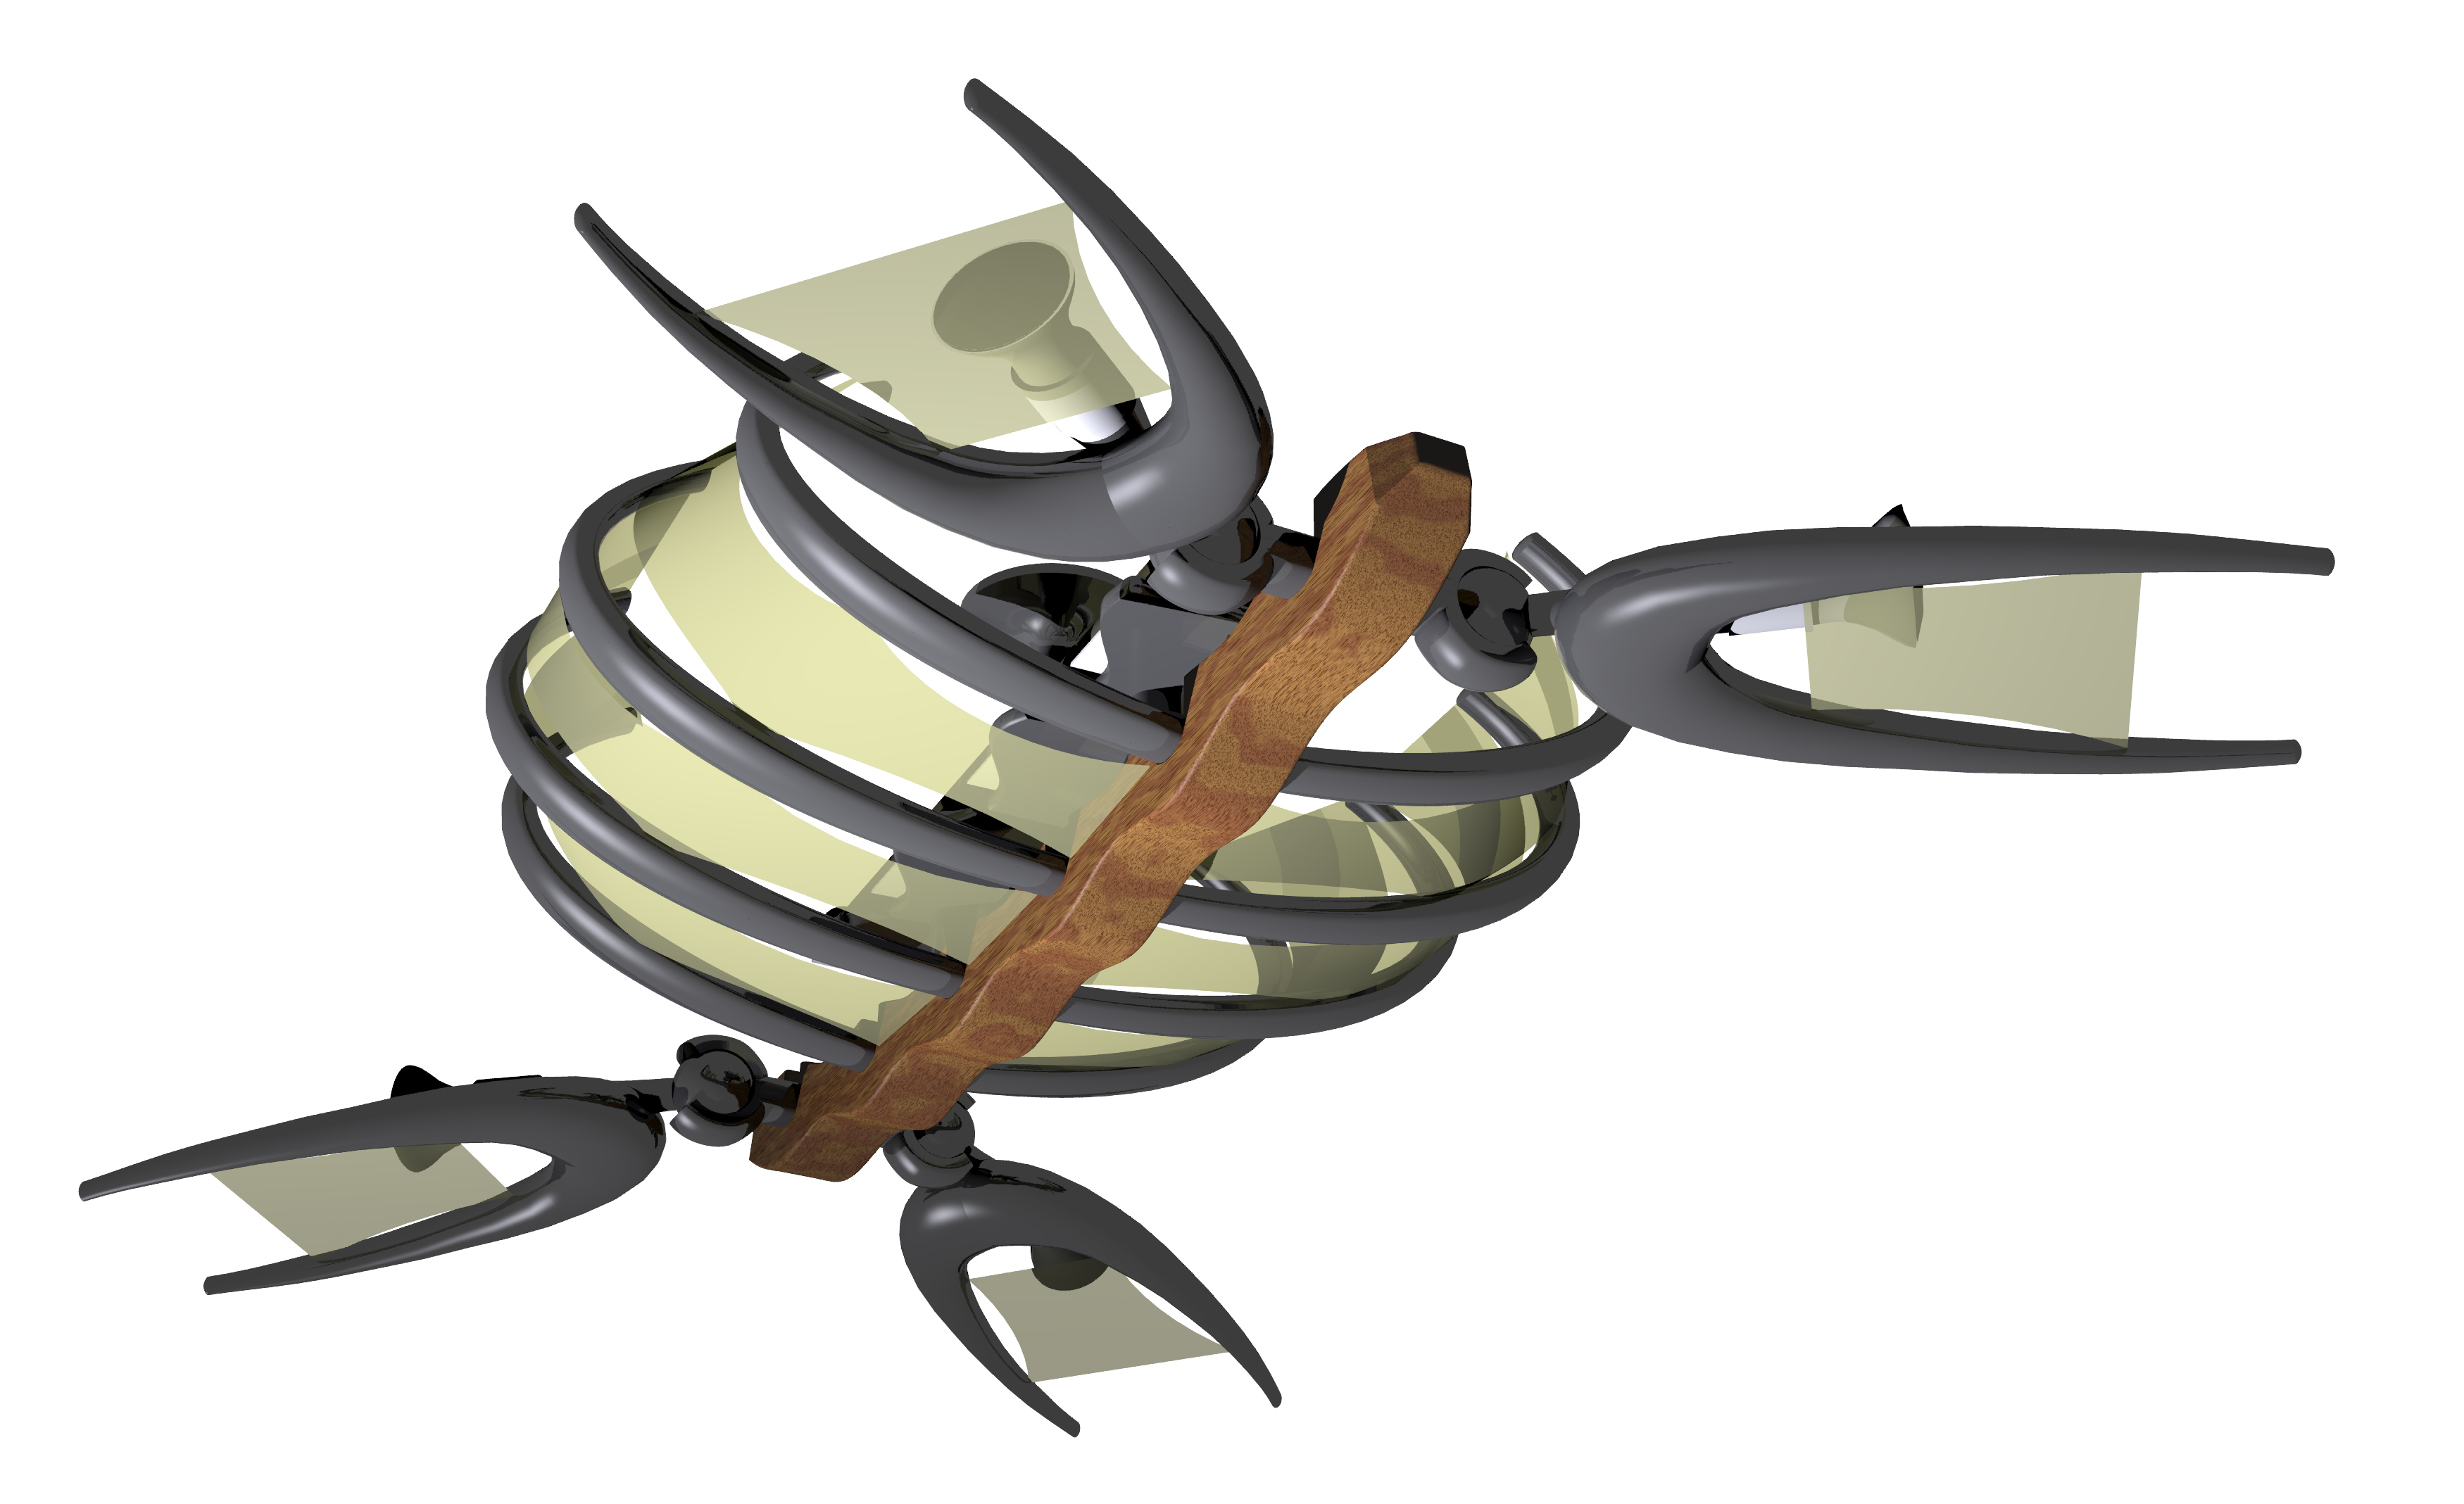
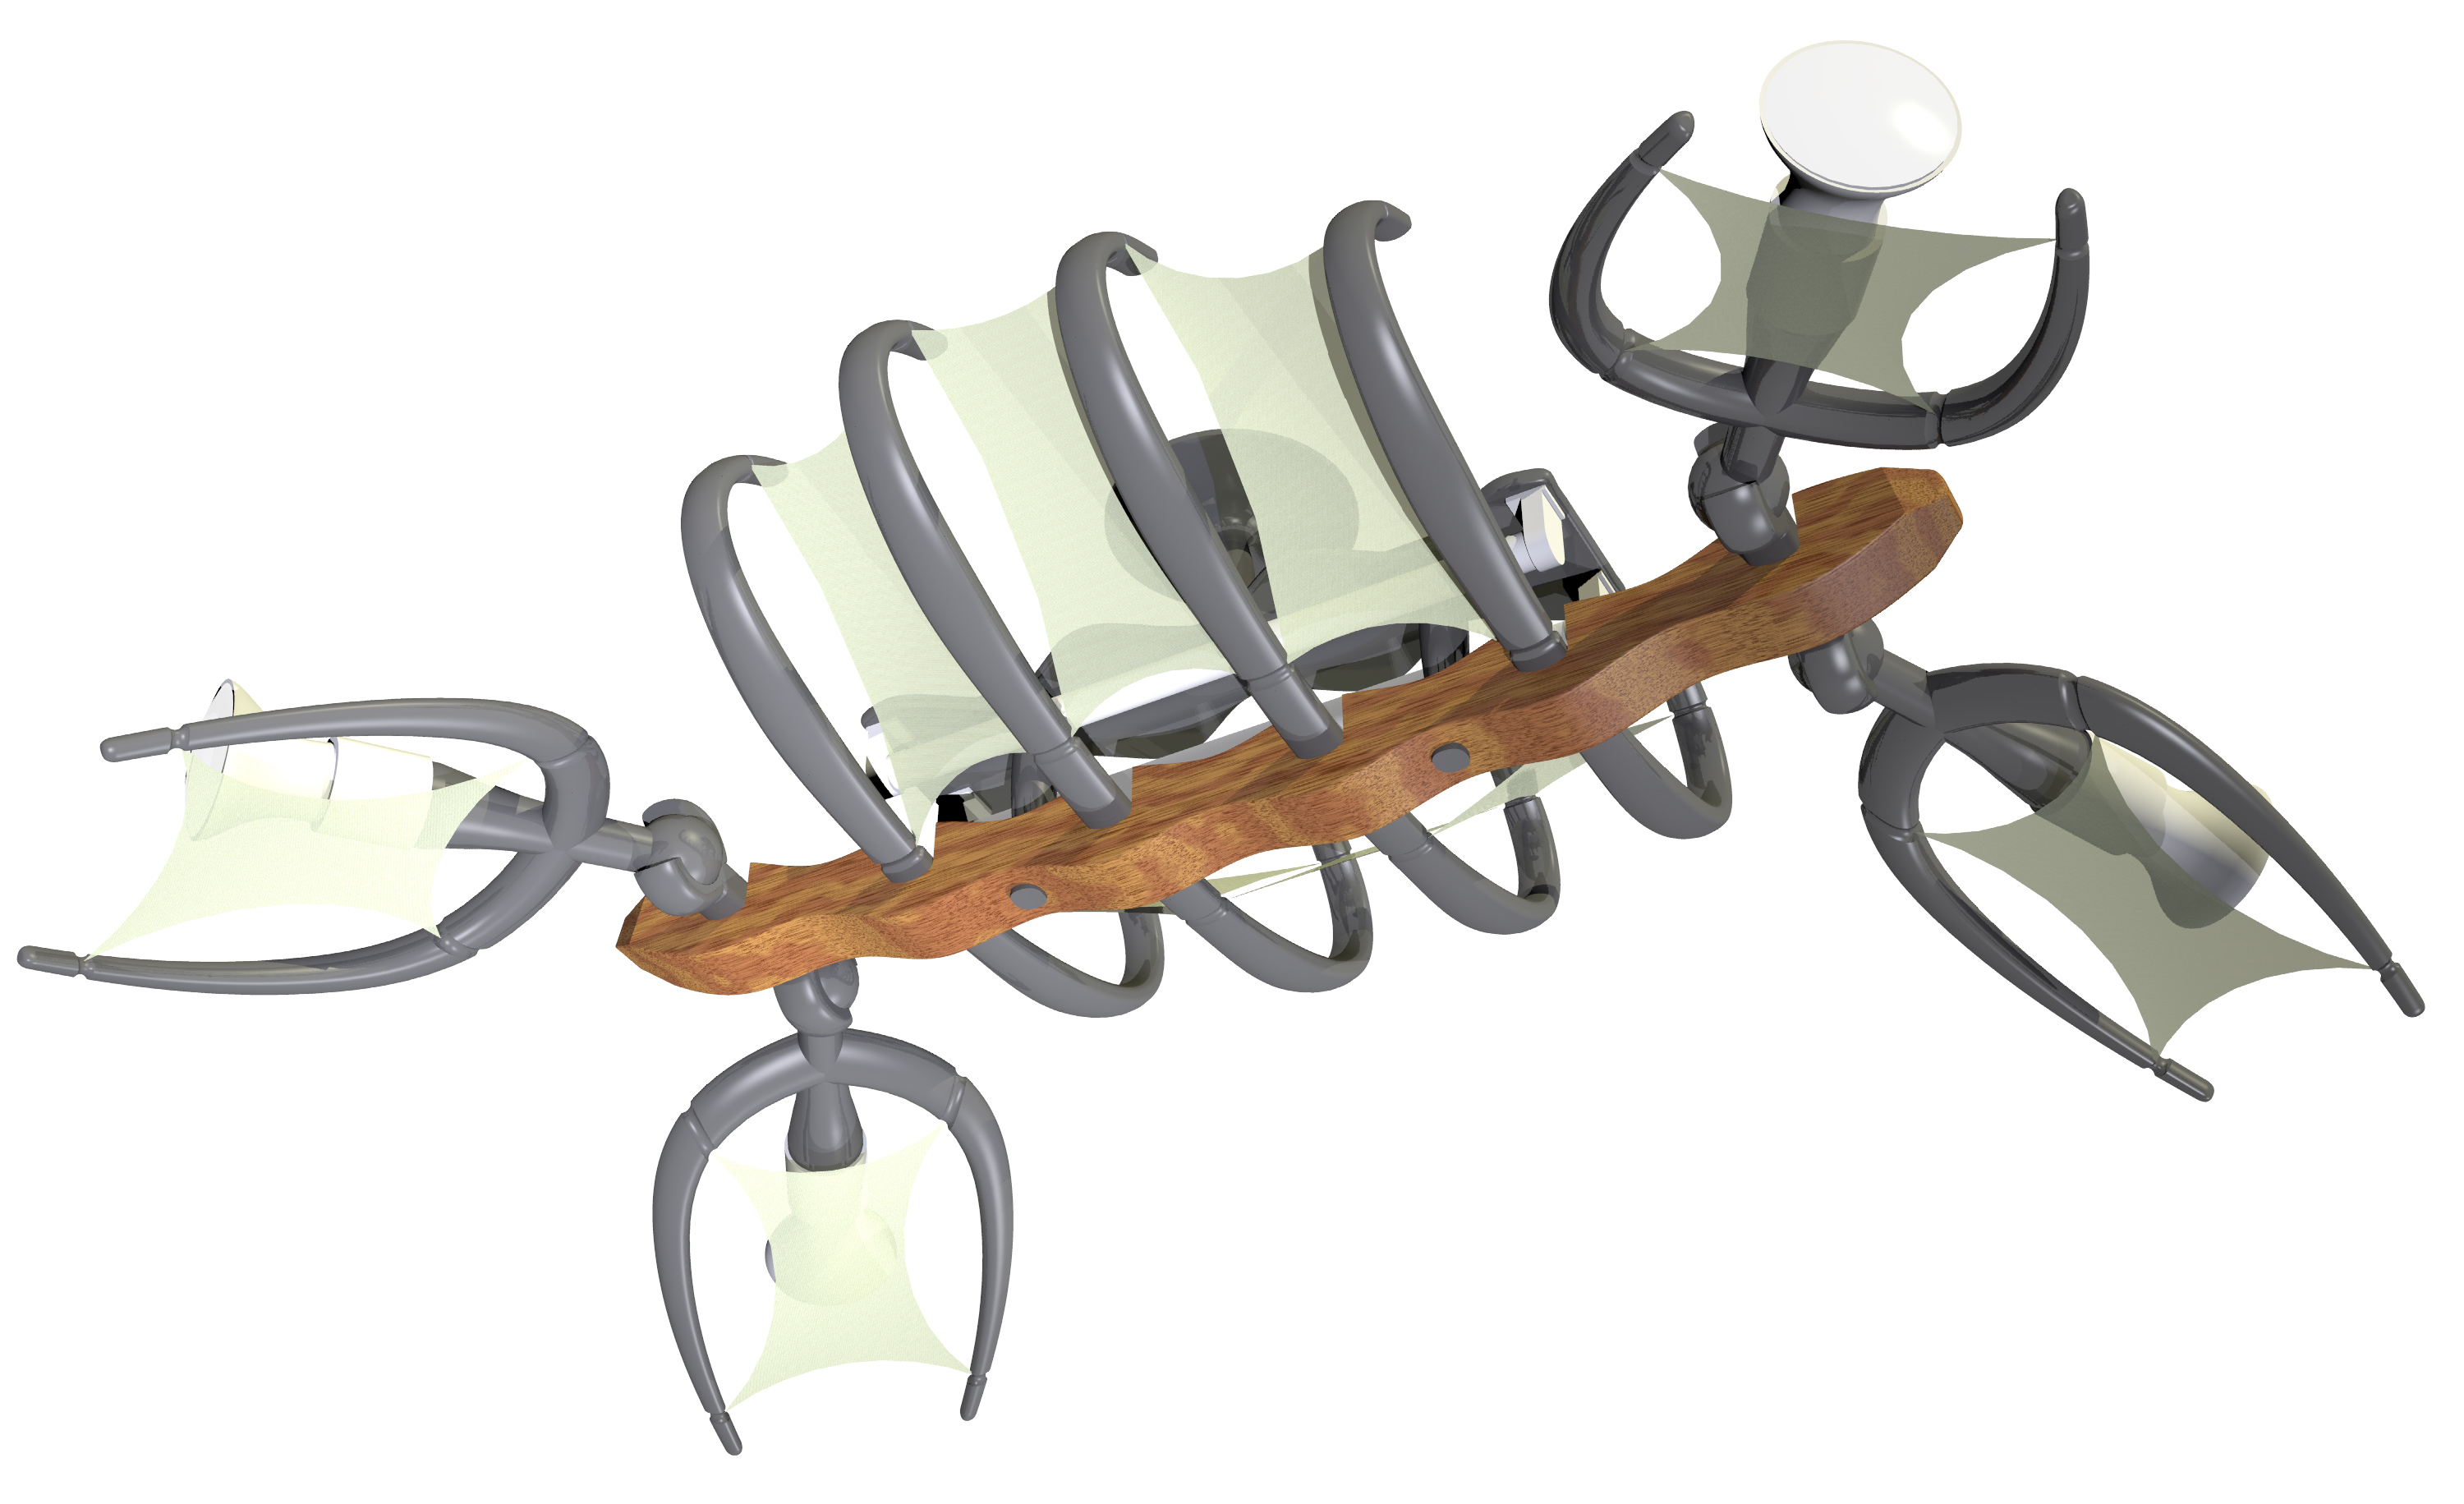
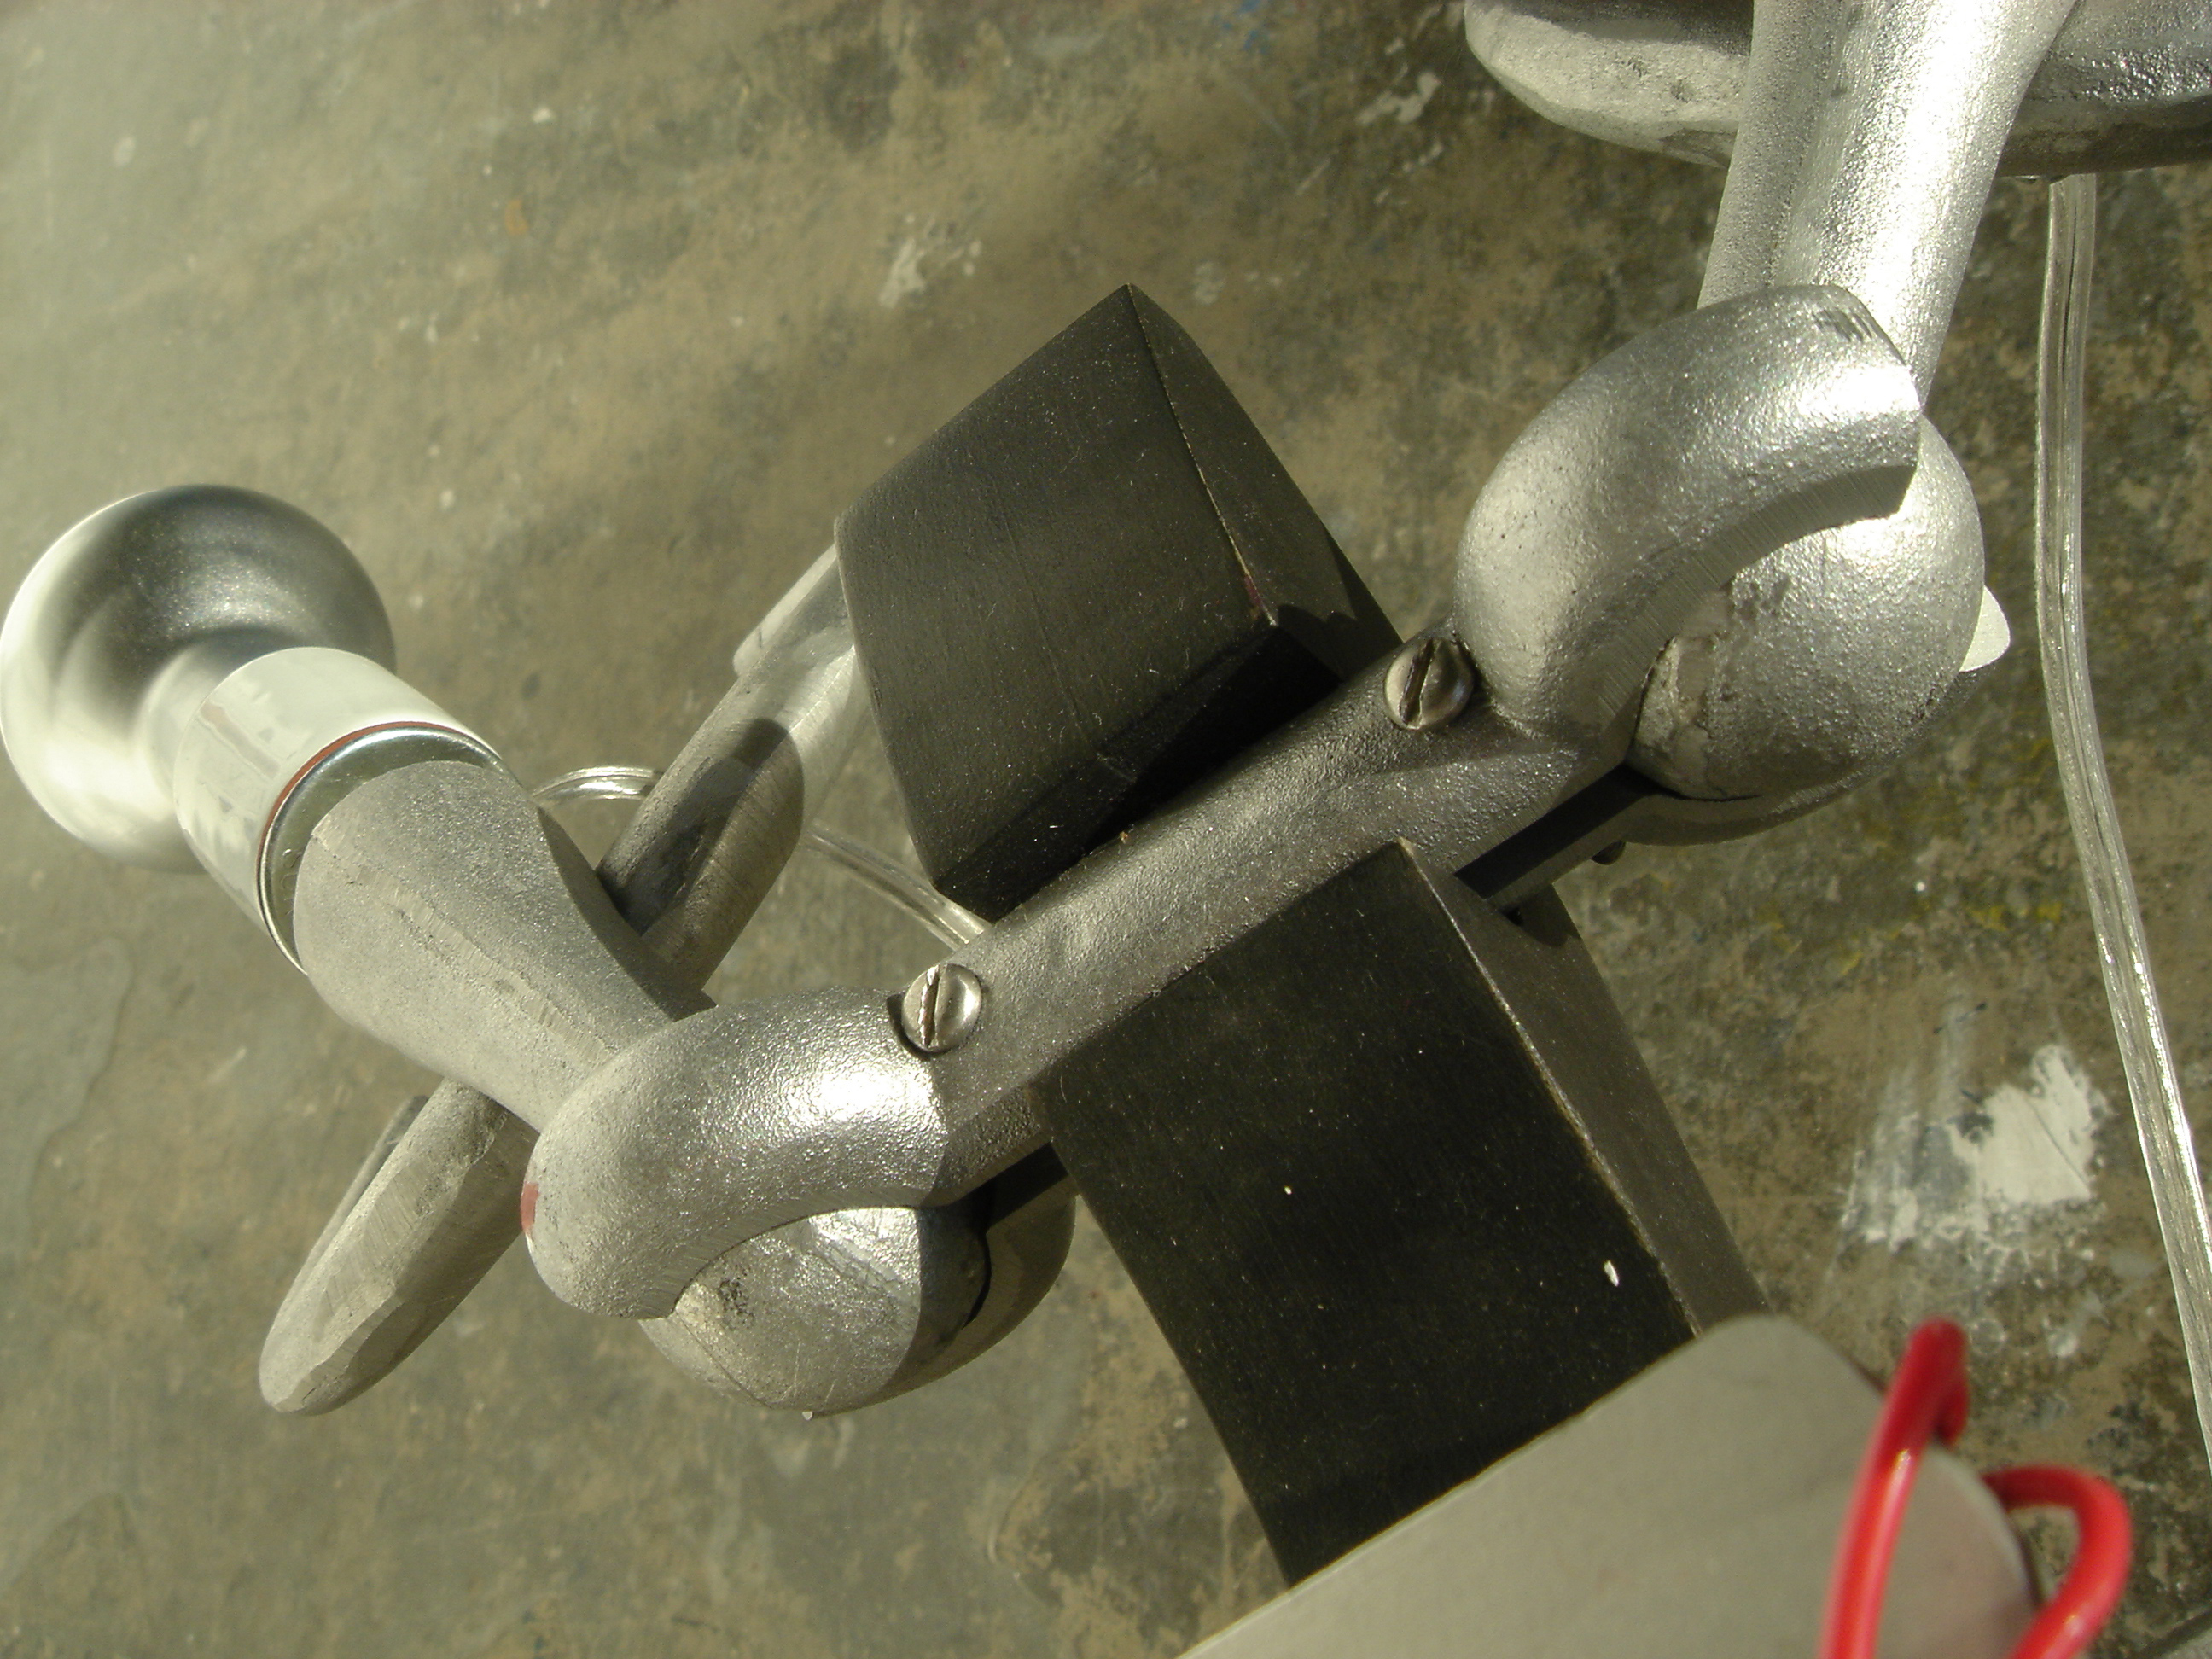
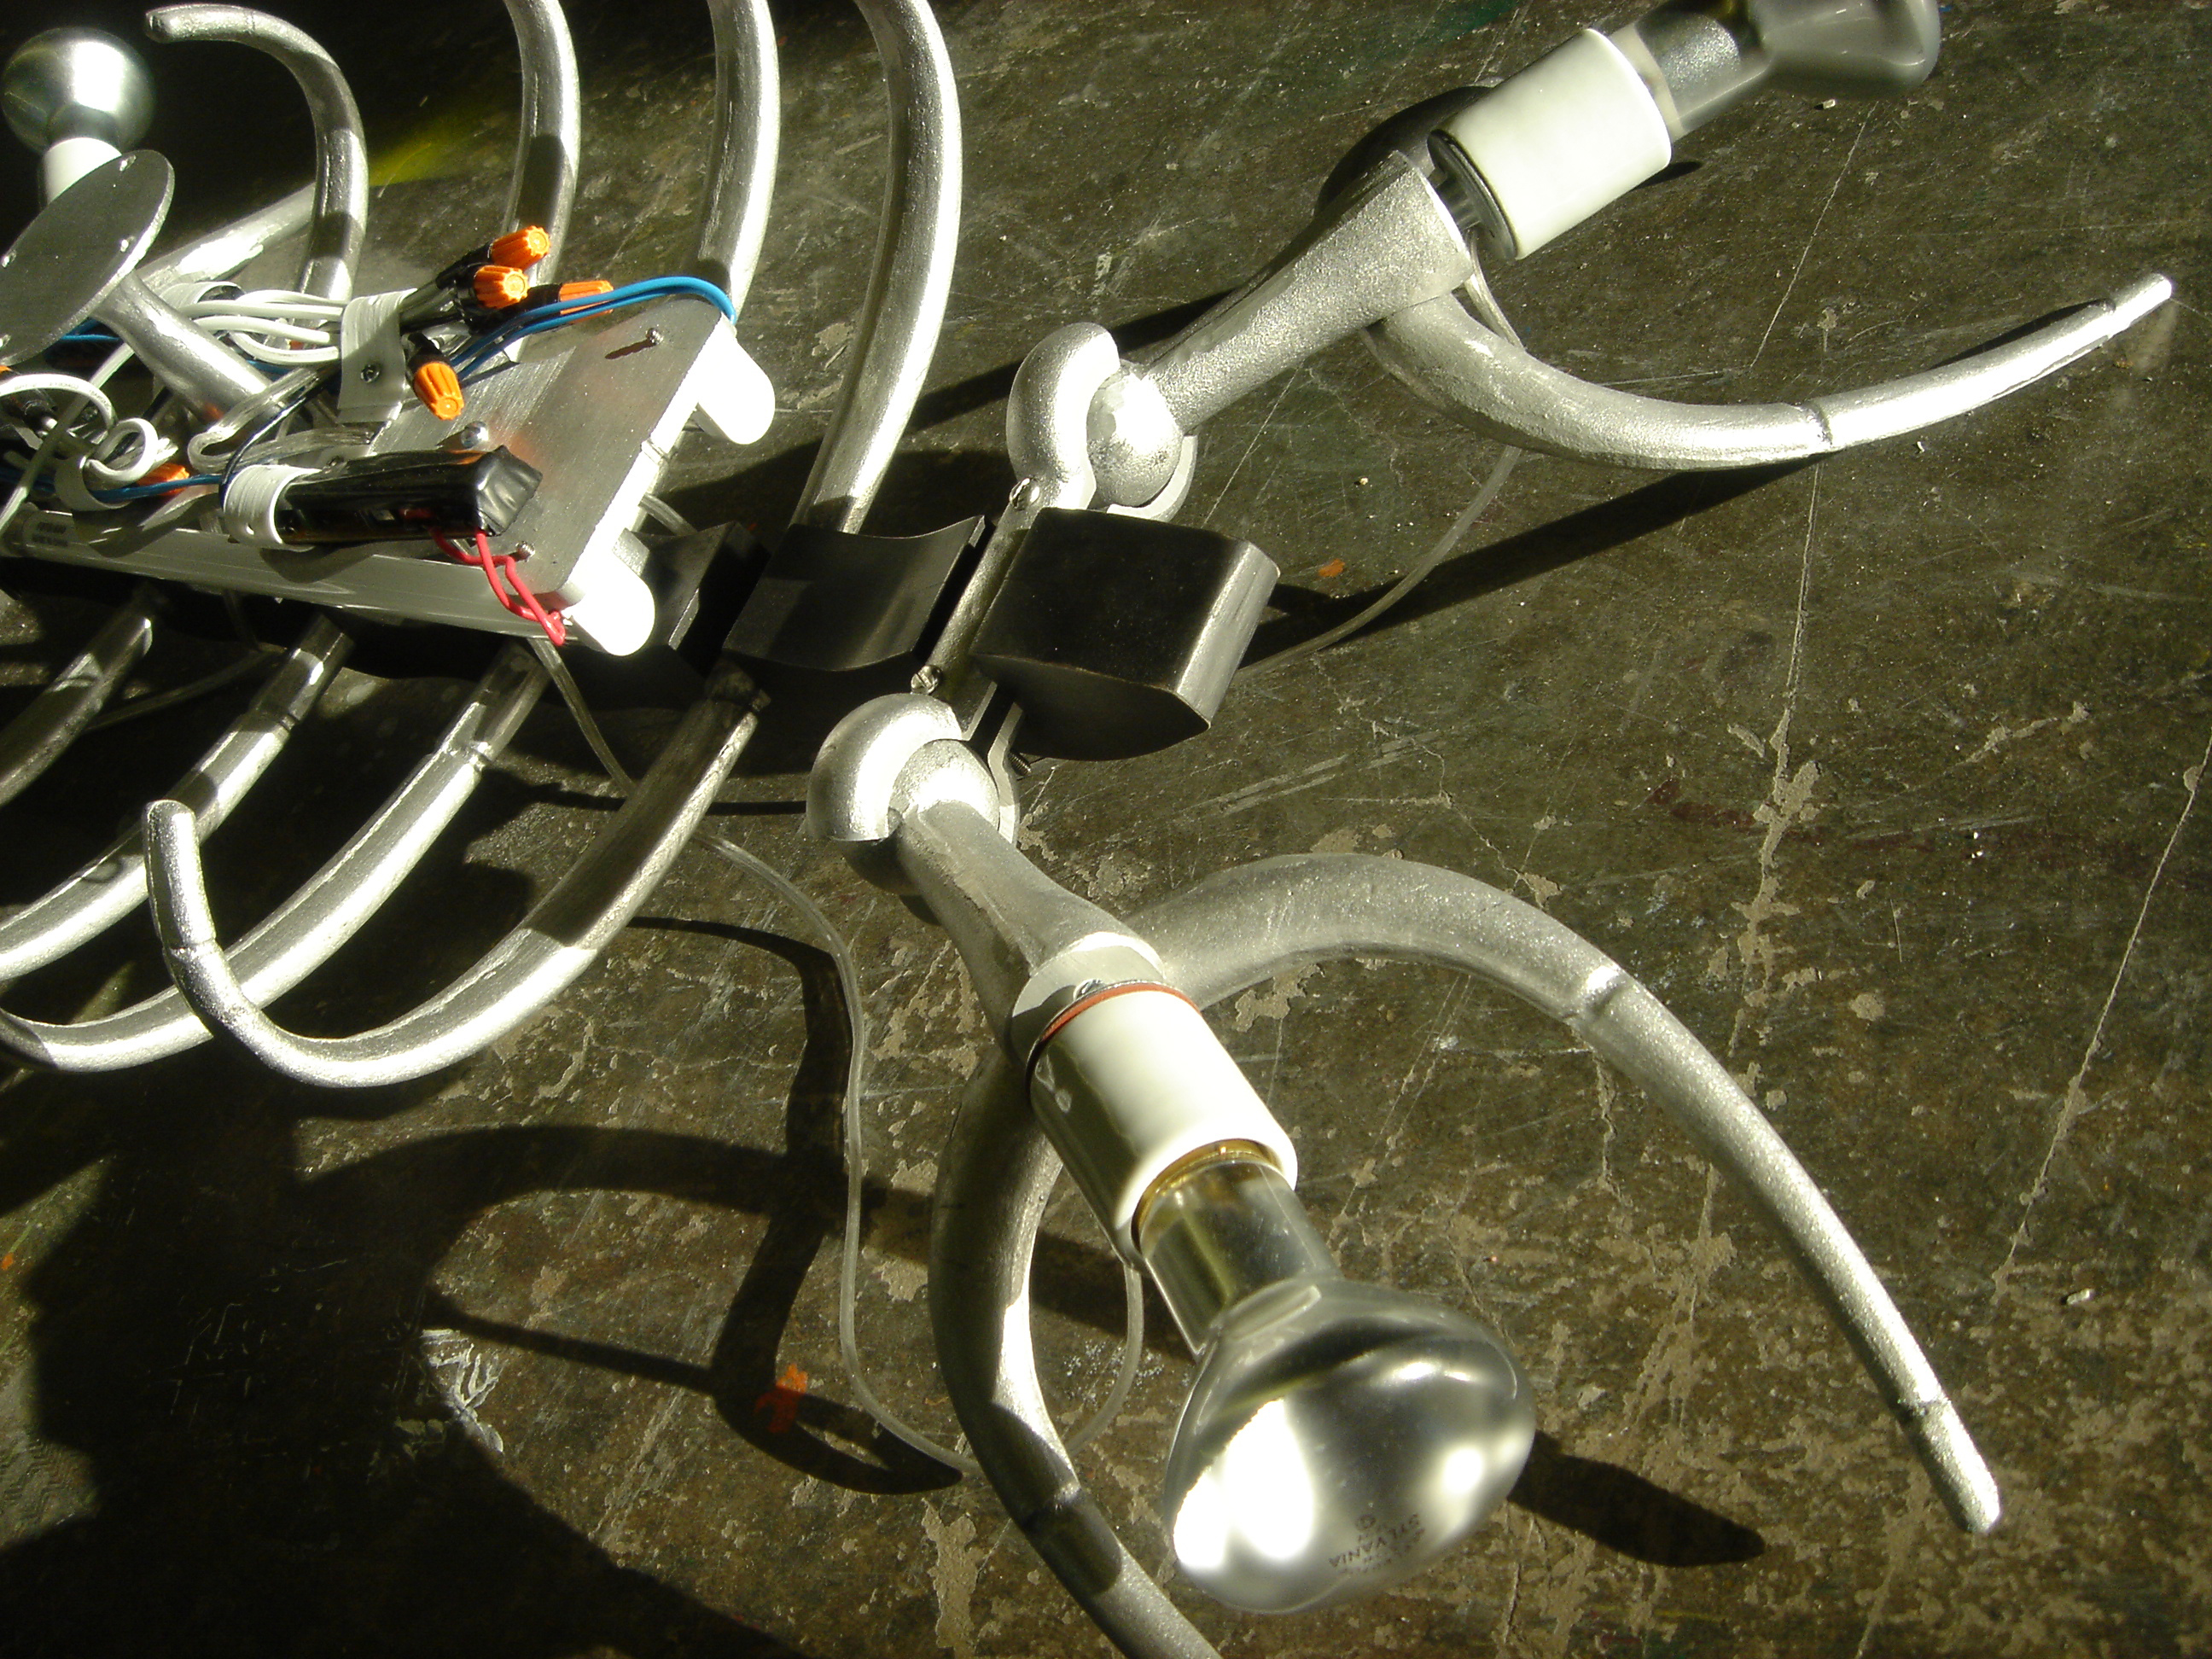
Even though I was able approximate a basic component in the foam model, the tentacle-limbs which held the spotlights in the initial design of this fixture proved particularly difficult to conceptualize as a basic positive formal element attached to the pattern, composed as they were of hollowed conical forms something like a succession of bathroom shower-heads. For the next iteration I abandoned the original tentacular “arms” in favor of a paddle-like shape with a ball-like end, like the head of a femur, that could be rotated within a socket clamp, itself a sort of metaphor for the cup-like acetabulum of a pelvis. With a certain number of trivial variations, this general configuration for the piece would hold through the creation of the patterns and the casting. And, unavoidably, it would from this point be characterized (by classmates) as “the dead turtle light-fixture.”
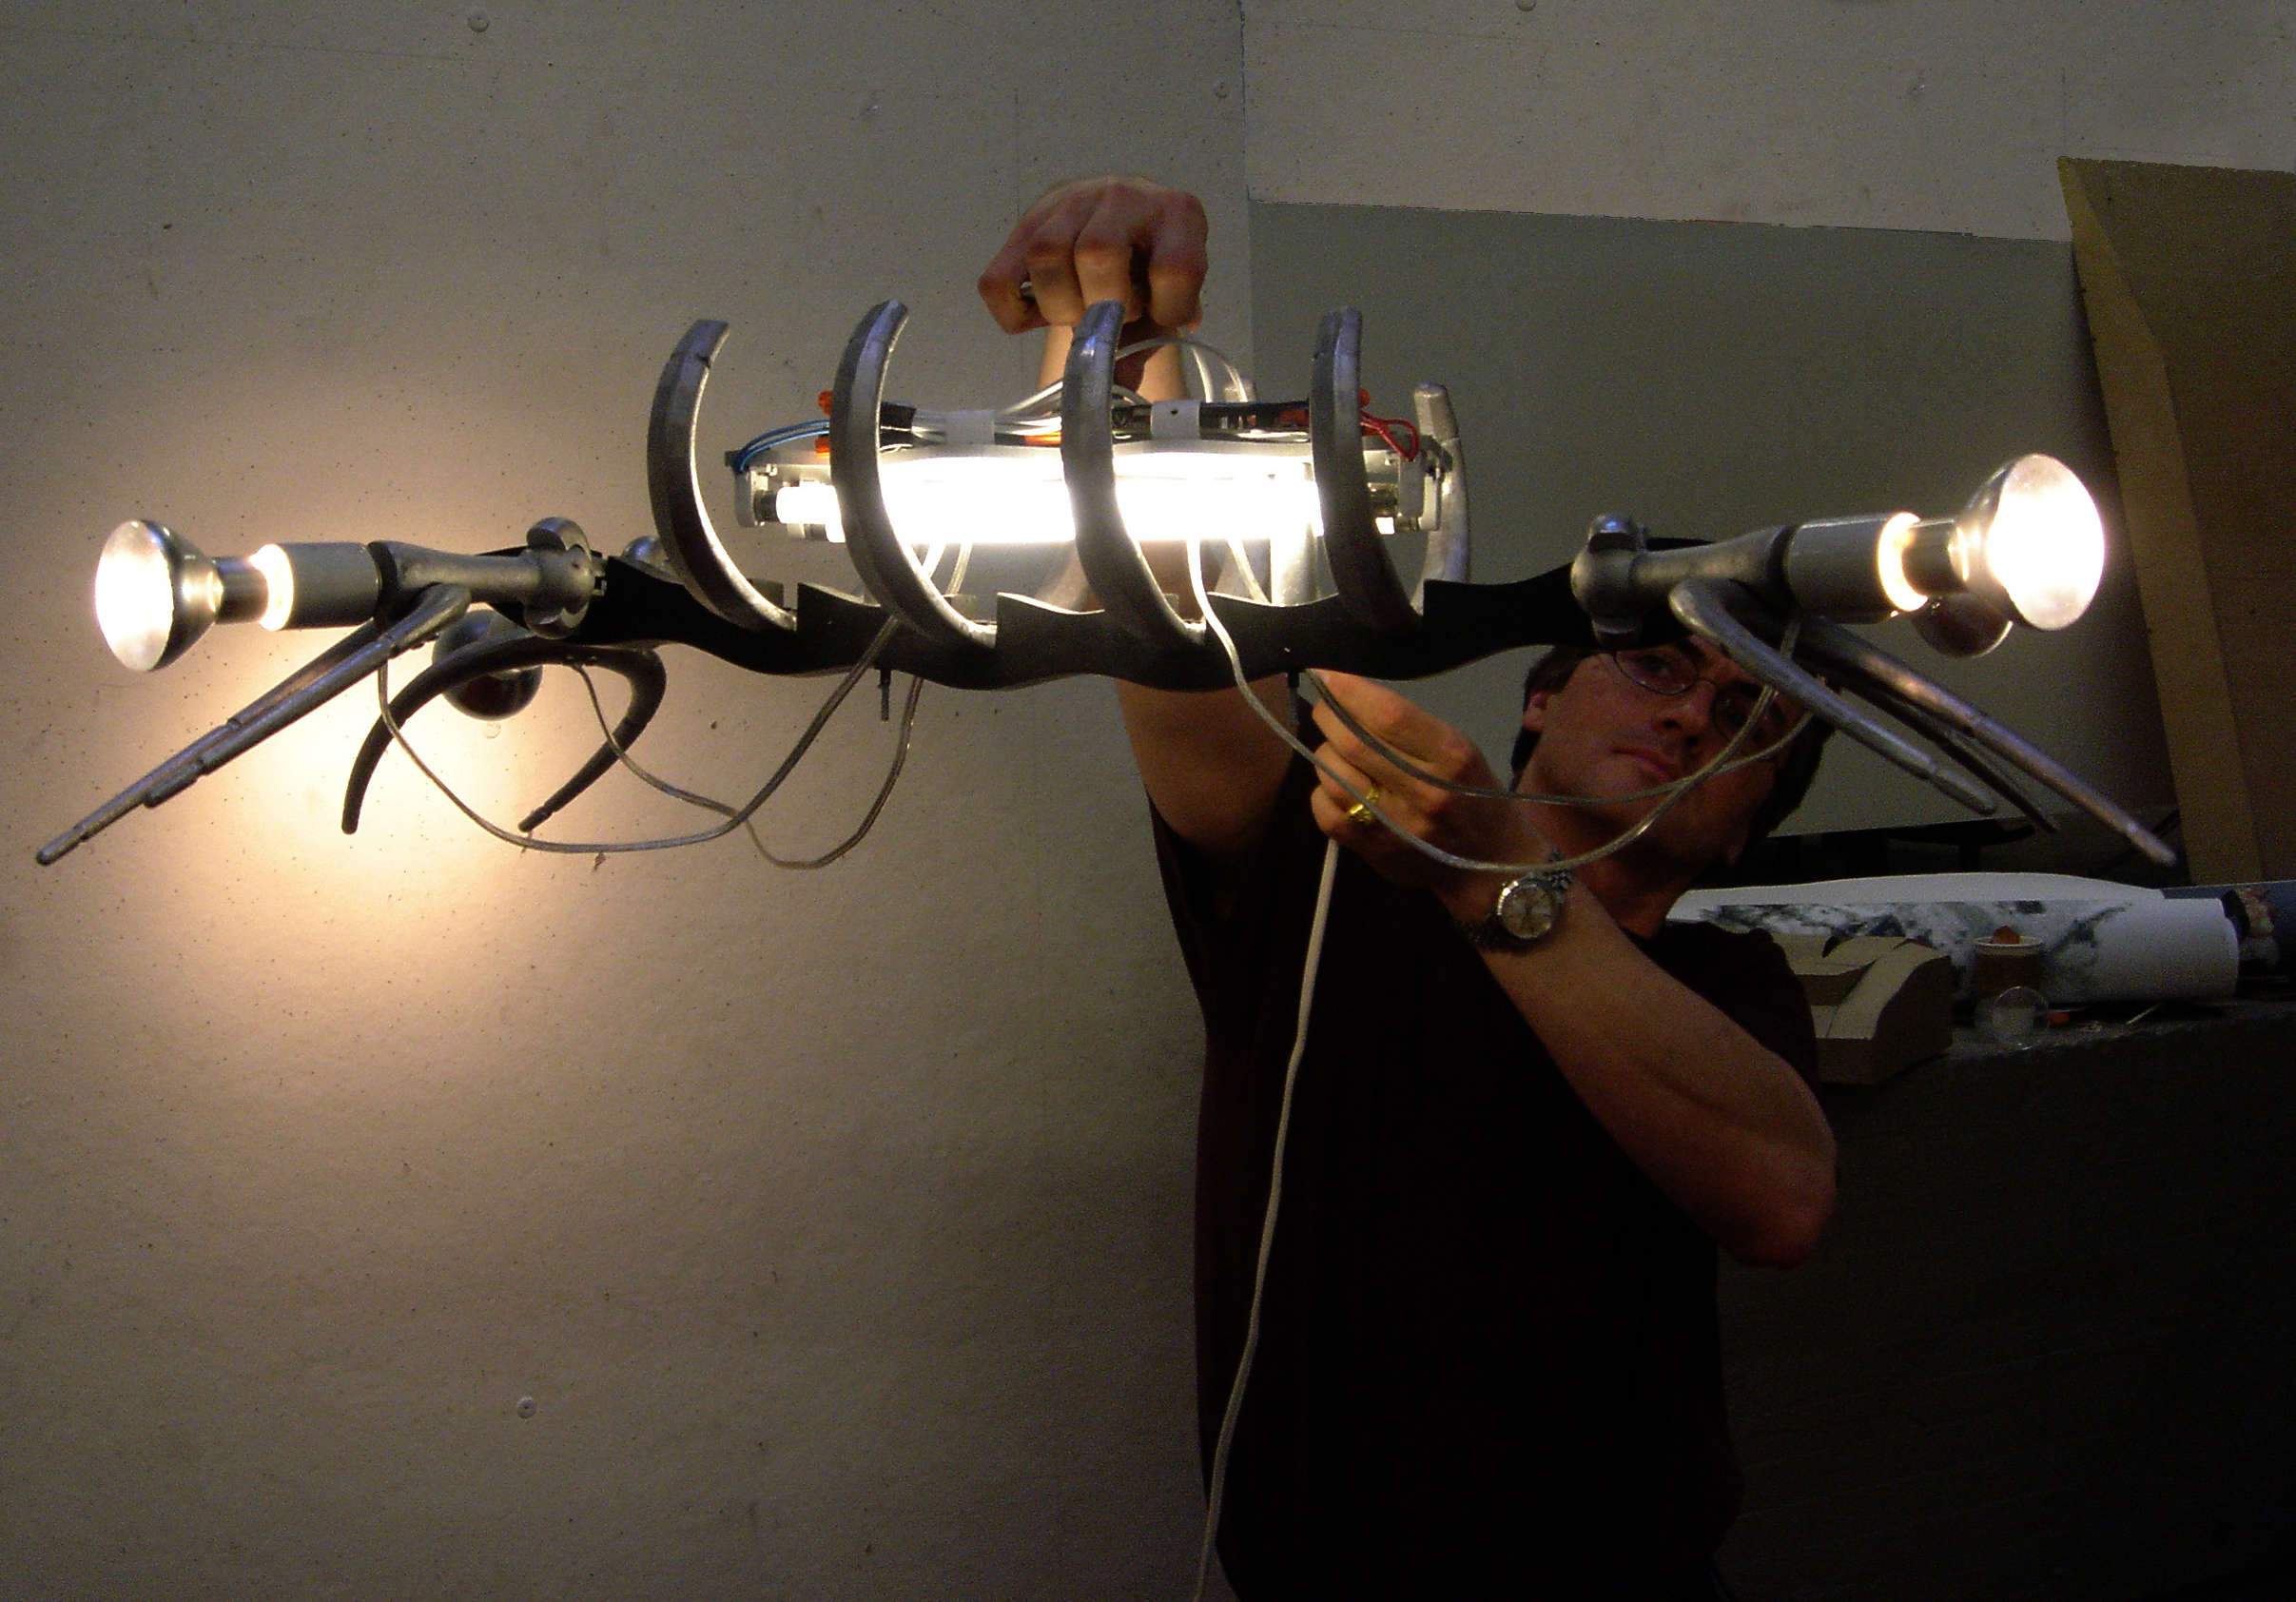
As the design progressed, some concern over the discomfort that one might experience while staring up from a dining table at a naked fluorescent light source prompted me to switch the positions of the light-tube-holding “sternum” and the CNC-carved walnut “spine” which supported the “ribs” and the “skin” shading, so that the spine now depended from the sternum. Of course, anyone who is willing to dine under a light fixture reminiscent of an animal’s skeleton will presumably have a somewhat unique notion of comfort so this was always probably a slightly silly deliberation.
Also, due to financial considerations, the final version of the spine would be cut, not milled, from inexpensive poplar boards using a carborundum water-jet, and this would be painted to disguise its base nature. The sternum would also be cut from flat metal stock with a waterjet, as opposed to cast; I had found a decently-sized scrap of quarter-inch aluminum plate abandoned in the trash at YSOA’s metal shop.
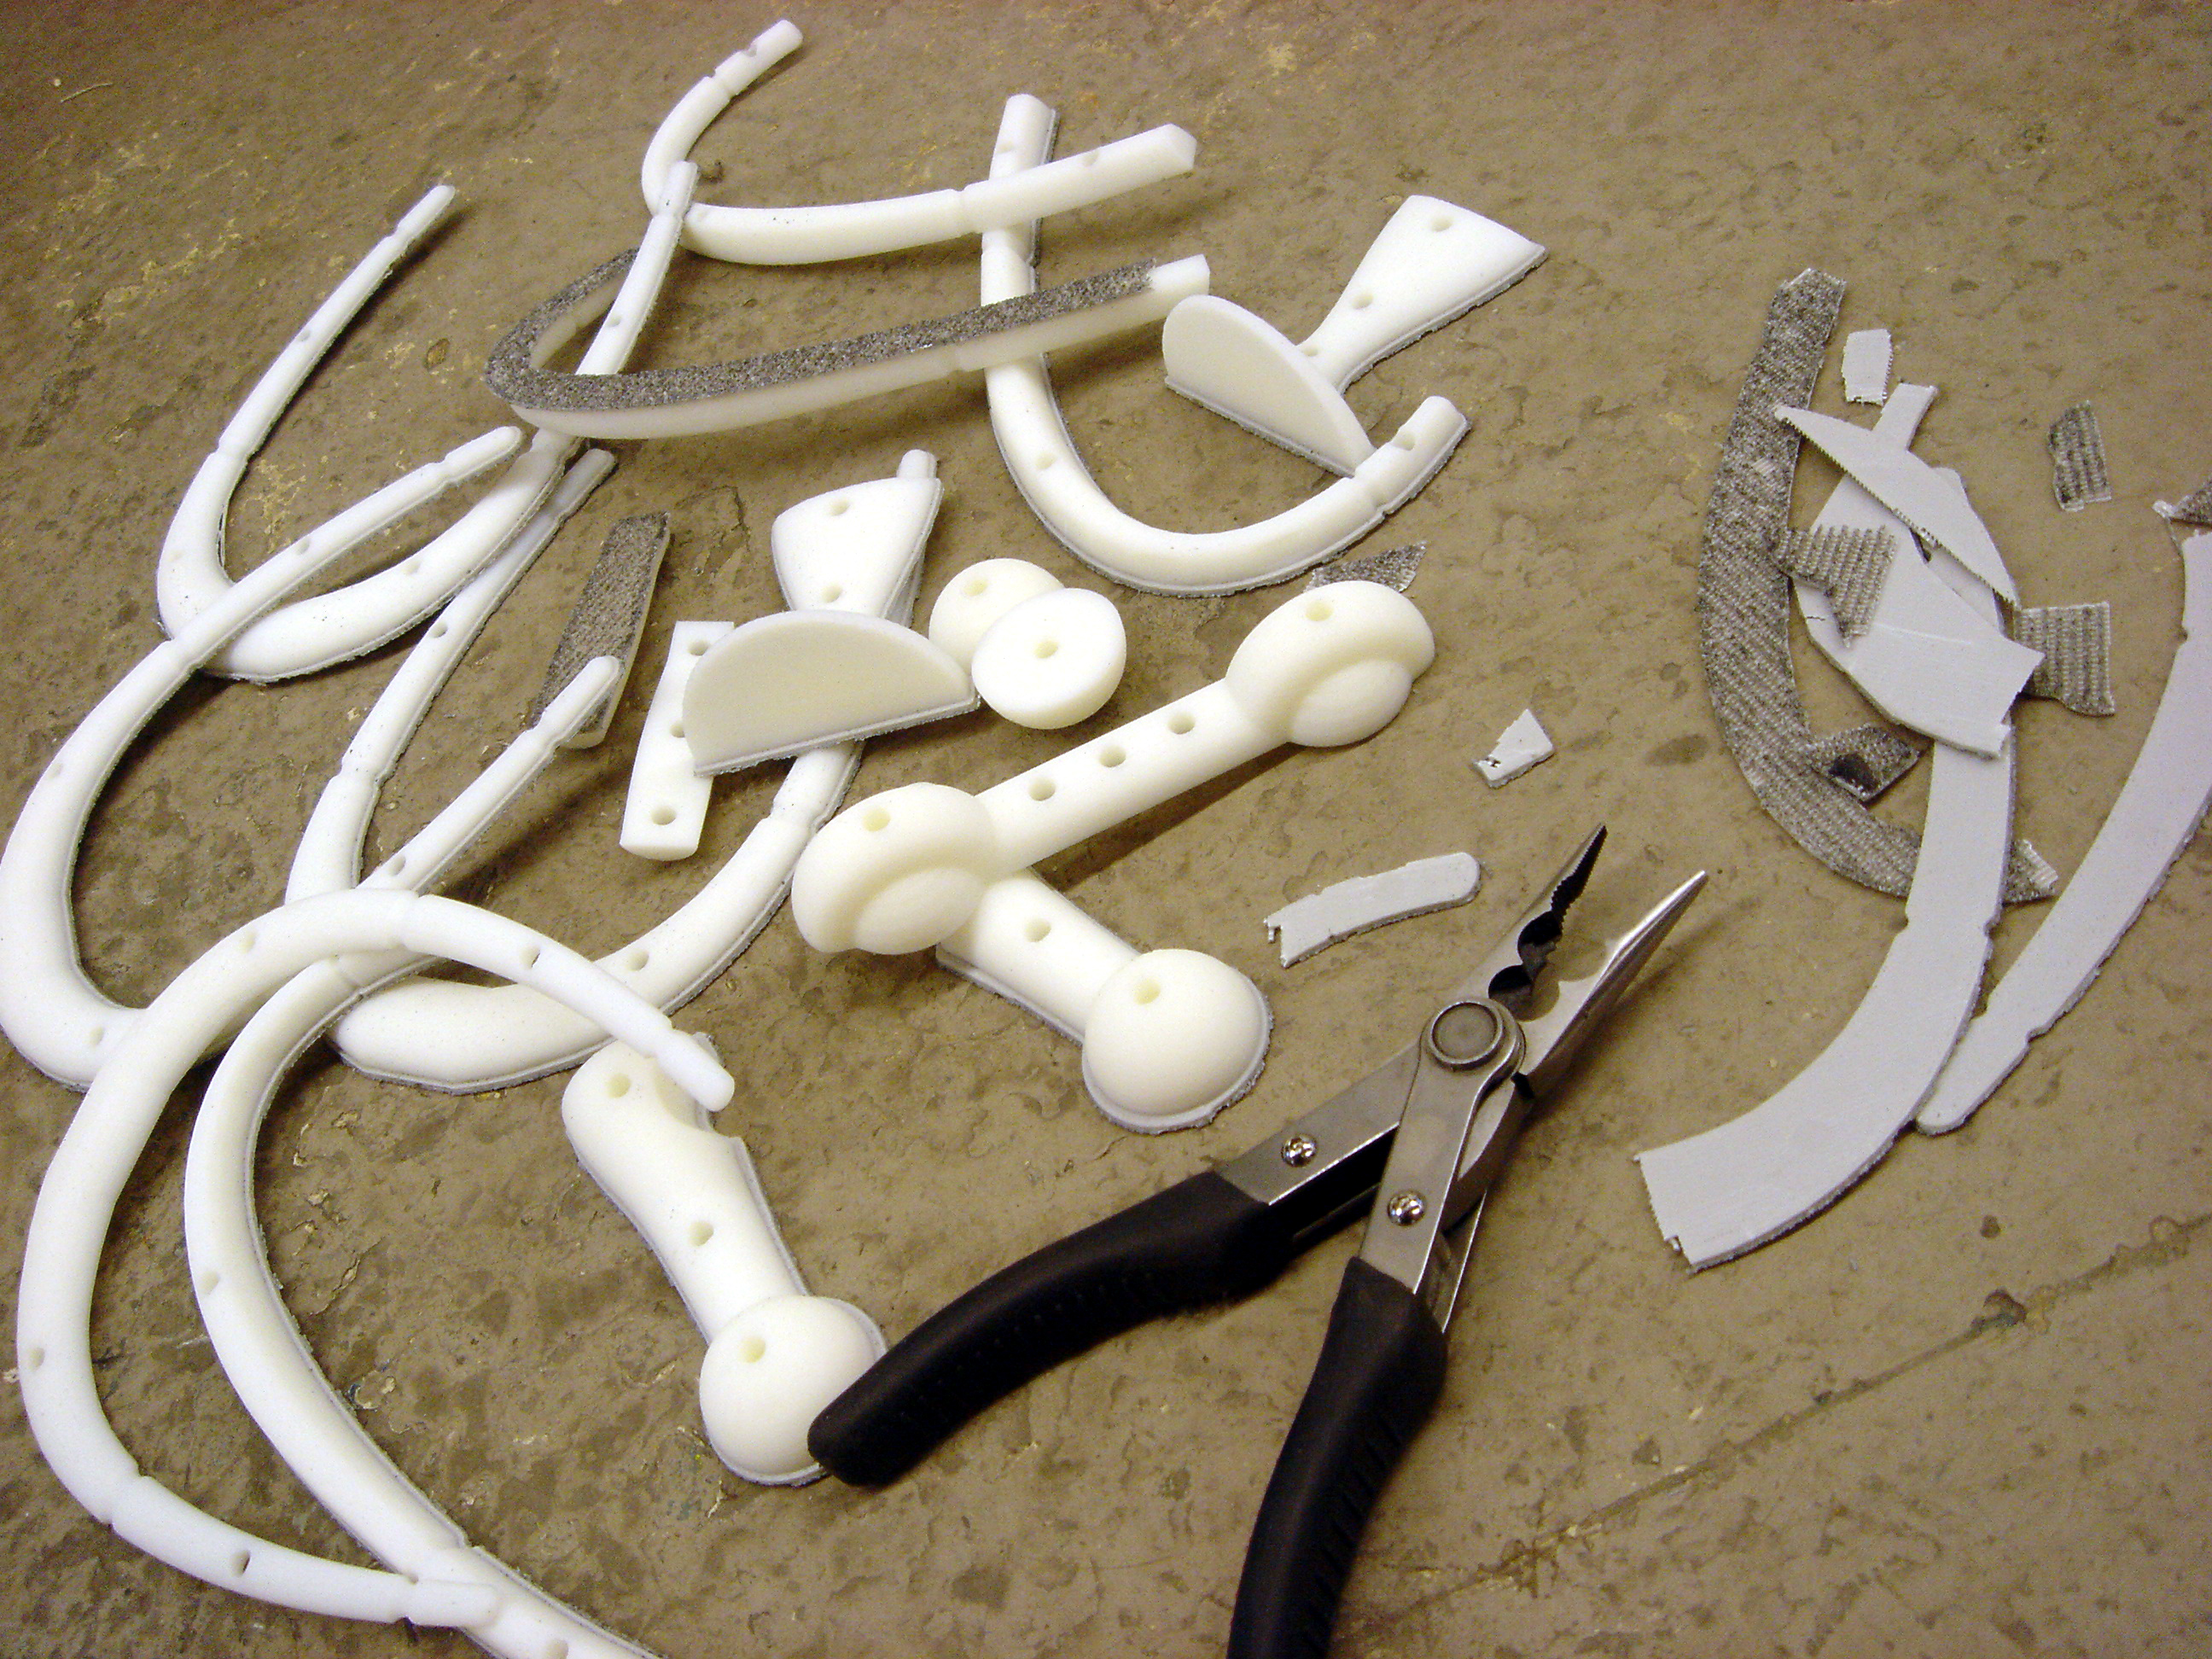
I decided to leverage may familiarity with the school’s ABS plastic printer (I worked as a monitor in the primitive “fabrication lab”) to create the positive forms for the casting pattern directly from the computer model. The little holes in the plastic prints were placed so that I could run dowels through the pattern board to insure that the two 3D-printed halves of each component were correctly aligned.
It is worth noting here that despite the ridiculously-exacting dimensionality of the computer models that generated the 3D-printed components of the pattern, a massive dose of imprecision had filtered into the work by the time I had my metal chunks in hand for assembly. First, the smooth compound-curving surfaces of the NURBS-based model (created in Rhino) were of necessity approximated as faceted polygonal meshes when converted to the stereolithography file format required by the ABS printer. Of course, the diameter and other limitations of the hot plastic thread spooled out by that machine’s print head resulted in plastic objects that themselves only approximated those meshes.
Furthermore, after the plastic elements were mounted and registered through the pattern board, it was necessary to fillet the joint between the plastic and the board by hand (my unpracticed and inevitably sloppy hand, I am afraid) with auto-body filler, to prevent sand from adhering to those areas and ruining the mold when the pattern was separated from the cope or drag. Given the very basic nature of the casting I had commissioned, during solidification a certain amount of contraction or even minor deformation also occurred in the cast metal.
And finally, it was necessary to remove the gating system, along with various burs and accidental “spreads” of metal, with the appropriate but grossly-inaccurate shearing and grinding tools.
What does this mean? …that at best, my “finished” metal bits of simulated skeleton were only rough-and-ready approximations of my original digital dream. Actually, even the wood “spine” that I cut in the school’s waterjet took a slight warp, despite my best efforts to minimize the contact of the stock with the cutting fluid. Every last component required near-endless milling, drilling, and filling before it fit together as I originally planned. So let’s just admit, up front, that not every instance of “organicism” in this piece was deliberate.
Is this sort of inevitably-haphazard manufacture really “the future” as the advocates of mass-customization (or whatever they wish to call the process now) would have us believe? Is this how everyday artifacts are designed and made, or are soon to be made?
But whether an example of rapid prototyping or handicraft-from-hell, I nevertheless had a presumably-reproducible example of my necrotic lighting design largely assembled and wired to inefficiently convert electricity into light in time for the hazing ritual that terminates every instructional course at architecture school: the juried critique. In fact. this was the very last “crit” of my work while I was graduate student.
And it almost caused a small riot, which I actually find a bit gratifying considering all I had been through at YSOA. I mean, this was after all really a “design to offend” from the start. Consider this: one juror, a celebrated elder designer and theorist of ornament, stormed from the room in what I think was horrified huff, after I responded to his criticism of the exposed wiring as “inorganic” by pointing out that he hadn’t grown up on a working cattle ranch, as I had. If he had — I elaborated — then he would have seen farm animals flayed and butchered and he would understand that living things, once their hides have been removed, are simply full of bits that look vaguely like cords, and tubes — and wires, or rather veins. Actually, I made up that grotesque riposte on the spot. Although I know that I was present during my youth several times when large helpless animals were violently converted to foodstuff on my grandfather’s property, I find I have no visual memory of those events.
Post graduation, in a fit of dissatisfaction with everything, I took apart my dead-turtle light fixture and stashed the pieces in my basement coal cellar.
Yet I dislike abandoning projects in which I have invested so much time and energy, even cynically-conceived ones such as this. With no access to fabrication equipment, a foundry, or power tools of greater precision than a small drill press and a metal-cutting miter saw, eventually it seemed to me that I could nevertheless treat this relic of my architecture school days as a sort of improvised sculpture, and I resolved to rework and refinish the light fixture without interference from the malignant quibblers that had ruled the roost at Yale.
The room for which this piece was destined was a low, narrow affair with one round end; in 2011, it remained unchanged from some previous residents’ attempt to restore it to its original Victorian oppressiveness. The electrical junction box depended from a defunct gas pipe fixture in the middle of a hexagonal muddle of plaster acanthus in the center of the ceiling. From a usability viewpoint, this has always been a less-than-optimal location for a pendant light, as the shape of the room prevents a standard eight-foot dining room table from being exactly centered in it; a light hanging from the plaster medallion center was always noticeably closer to one end of the table than the other.
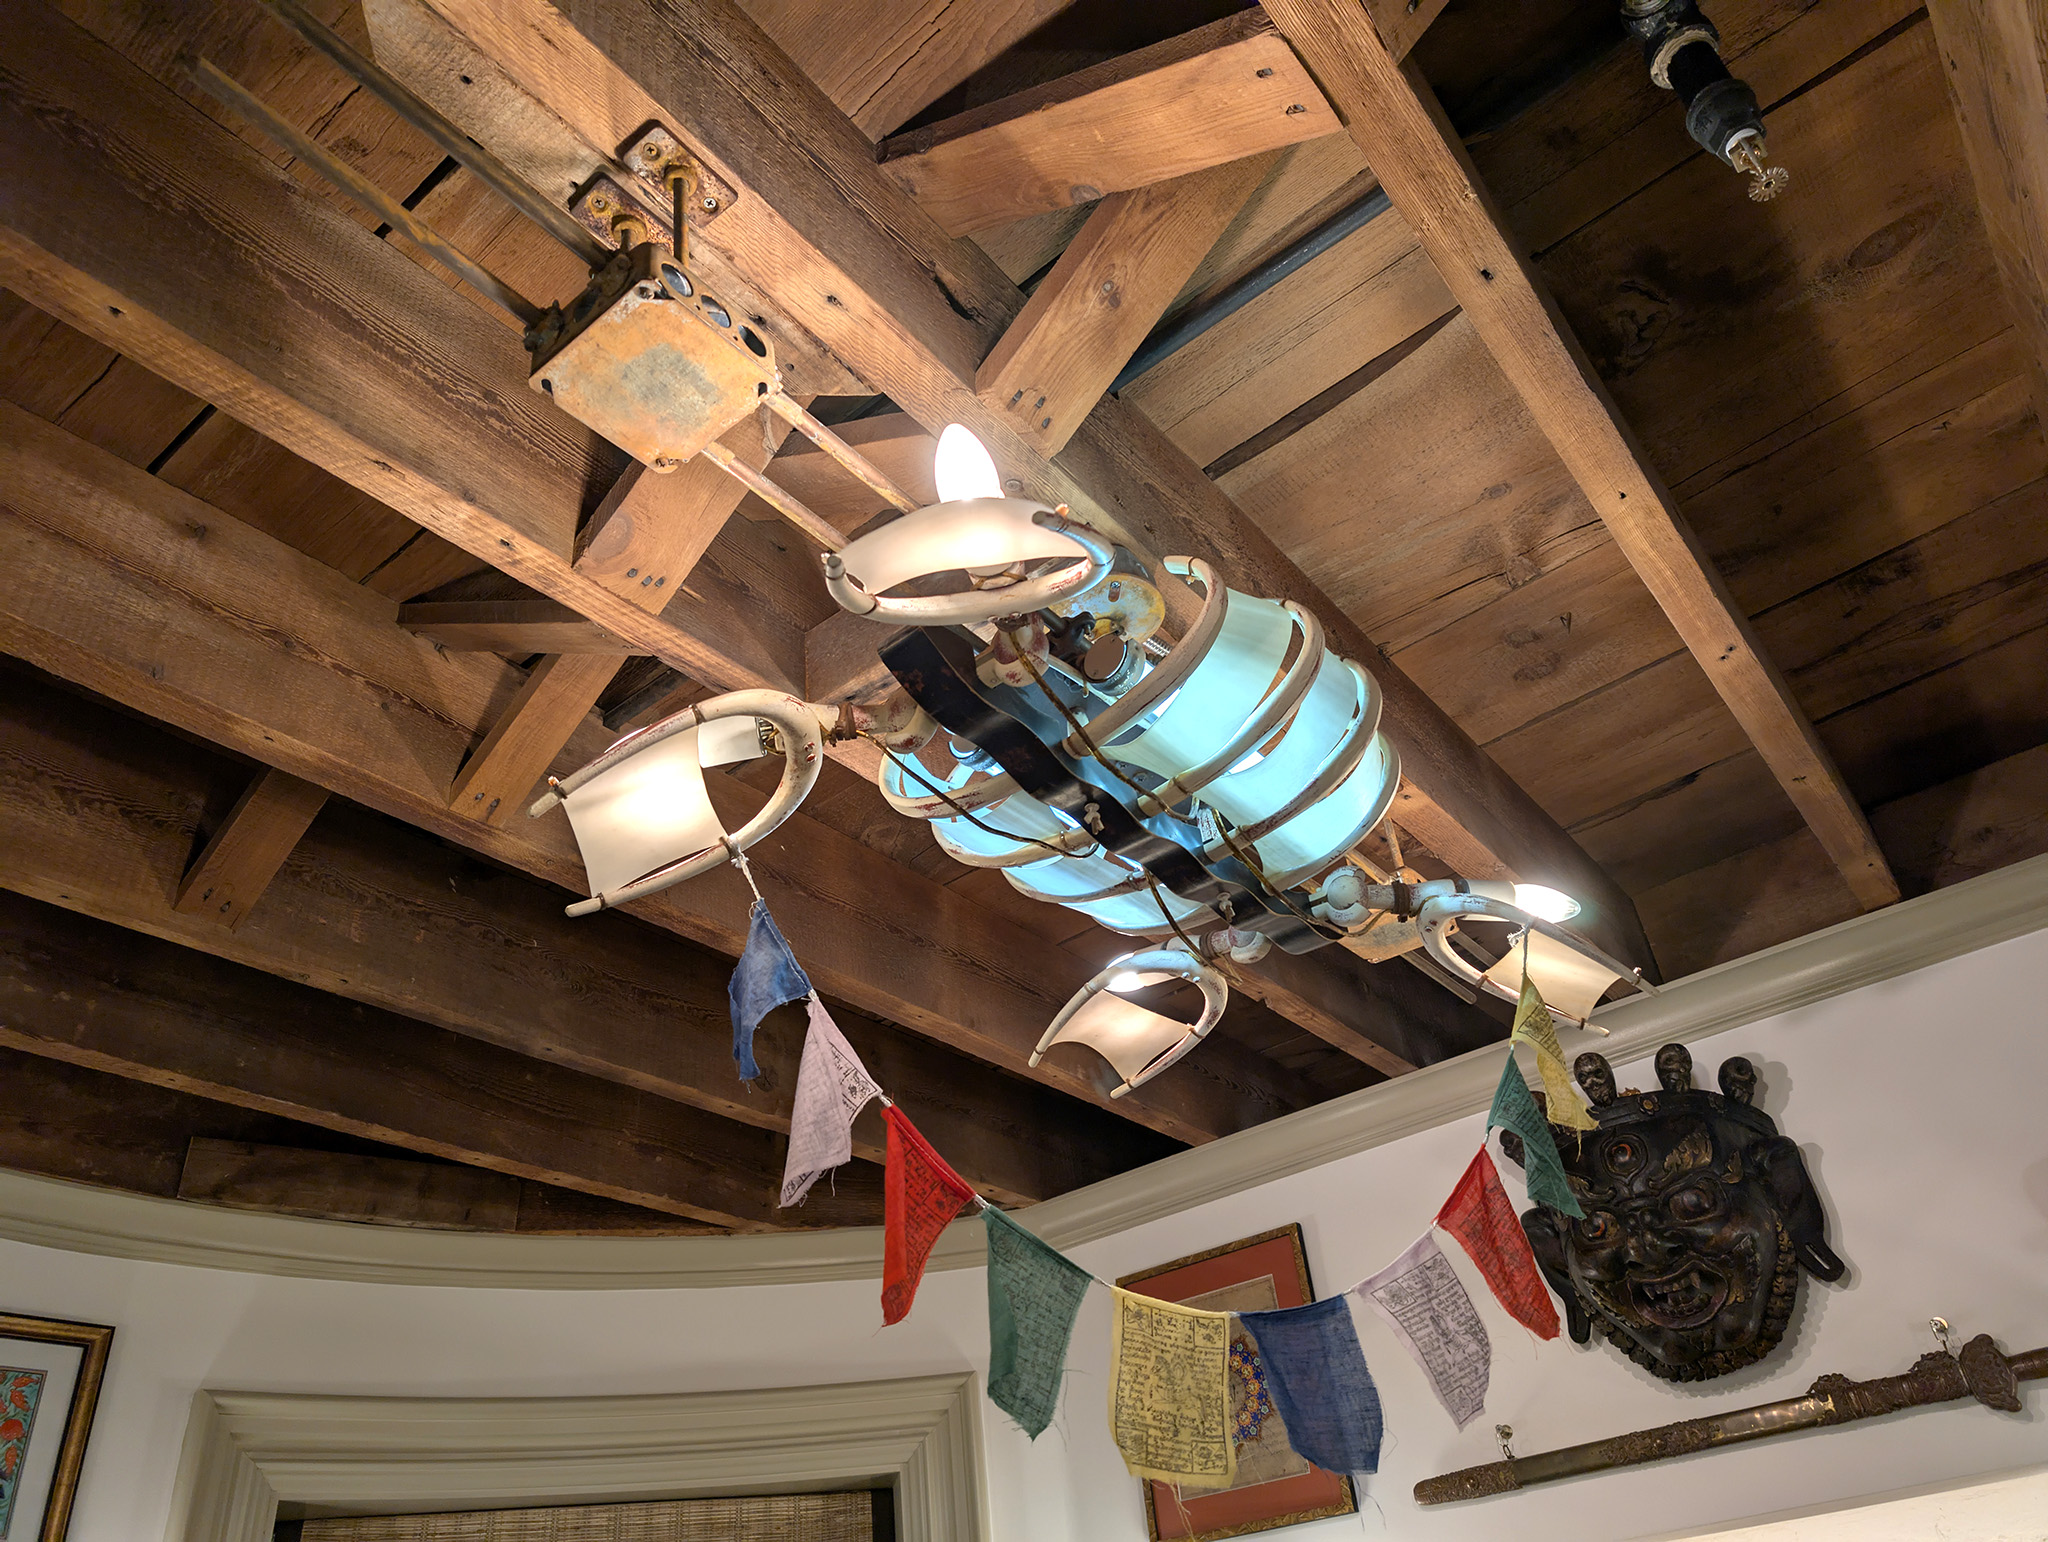
To deal with that last issue, I created a rail-system (from two salvaged five-foot lengths of copper grounding rod, some pipe-hanging hardware, and steel junction boxes), which permitted me to position the “dead turtle’s rib cage” over the center of the table. And I discarded the cast aluminum hanger that I had made in architecture school in favor of a “pancake” fixture box and cable-armor that routed the electrical circuit from the plaster medallion to the center of the sternum piece.
I also decided to replace the original fluorescent lighting tubes that depended from the sternum plate with a pair of energy-efficient wall-washer LED strips designed to illuminate wall-mounted artwork. These were originally samples sent to an architecture firm where I was employed and then quickly discarded because they were horrible and cast a nasty “freezer glow” over anything they illuminated. Fortunately, I had an extra sternum plate, a cutting test left from the architecture school phase for this project, that I could configure to support them. And the original incandescent spot lights on the paddle-limbs could be replaced with more modern, lower-wattage, Edison-bulb-base compact fluorescents or LEDs of such a warm color temperature that they could counteract the blue tint of the wall-washer strips.
I had not arrived at a completely acceptable material for the translucent “skin” between the “claws” and between the ribs during the original development phase in 2005 (no paper product seemed stiff or particularly safe enough), but while sorting some household recycling in 2011 it occurred to me that I could create the look and get the behavior I wanted with flexible HDPE sheets cut from the sides of common yoghurt tubs. I discovered that the printed labels on these containers could be quickly removed with acetone and steel wool; a brief sanding of the cleaned and unrolled plastic left them slightly translucent with a vellum-like texture.
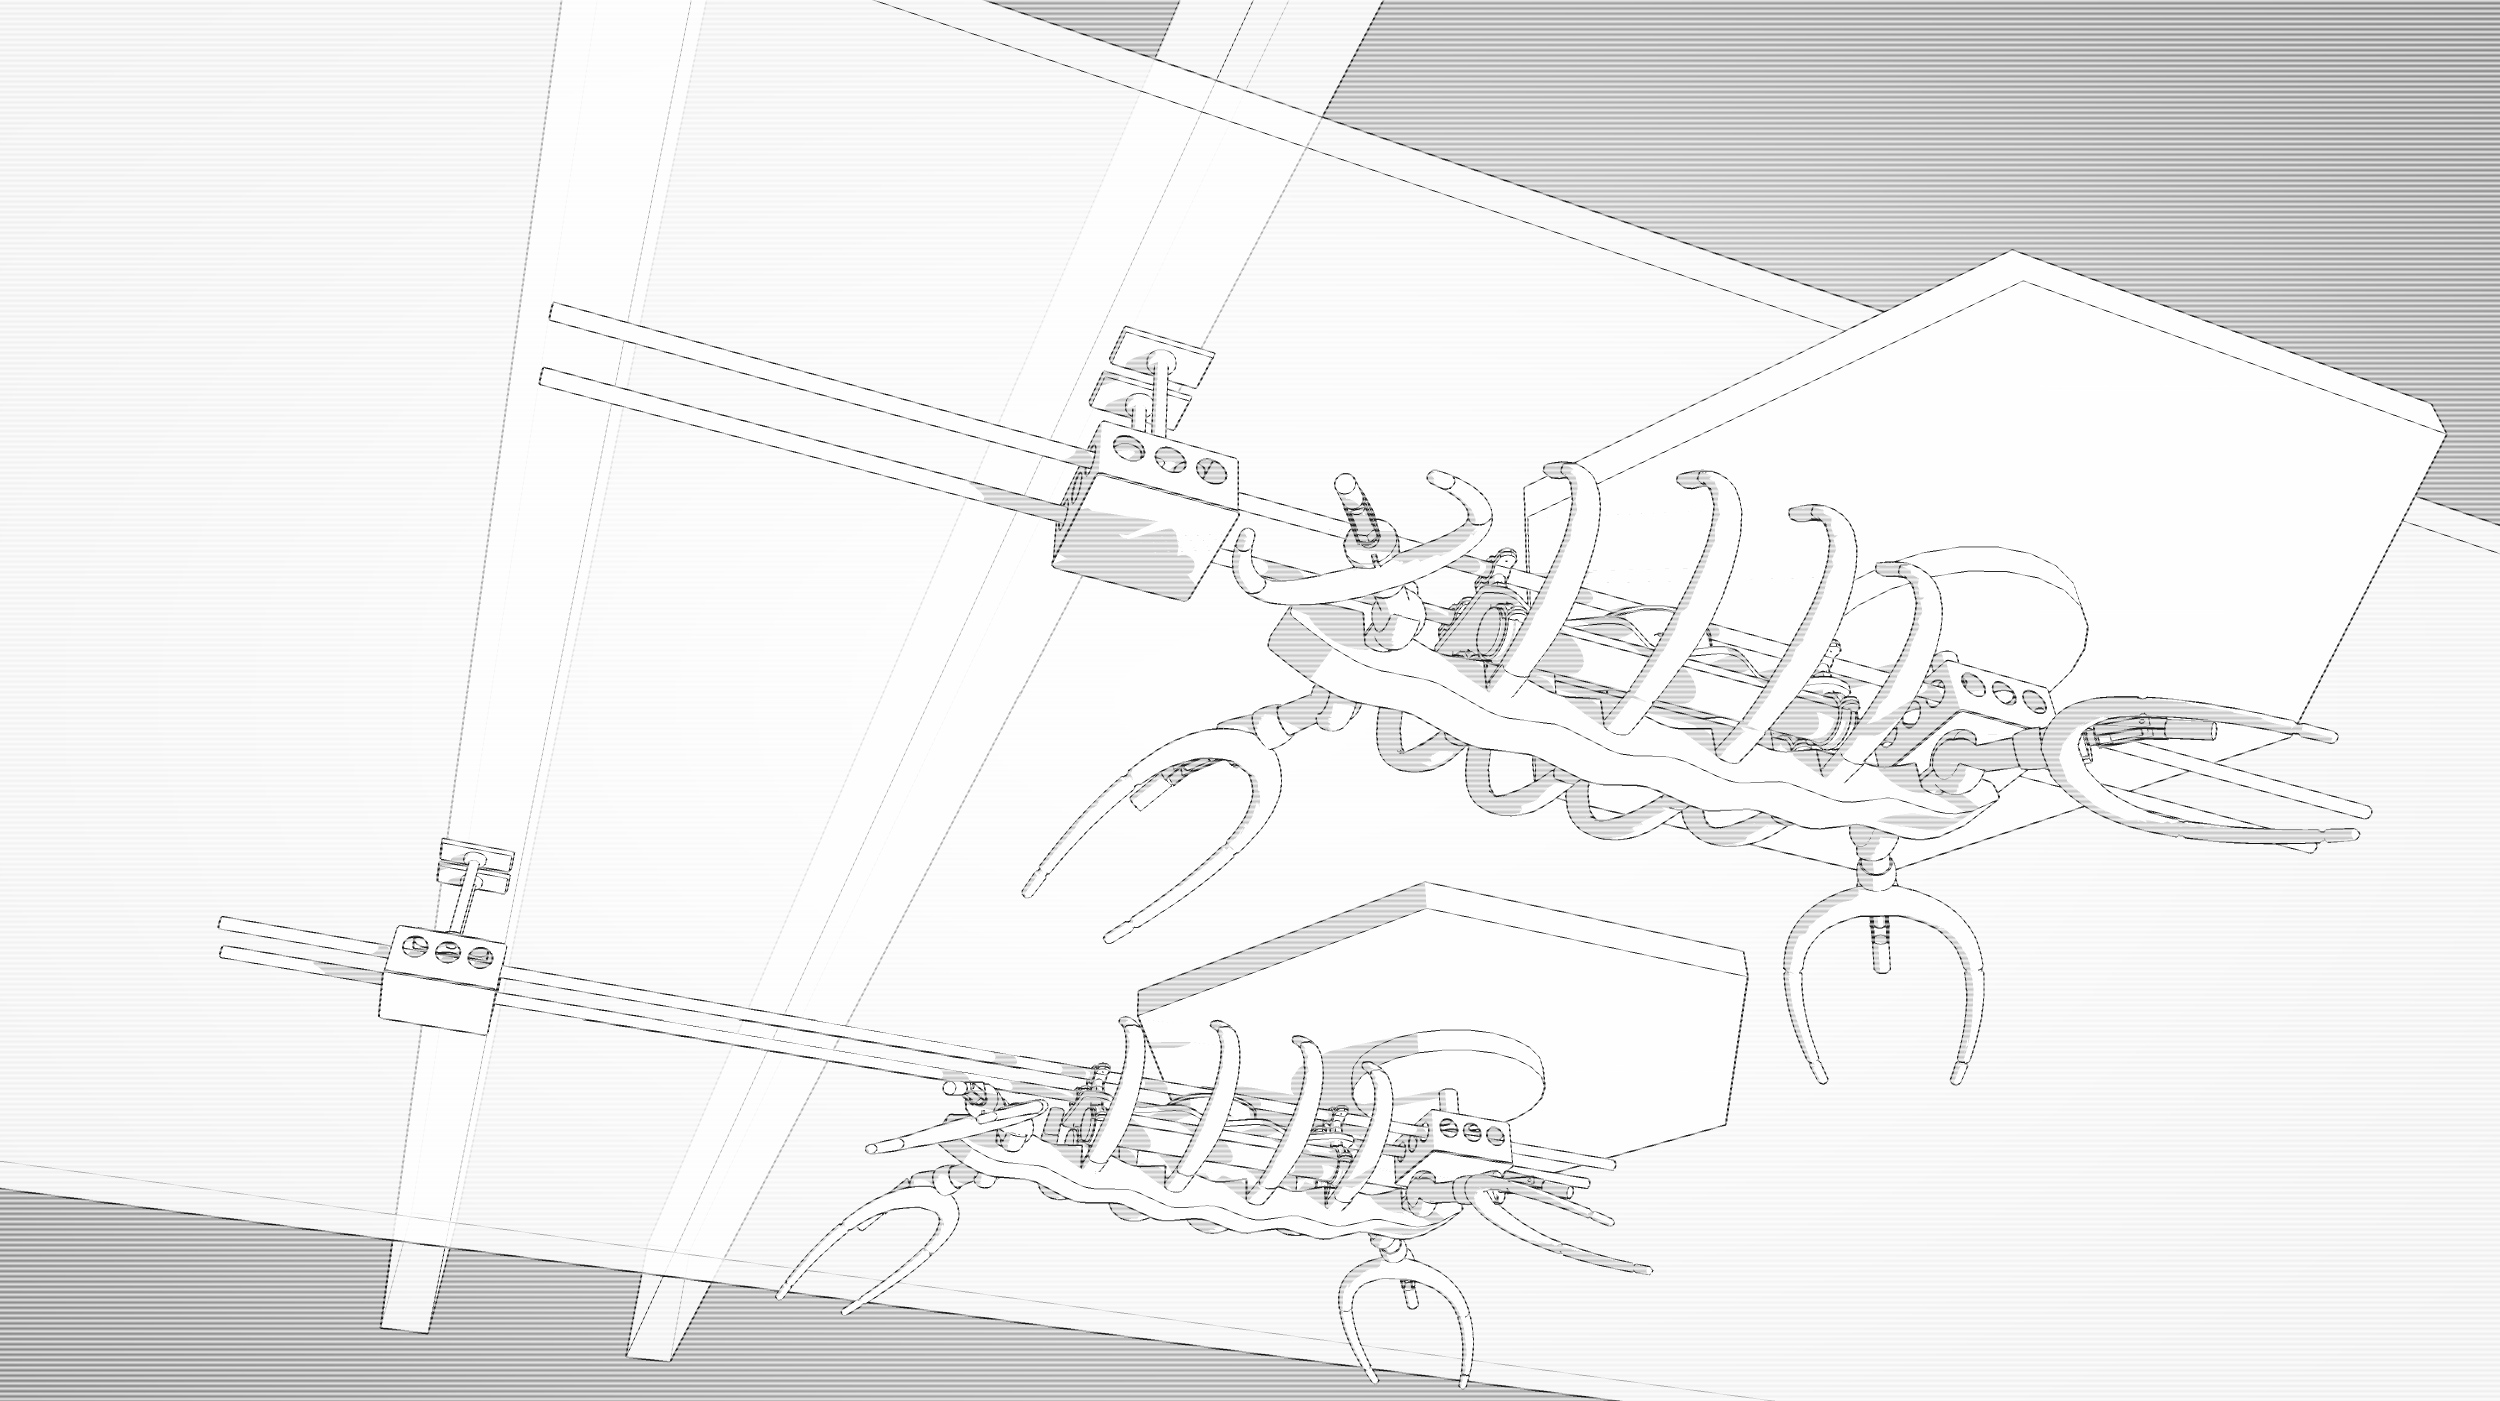
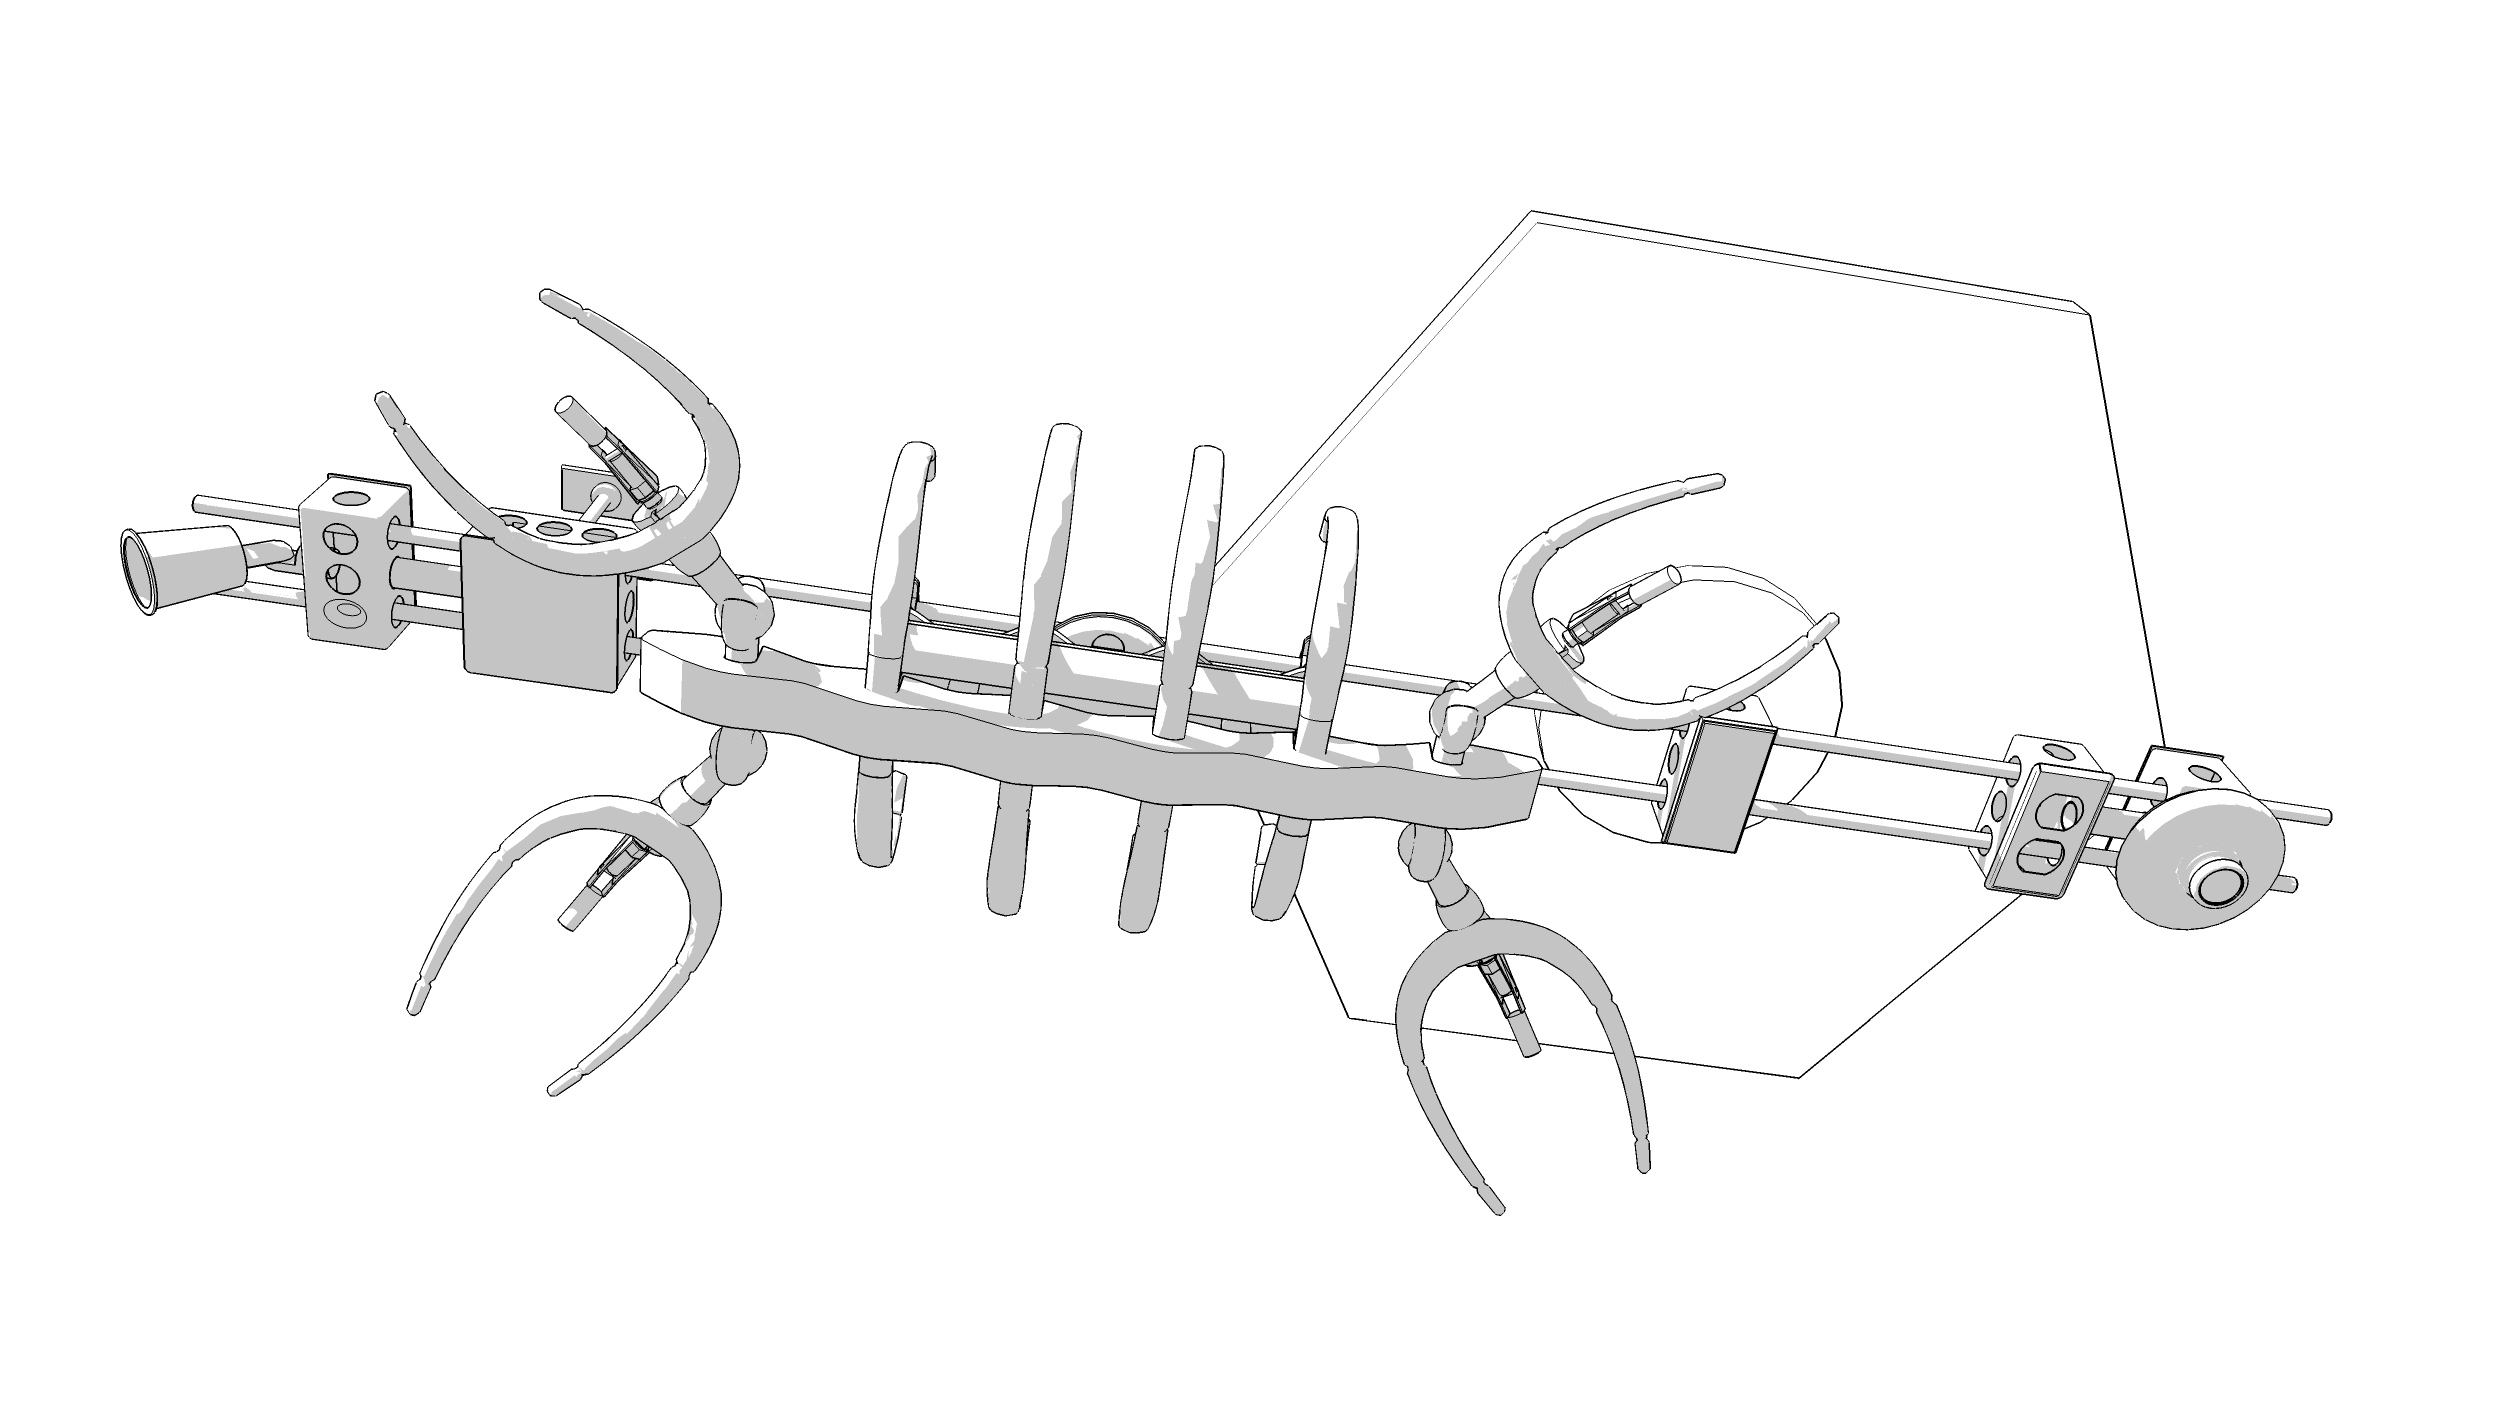
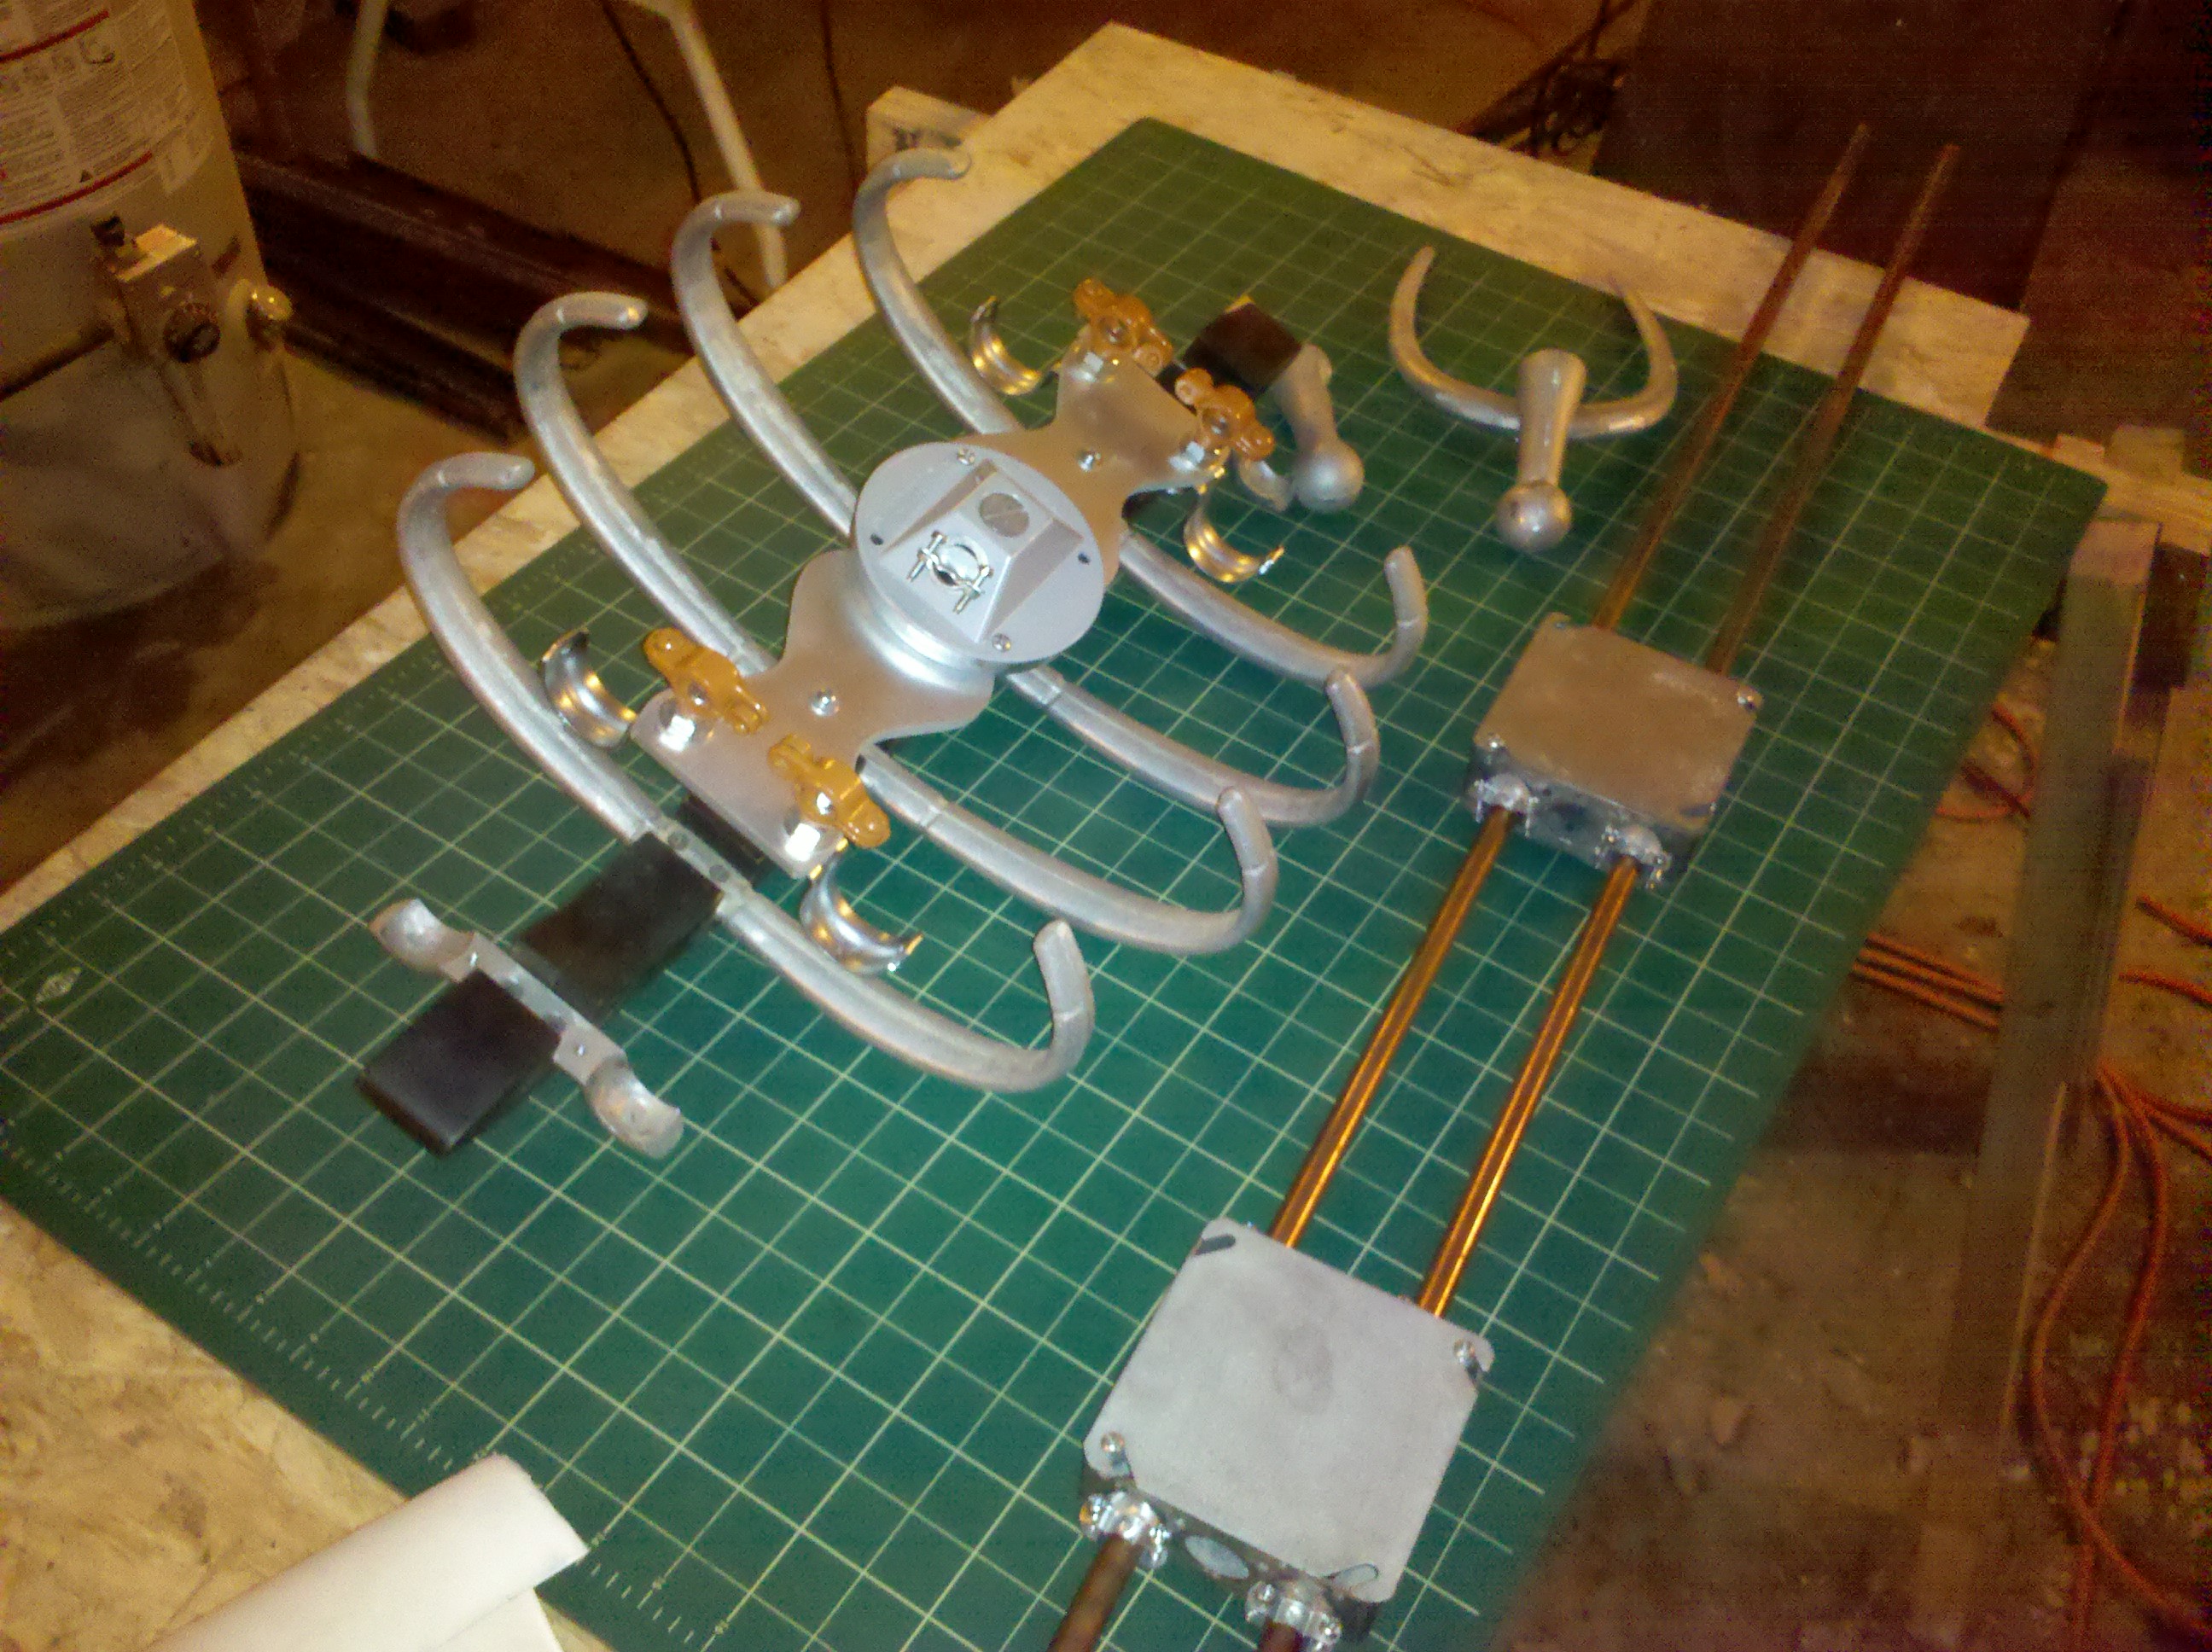
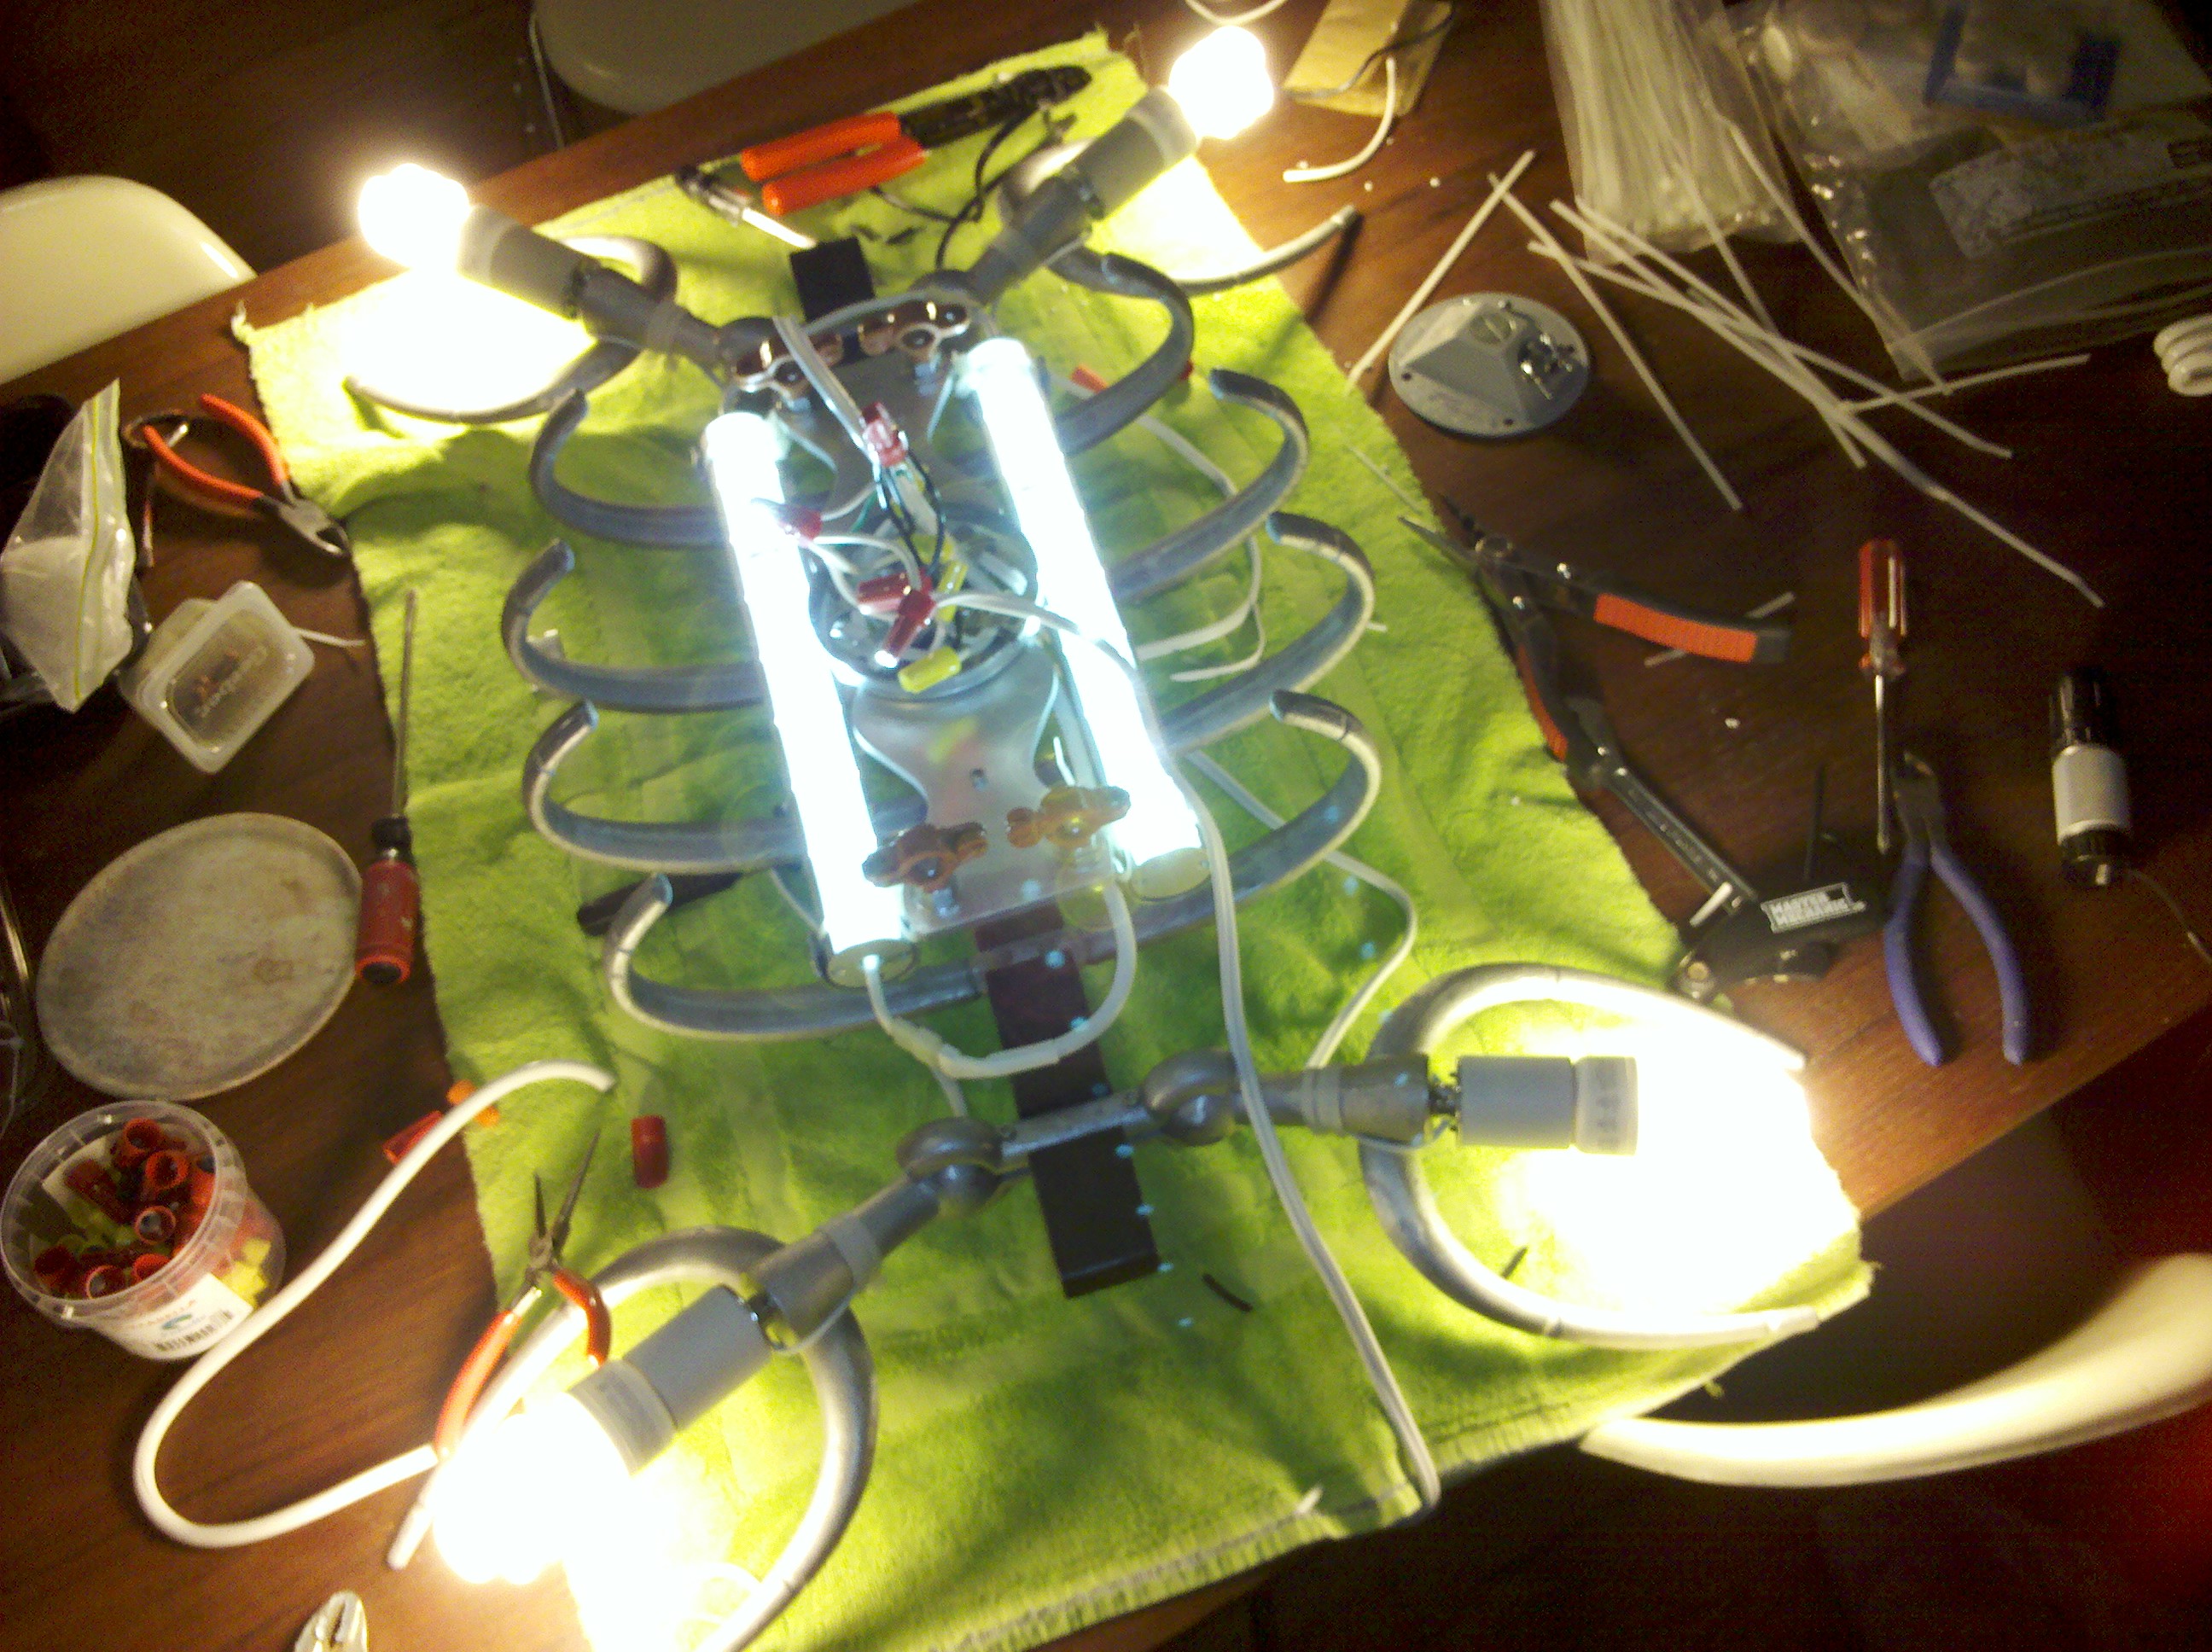
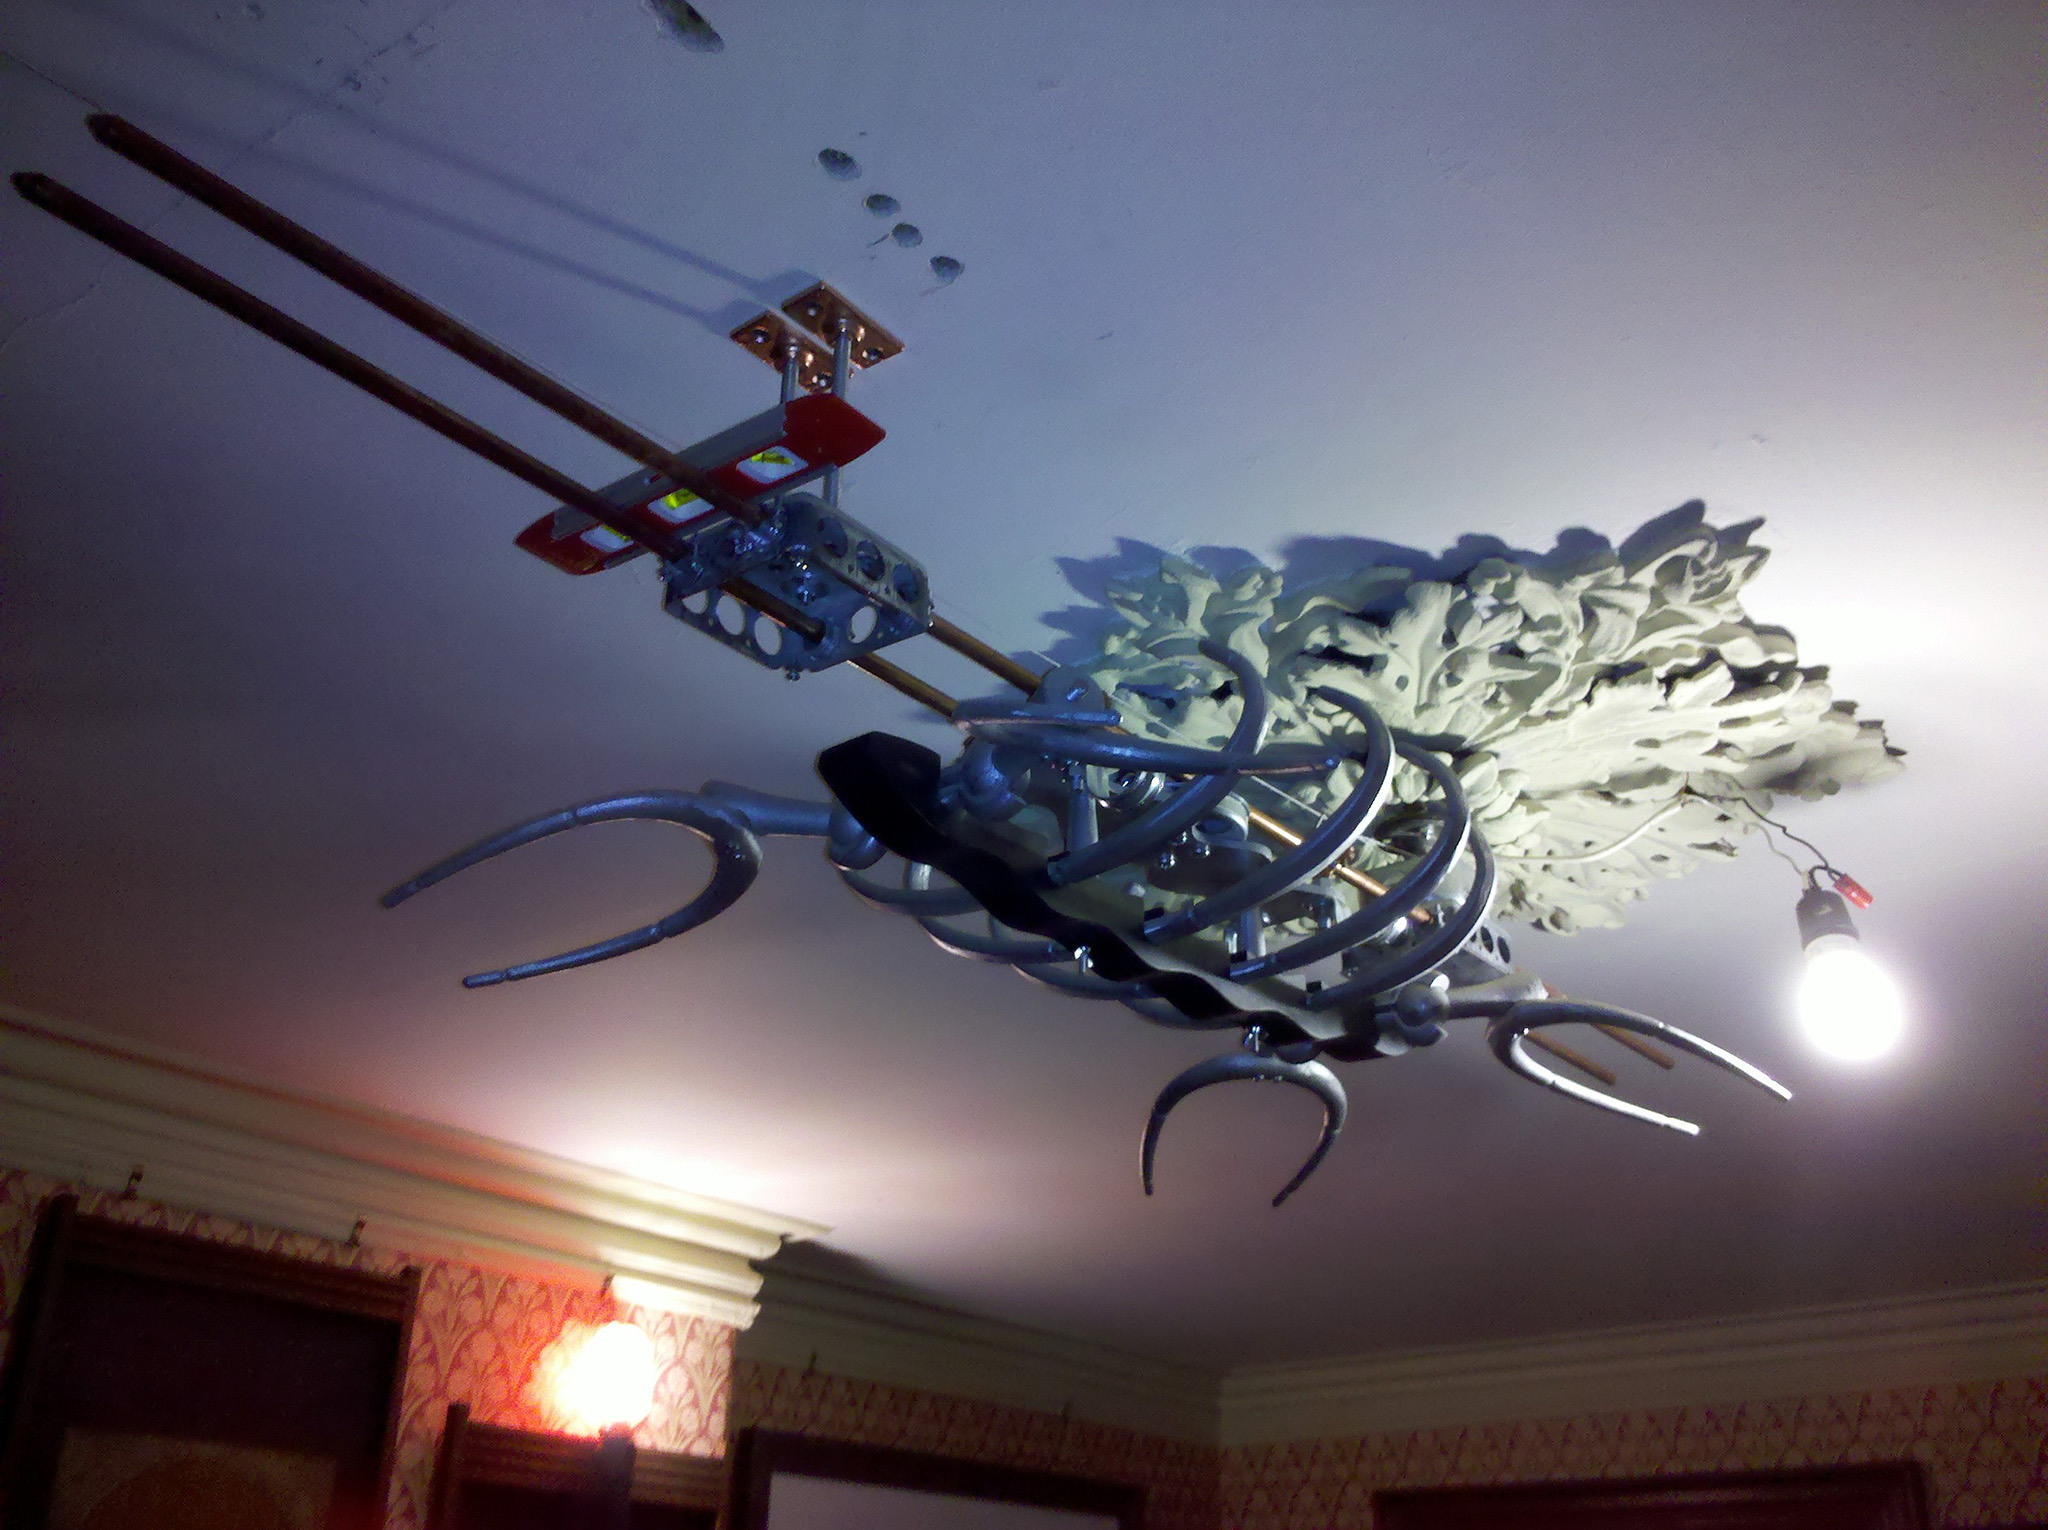
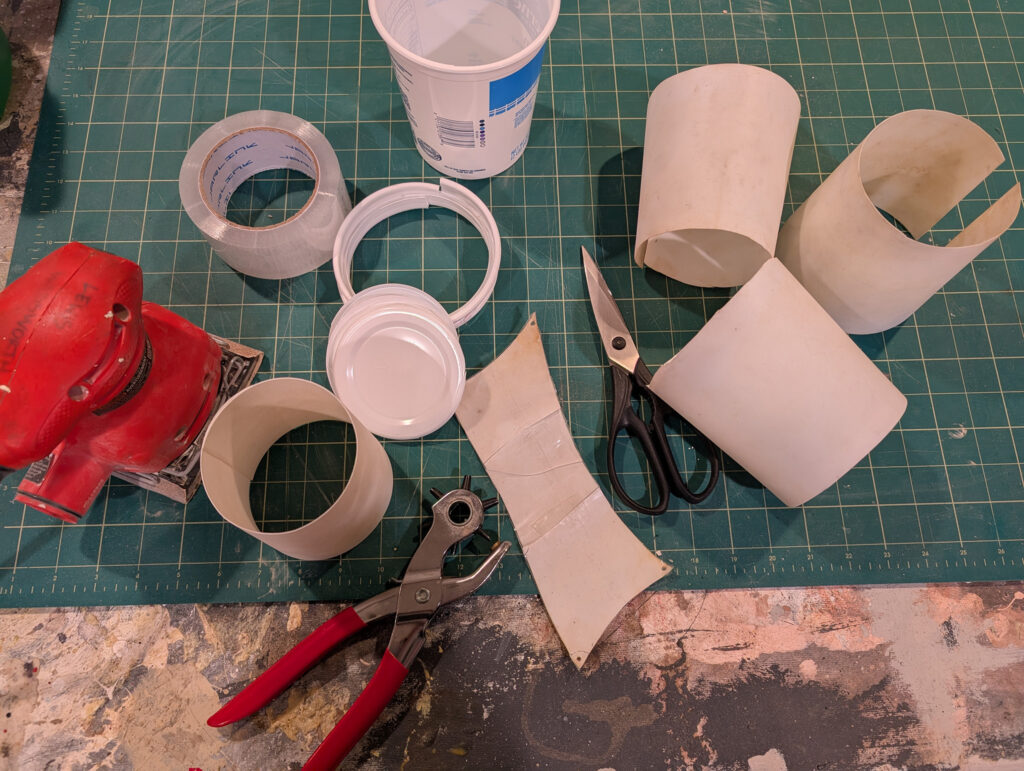
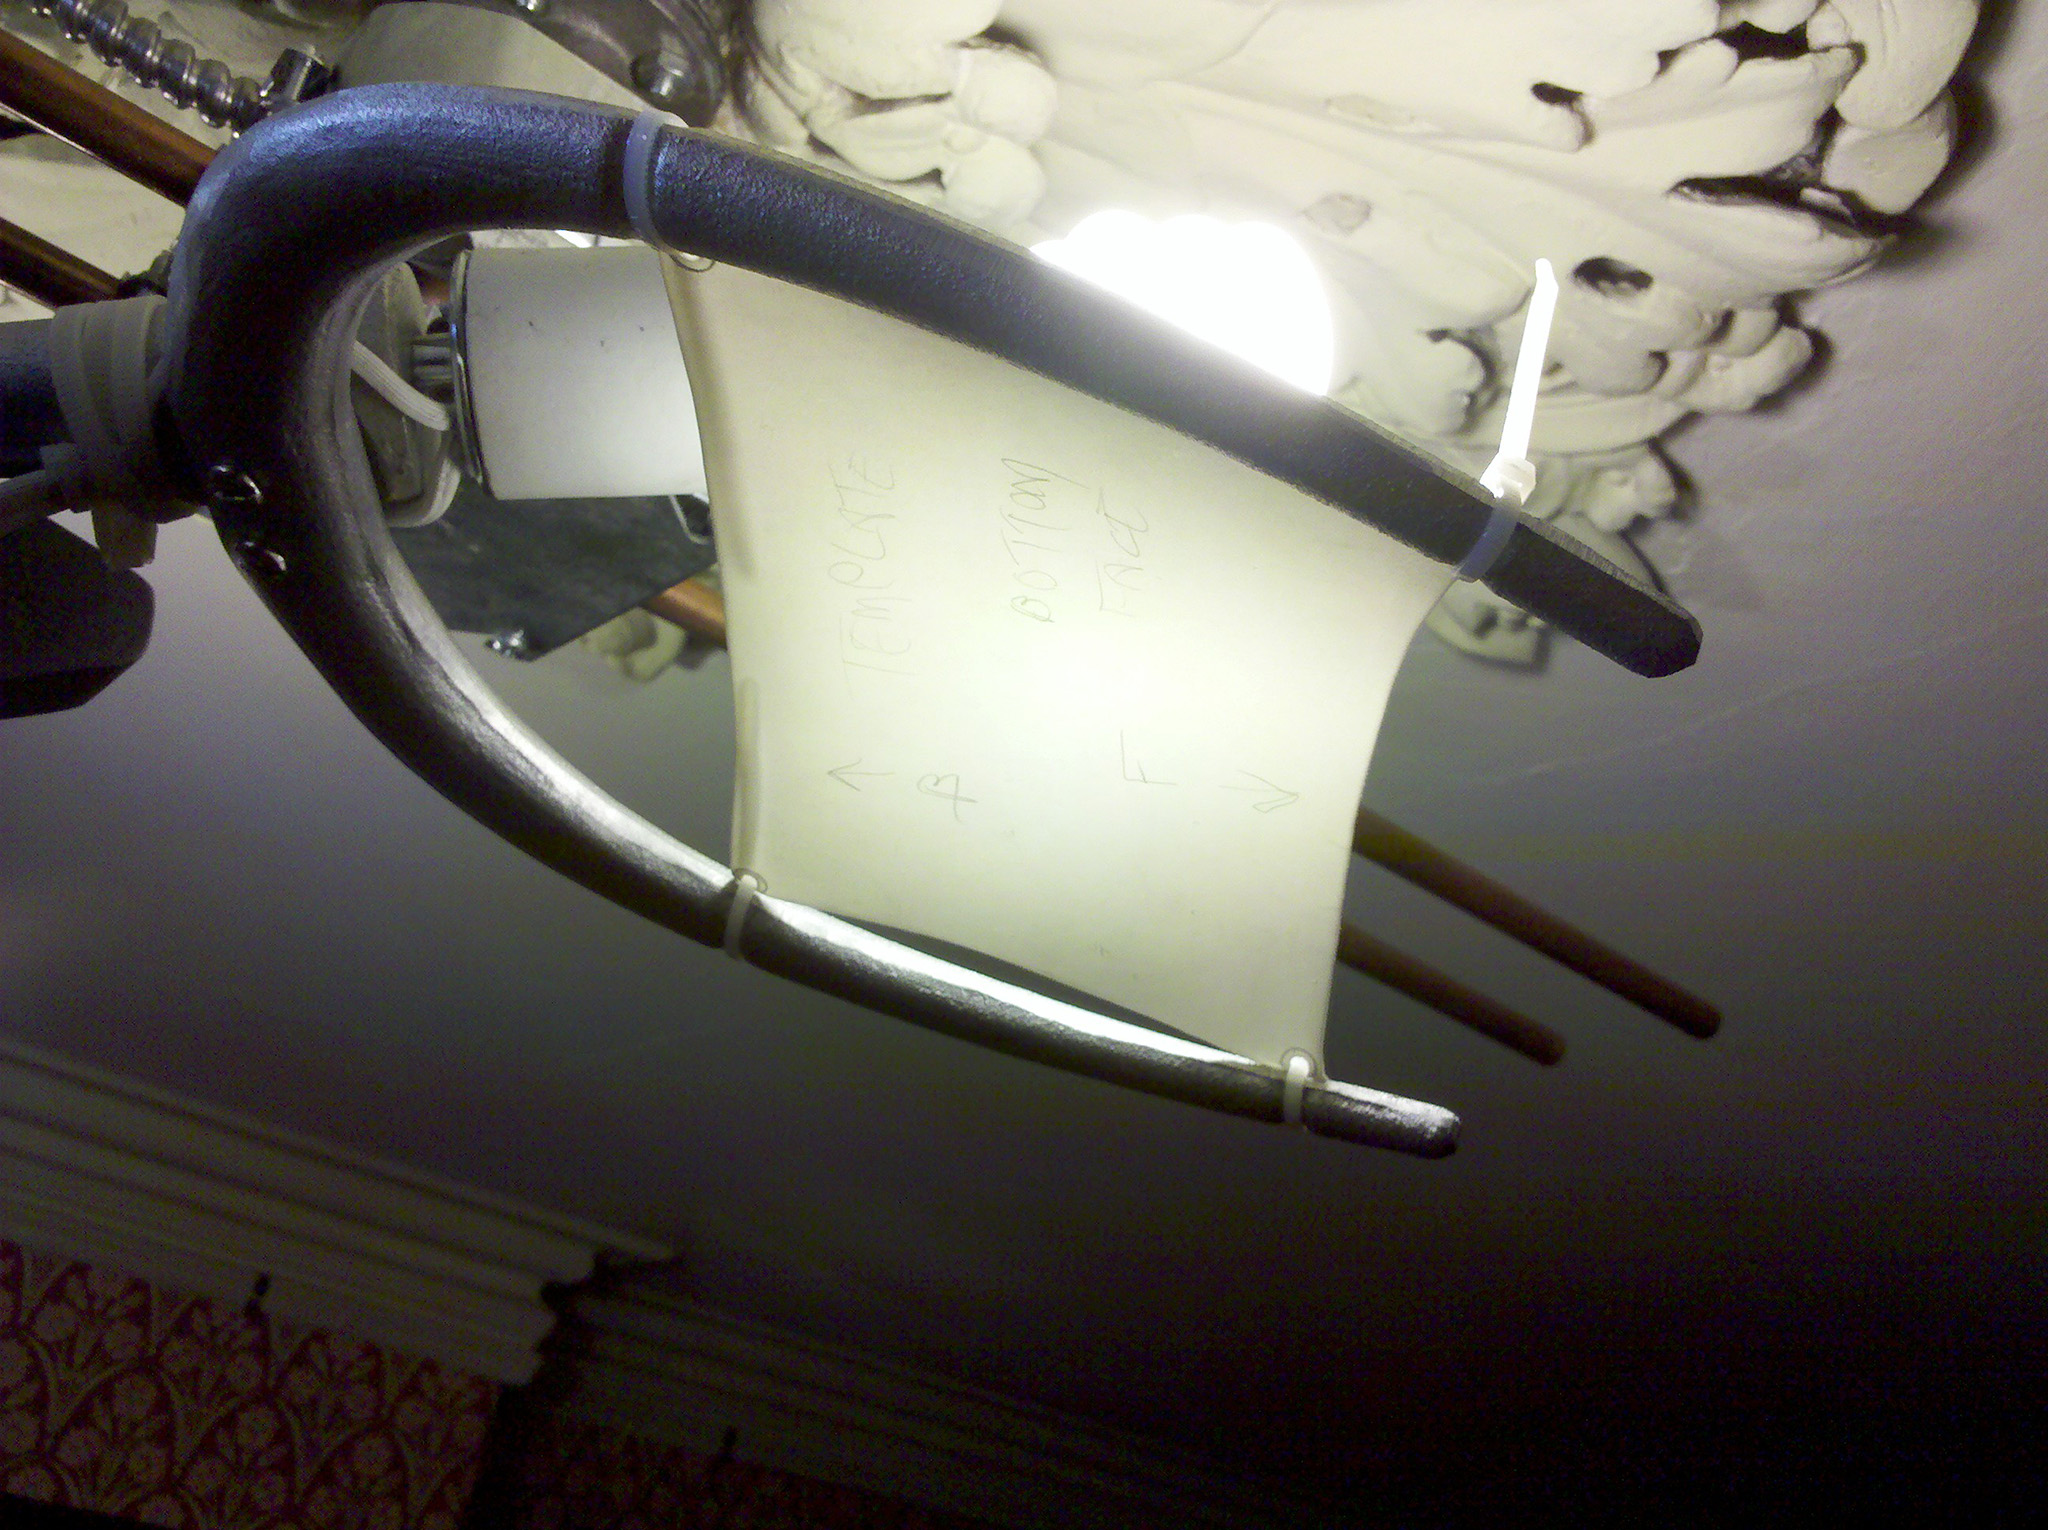
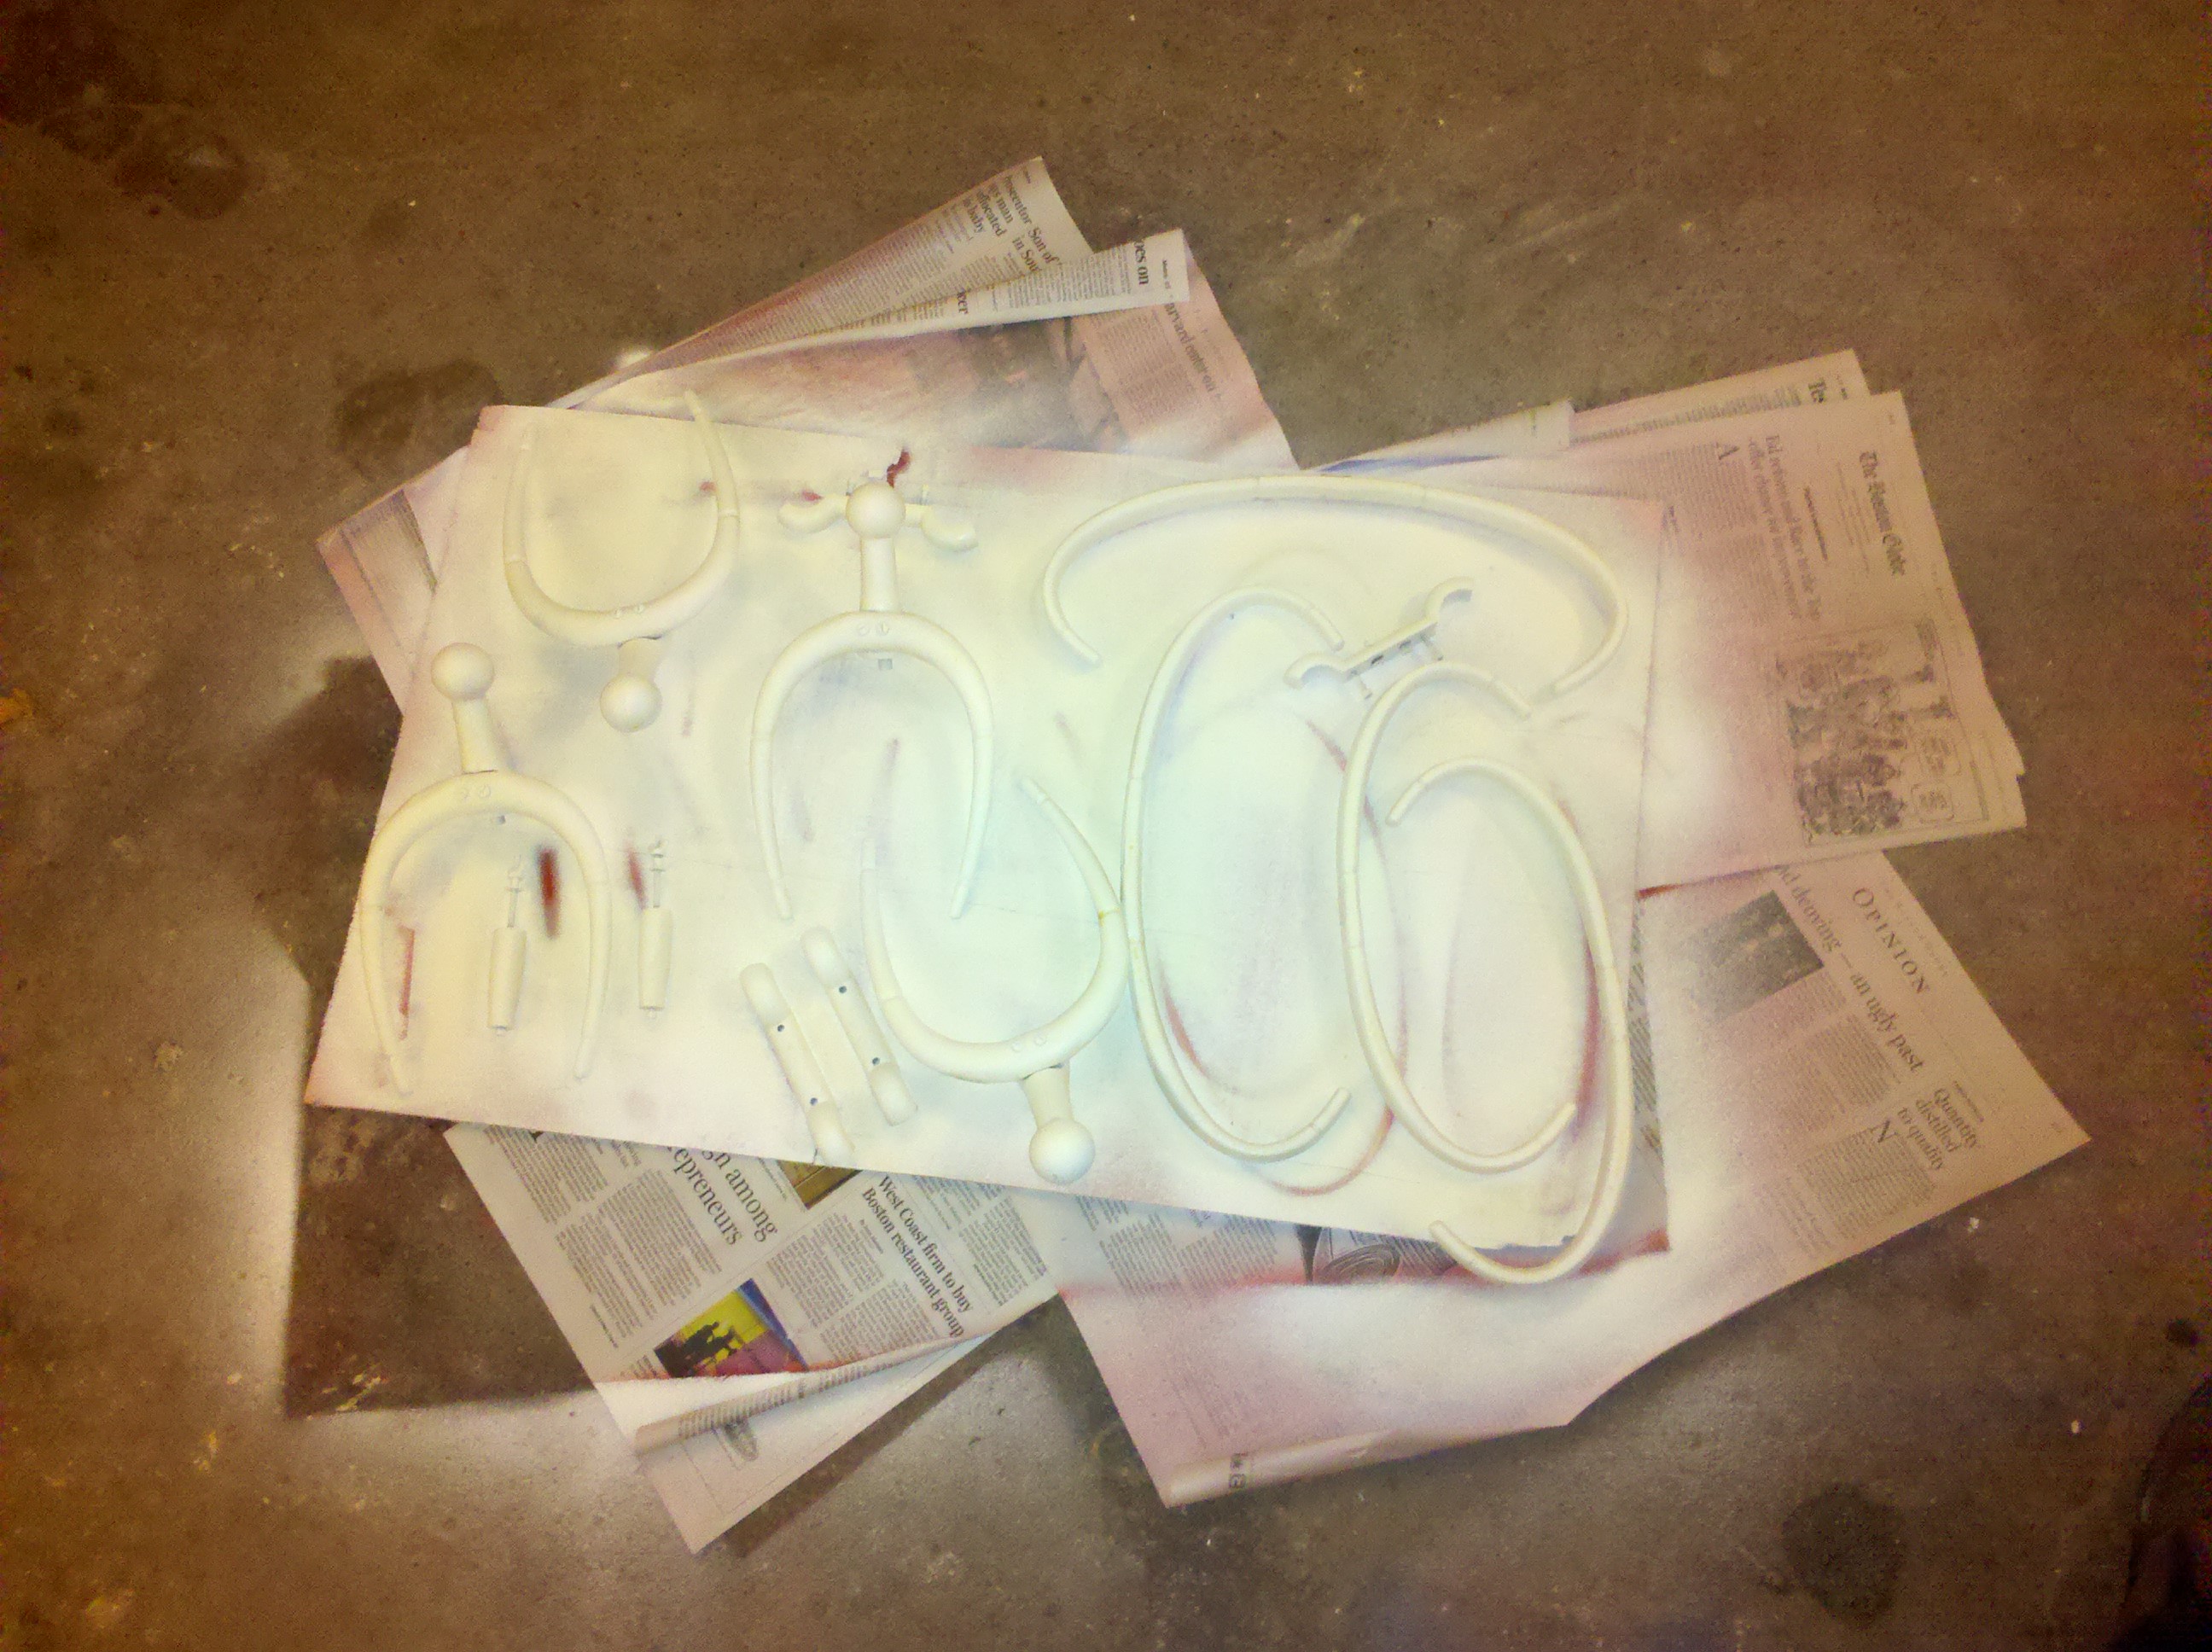
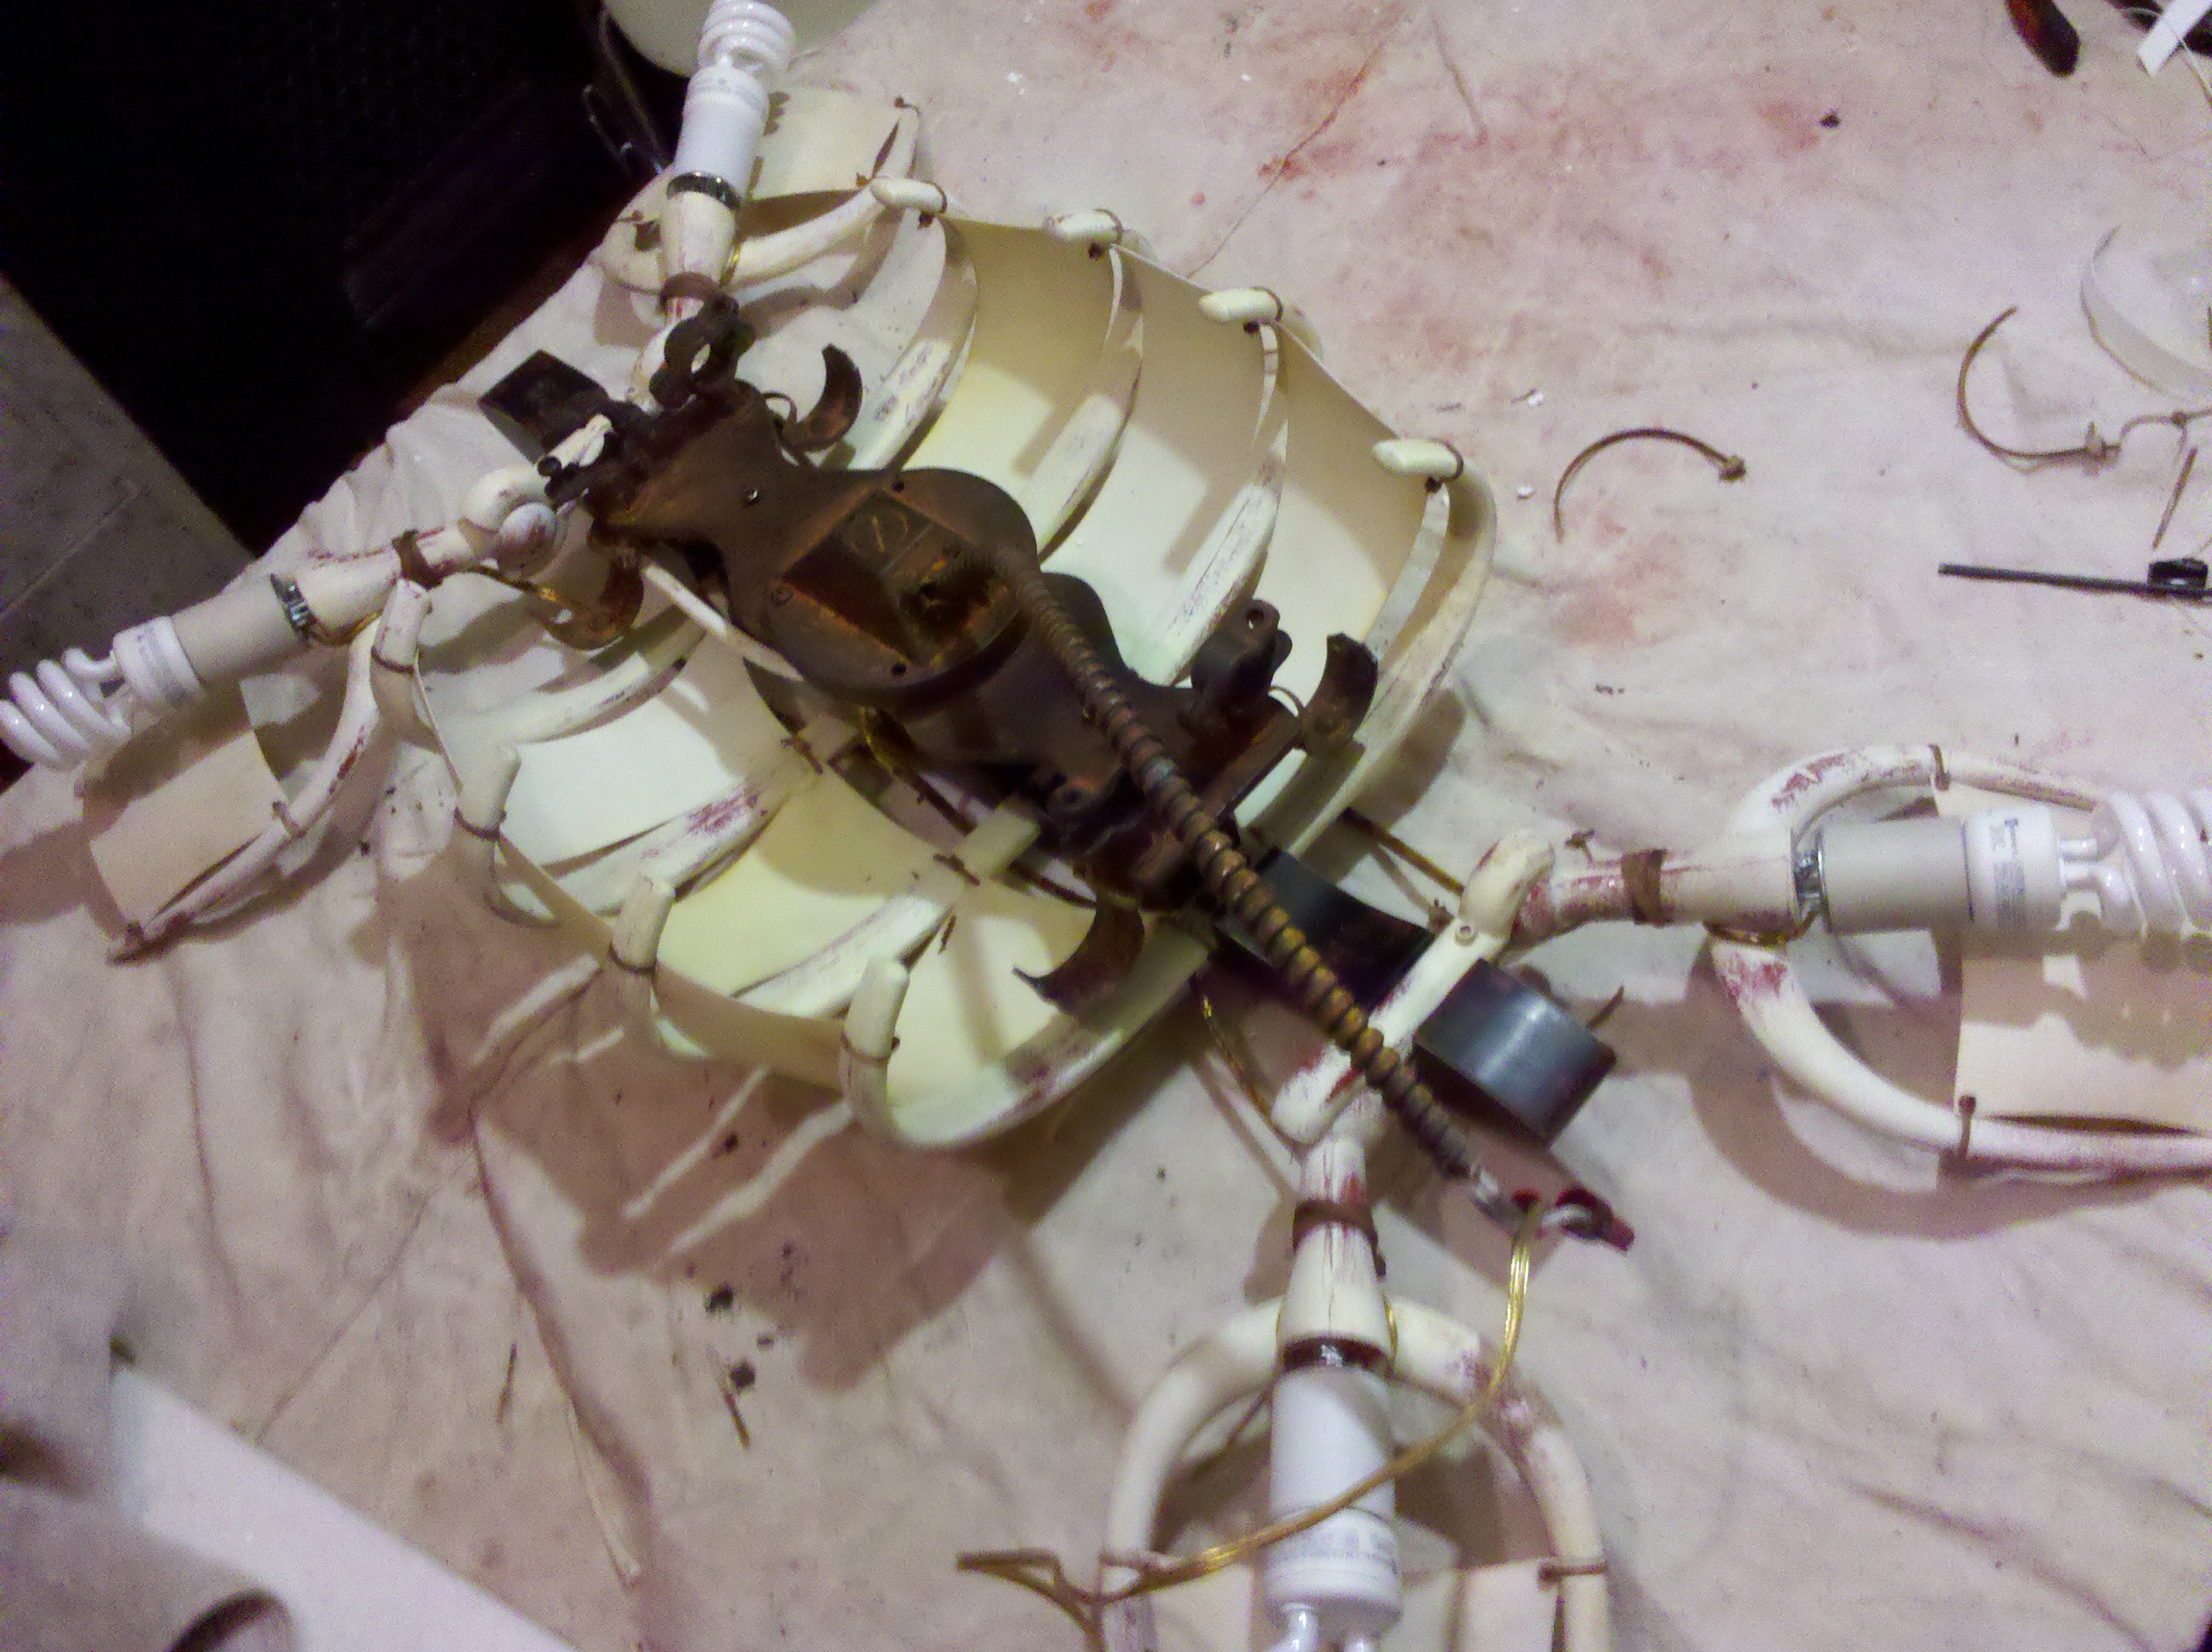
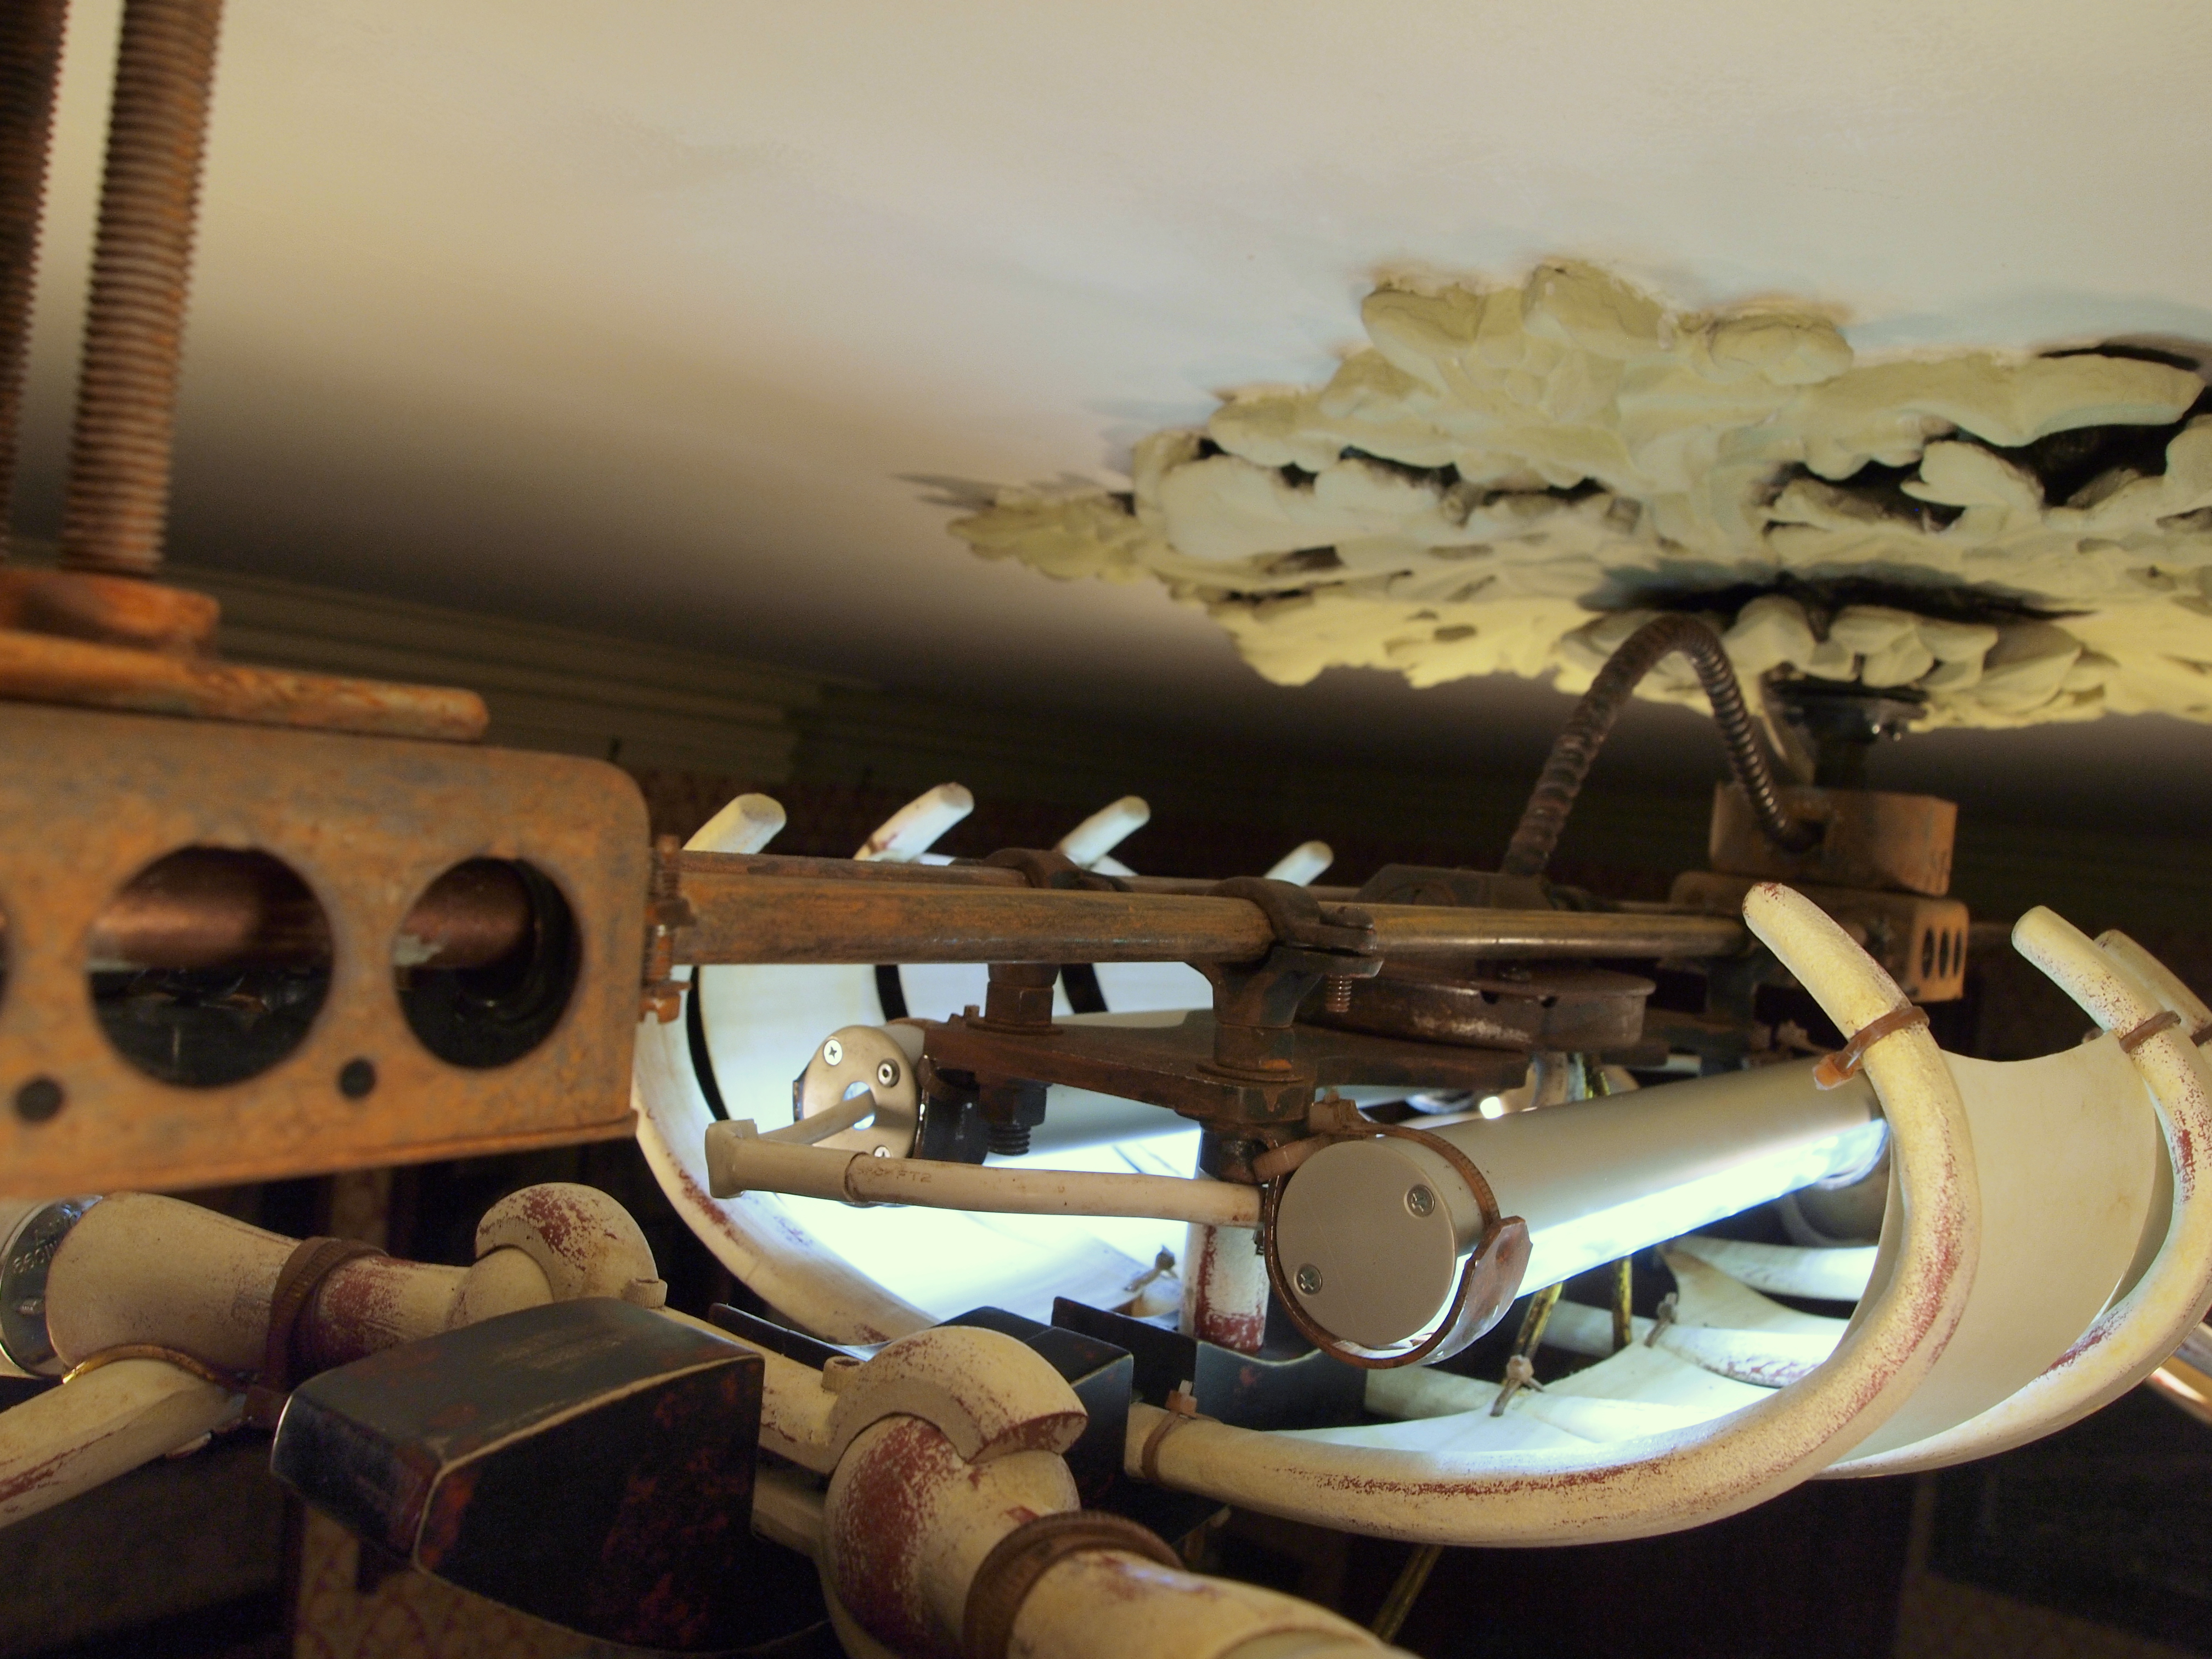
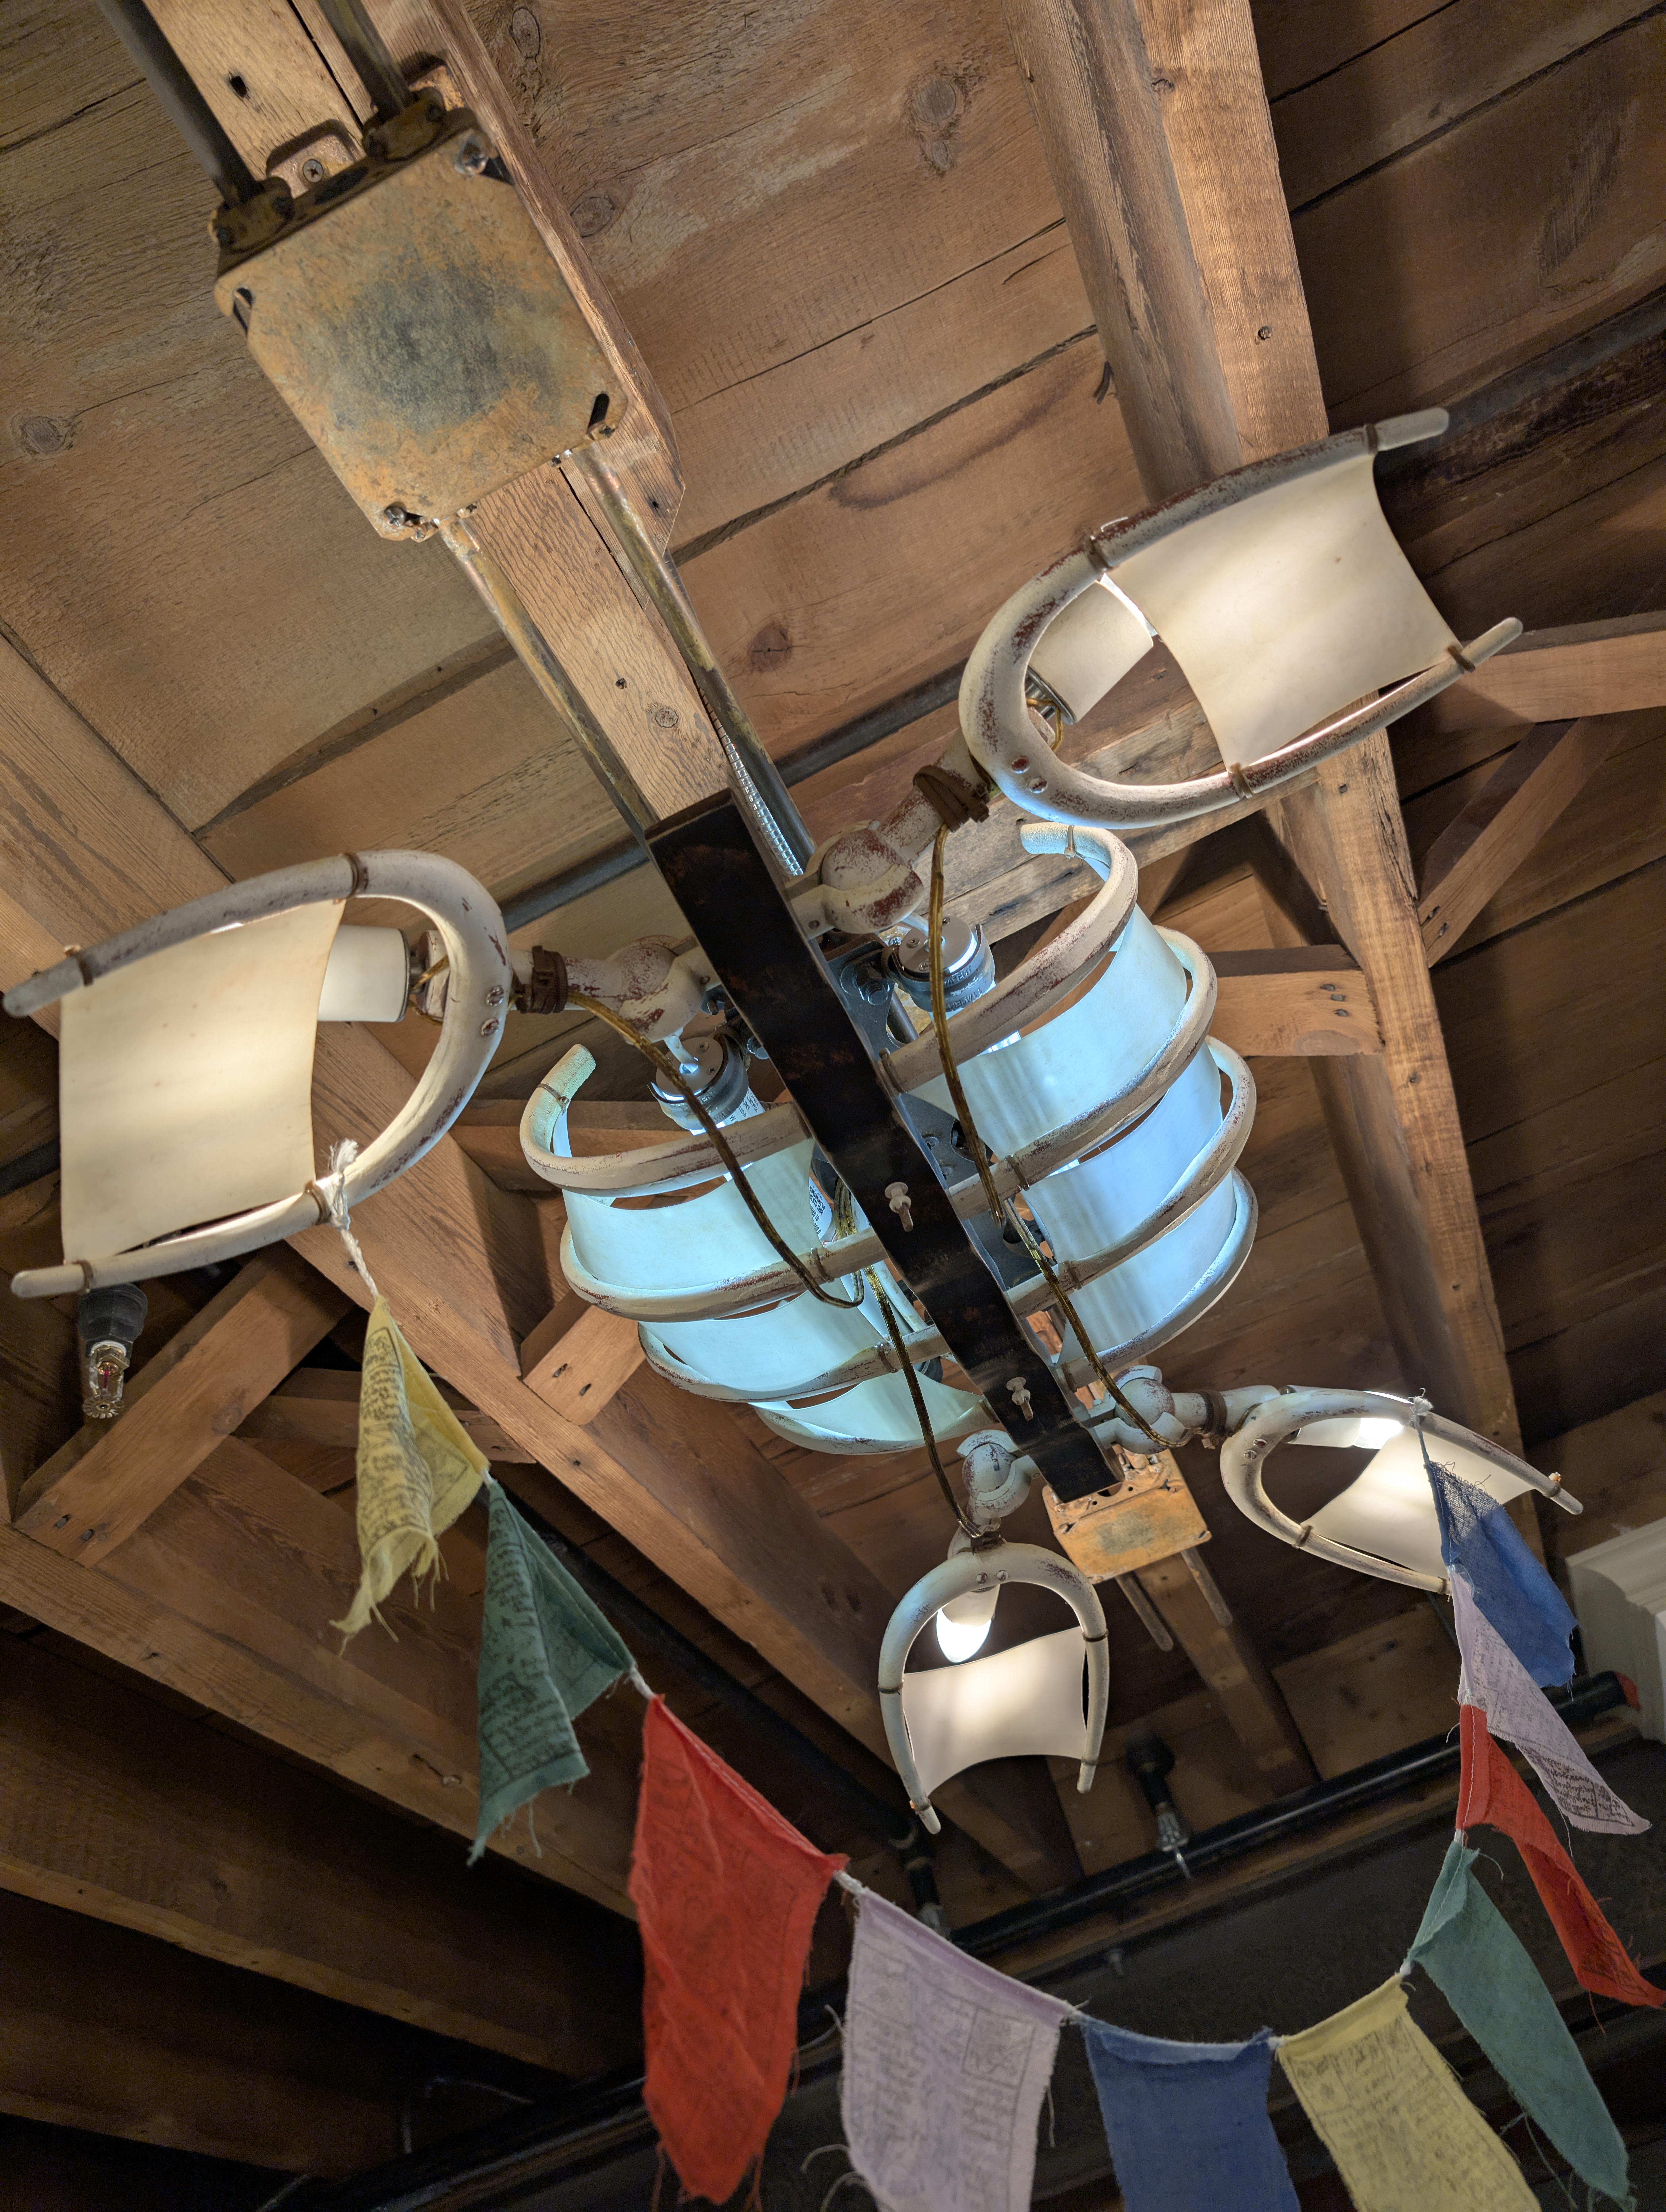
Since I no longer had to conform to the requirement for “honesty in materials” prescribed in school, I decided to give the dead turtle a full polychroming, synthetically aging the various elements. So the aluminum “bones” received several glaze coats, primarily consisting of left-over acrylic floor varnish mixed with old ceiling paint, some red iron oxides, and other raw pigments; this was deliberately abraded to reveal the layering or even some bare metal. The salvaged electrician’s supplies and the waterjet-cut aluminum plate that supports the LED wall-washers were all given a unifying faux rusting-steel treatment. Nylon cable-ties used at various points to secure items tightly to the aluminum were dipped in a burnt-umber-and-white-glue solution to look like old rope. Even the plastic-vellum skins were treated to seem water-stained.
“Cool! But it doesn’t look like a turtle,” decided my nine-year old daughter.
“Looks like a prehistoric fossil to me,” pronounced my wife. Aha! The piece had a final, appropriate title in short order.
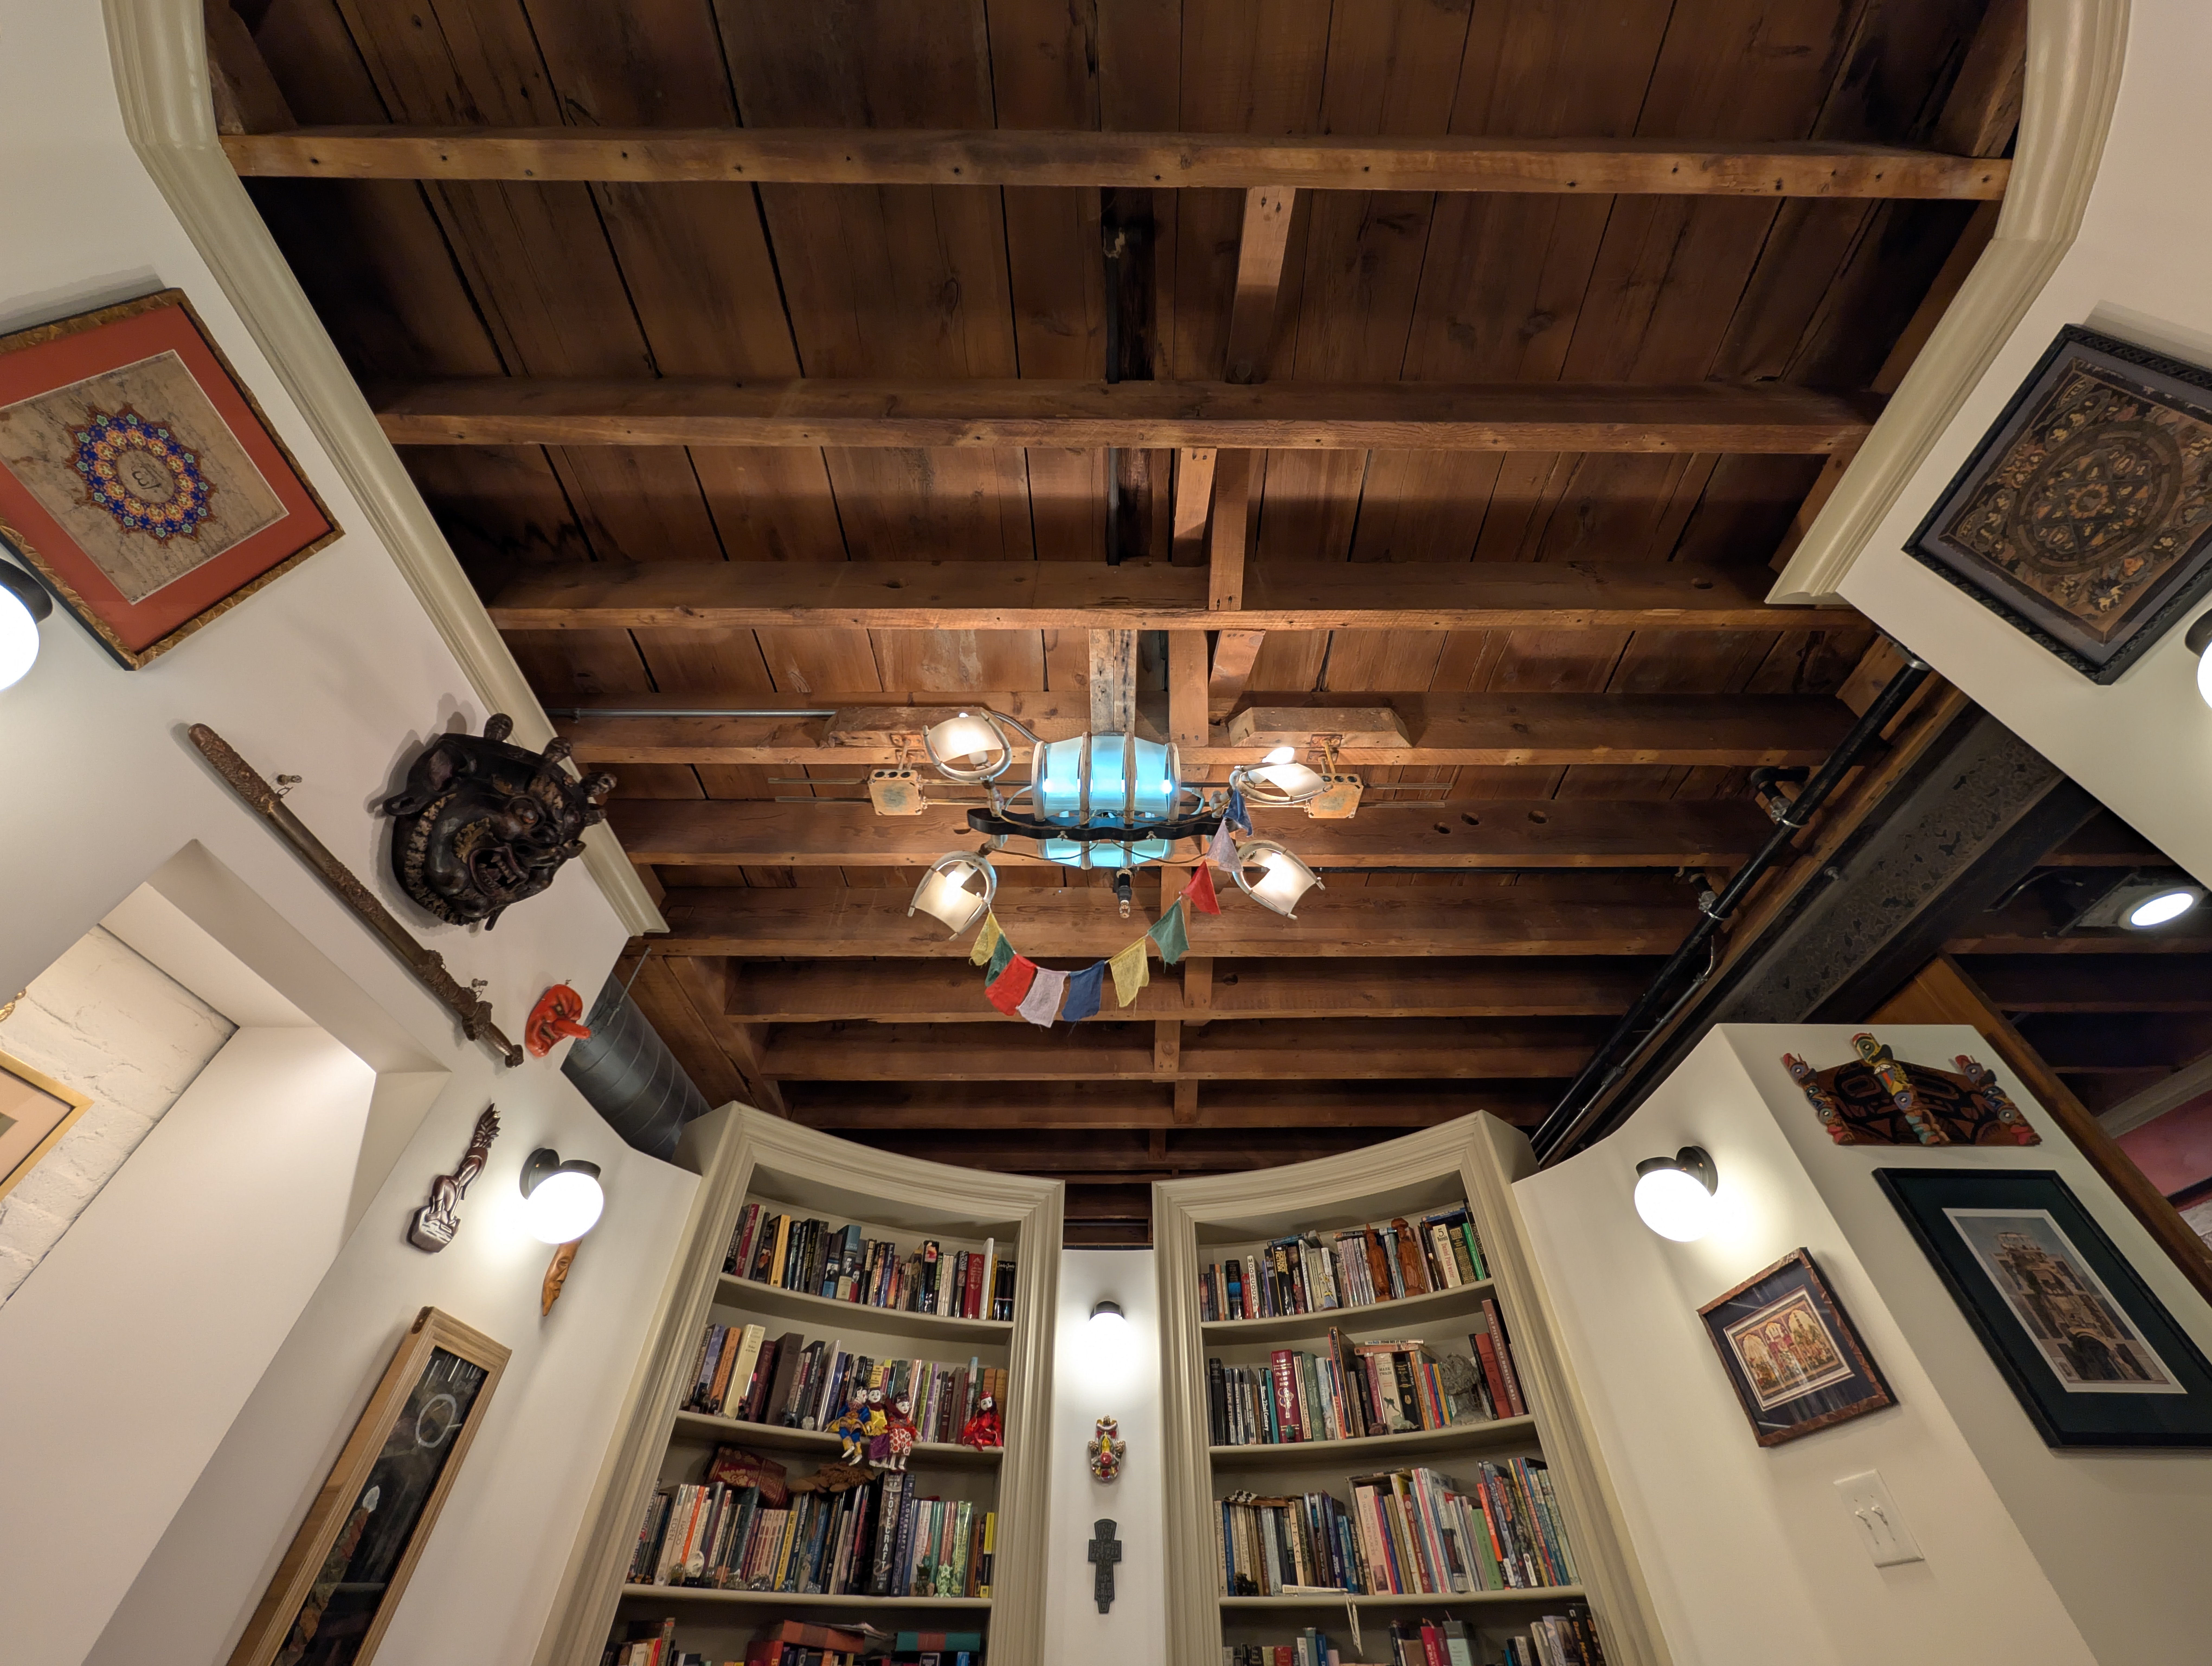
Unlike so much that originated in architecture school, the Plesiosaur still serves me well and sees daily use. In fact, it currently resides above my Soane-inspired “domeless-domed room” study — see the Palazzo (2013-2016) project. I recently decorated it with a string of miniature Buddhist prayer flags that were given to me in Bhutan, after it occurred to me that the piece resembled a “charnel ground” artifact of the Tantric “necromantic” practice, Chöd (གཅོད) — which essentially amounts to hanging out in a charnel ground with dead things and scaring yourself silly until you decide you don’t really exist because the ghosts and demons have eaten you all up.
Leave a Reply